
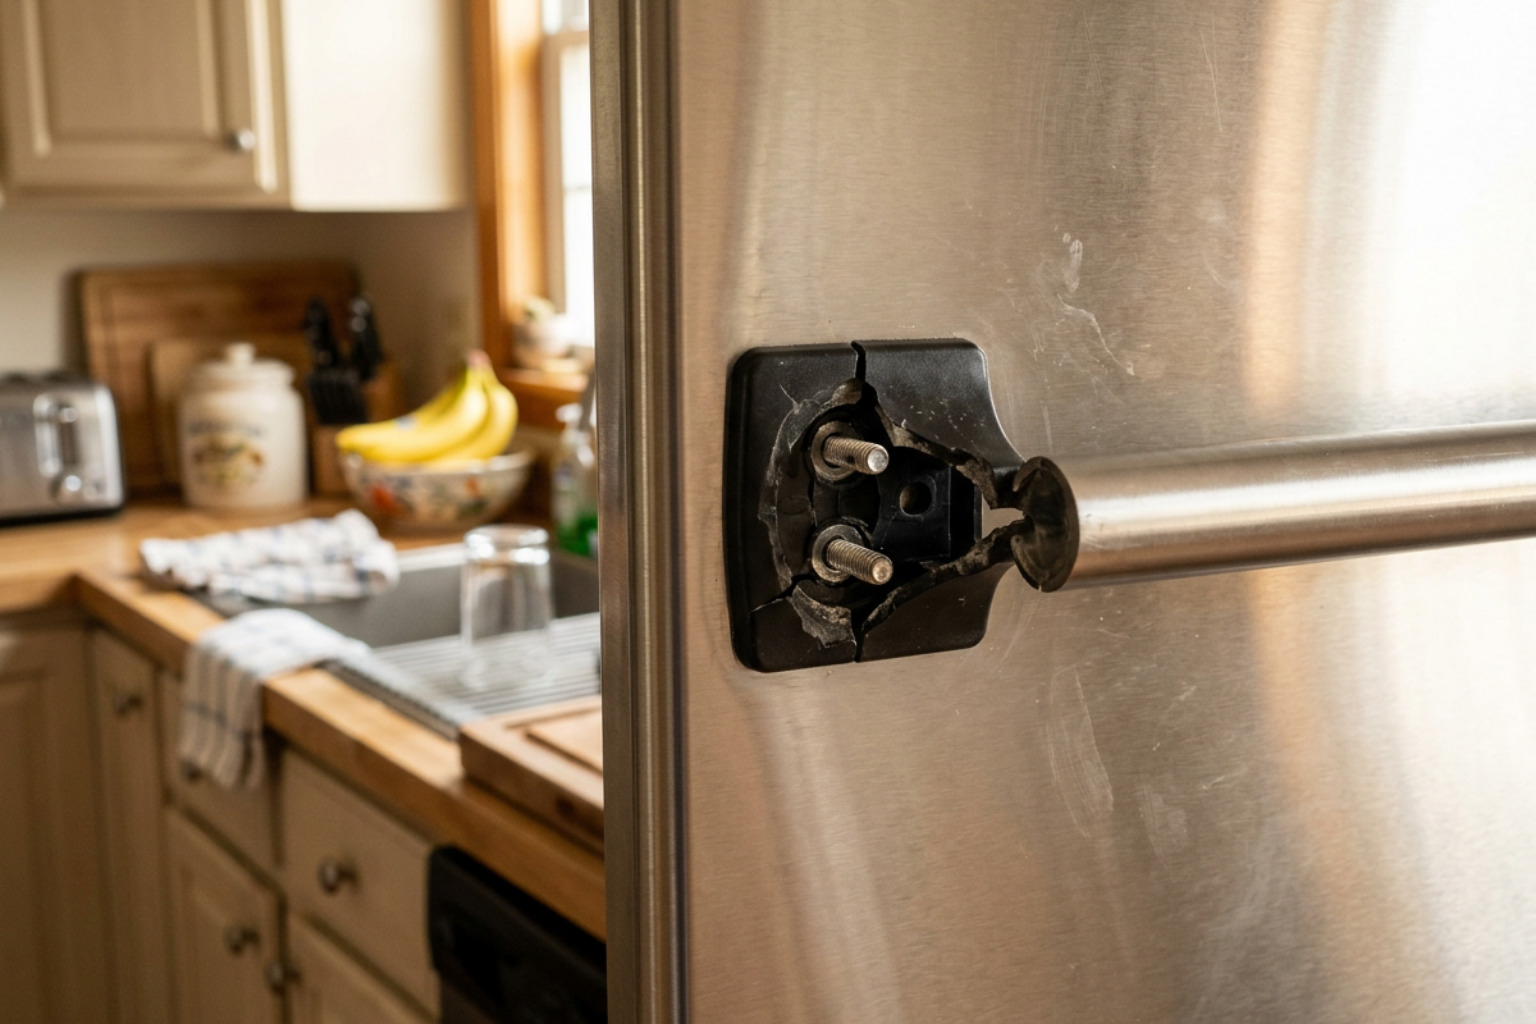
Fix a Loose or Broken Refrigerator Door Handle
If your fridge handle is broken, first check whether the handle itself is cracked or whether its screws, set screws, or mounting brackets are loose. A wobbly handle often needs only careful tightening with the correct manual screwdriver or hex key. Replace the handle when the plastic is split, the mounting tabs are broken, or the screw threads will not hold.
Do not keep pulling hard on a loose handle. It can damage the door liner, mounting points, or gasket. In many cases, the repair is a simple job: identify the refrigerator model number, order the matching handle or handle kit, remove the old hardware, and install the replacement without over-tightening the screws.
I am Vasyl Turetsky, Founder and Appliance Repair Specialist at iFix Appliances. I help Raleigh-area homeowners diagnose a fridge handle broken at the screws, brackets, or plastic grip and decide whether a quick repair or a replacement is the better fix.
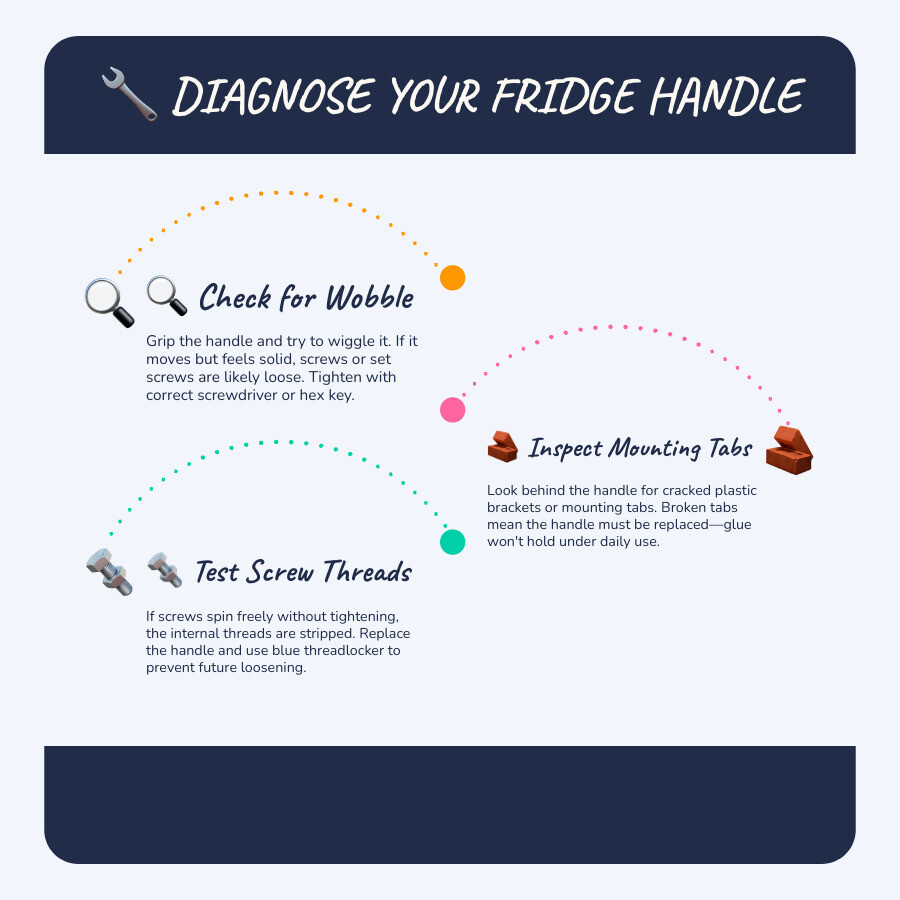
Basic fridge handle broken terms:
Is Your Fridge Handle Broken or Just Loose? Diagnostic Steps
When your refrigerator door handle feels unsteady in your hand, it is tempting to just tug harder to get the door open. However, continuous strain on compromised hardware can quickly turn a minor annoyance into permanent door damage. Before ordering parts or taking your door apart, you must diagnose the root cause of the handle wobble.
In my years servicing kitchens across Wake County, I find that handle issues usually stem from one of three areas:
- Loose mounting fasteners: Everyday door pulls gradually back screws out of their anchor points.
- Bracket failure or plastic fatigue: Modern plastic handles and end caps endure repetitive tensile force, leading to hairline cracks or sheared anchor tabs.
- Heavy door gasket resistance: A very strong magnetic seal creates excessive suction, multiplying the leverage required to open the door and placing intense stress on the handle assembly.
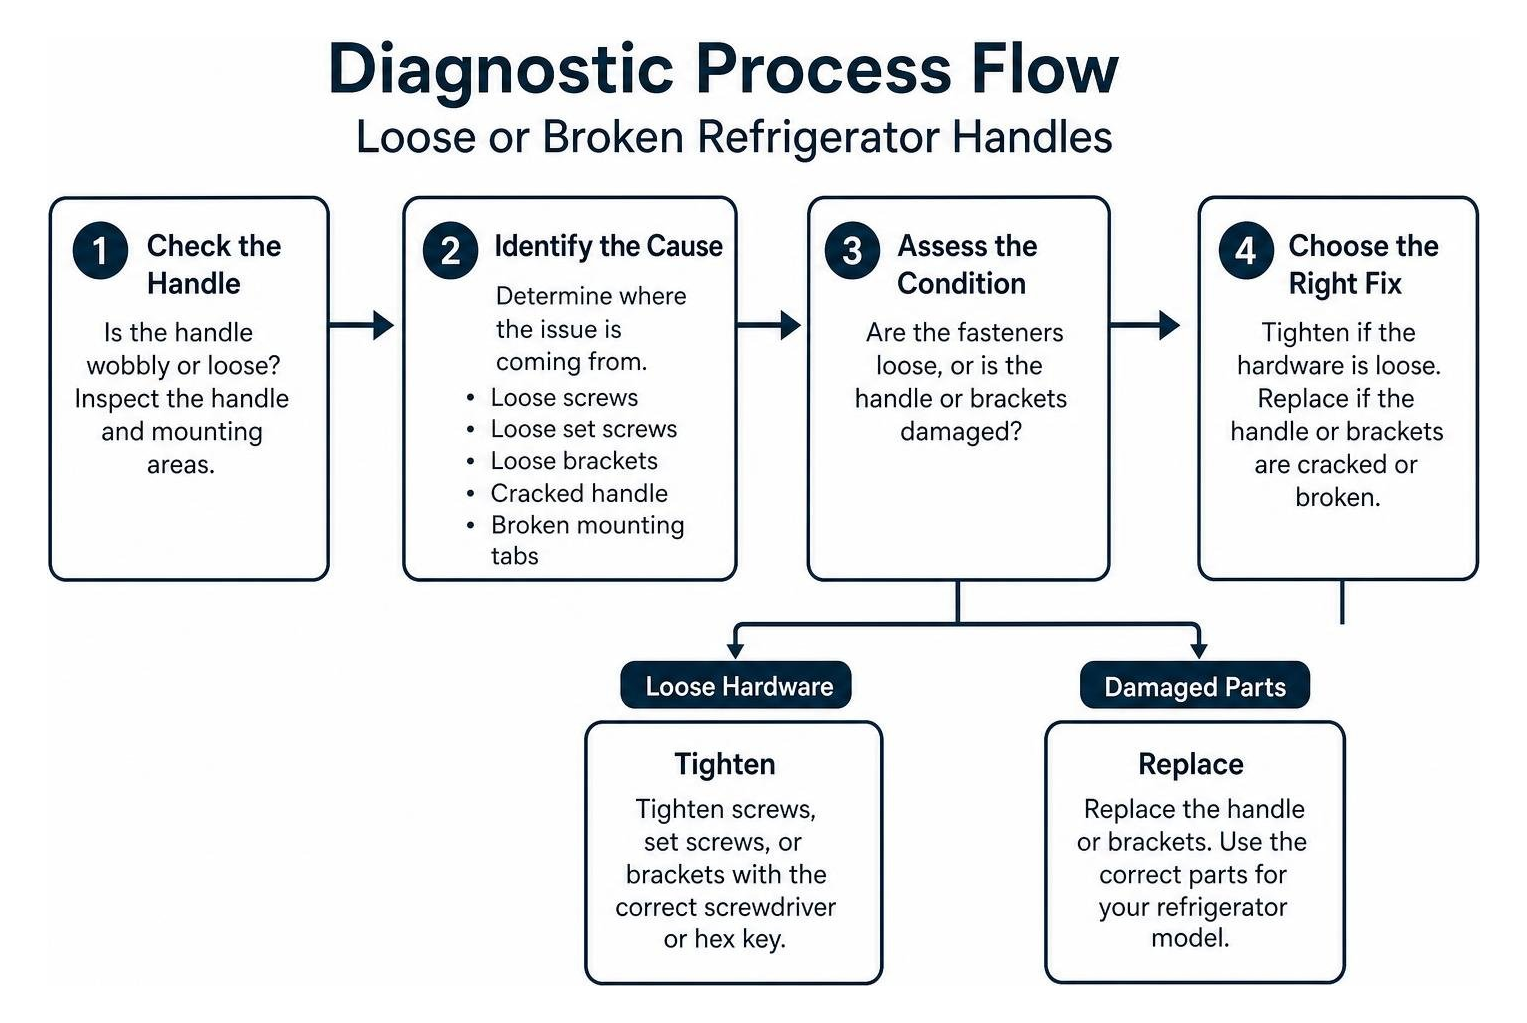
Tightening vs Replacing: When a Fridge Handle Broken Bracket Requires Full Removal
Determining whether you can simply tighten your handle or need a full replacement comes down to inspecting the connection points.
Start by inspecting the underside and sides of the handle mounts for tiny set screws. These are commonly 3/32-inch, 1/8-inch, or 2.5 mm Allen (hex) screws that lock the handle onto pre-installed door studs. If the set screws have simply backed out, tightening them with an Allen wrench will immediately solve the problem.
However, full replacement is required when:
- The internal set screw threads are completely stripped, preventing the screw from biting into the stud.
- The mounting bracket or plastic end cap has cracked through its structural body.
- The anchor stud mounted to the door skin itself has broken away or loosened internally. If the door panel surface itself is warped or damaged, reviewing No More Dents The Ultimate Guide to Refrigerator Body Repair will help you evaluate structural metal concerns before installing fresh hardware.
Evaluating Interior vs Exterior Plastic Damage
Exterior door handles endure high pulling loads, but interior components like vegetable crisper pan handles face extreme cold and humidity that make polymers brittle over time.
When dealing with a cracked crisper drawer or interior trim handle, you do not always need an immediate OEM replacement. Applying specialized crisper pan handle repair techniques allows you to bond the broken plastic using a reinforced bridging method:
- Thoroughly degrease the fracture edges using 91% isopropyl alcohol.
- Scuff the surrounding plastic with 400-grit sandpaper to give the adhesive a mechanical surface key.
- Apply a food-grade, low-temperature-rated two-part epoxy over the seam.
- Embed a fine nylon or stainless steel reinforcement mesh across the joint (acting like rebar in concrete) and apply a second epoxy layer.
- Allow 24 hours of curing at room temperature before sliding the crisper drawer back onto its rails.
For exterior main handles, however, standard glues rarely survive the repetitive 15-to-25-pound tensile pull required to break a refrigerator’s vacuum seal. Exterior handle breaks almost always demand a direct hardware replacement.
Tools and Sourcing for Refrigerator Handle Repair
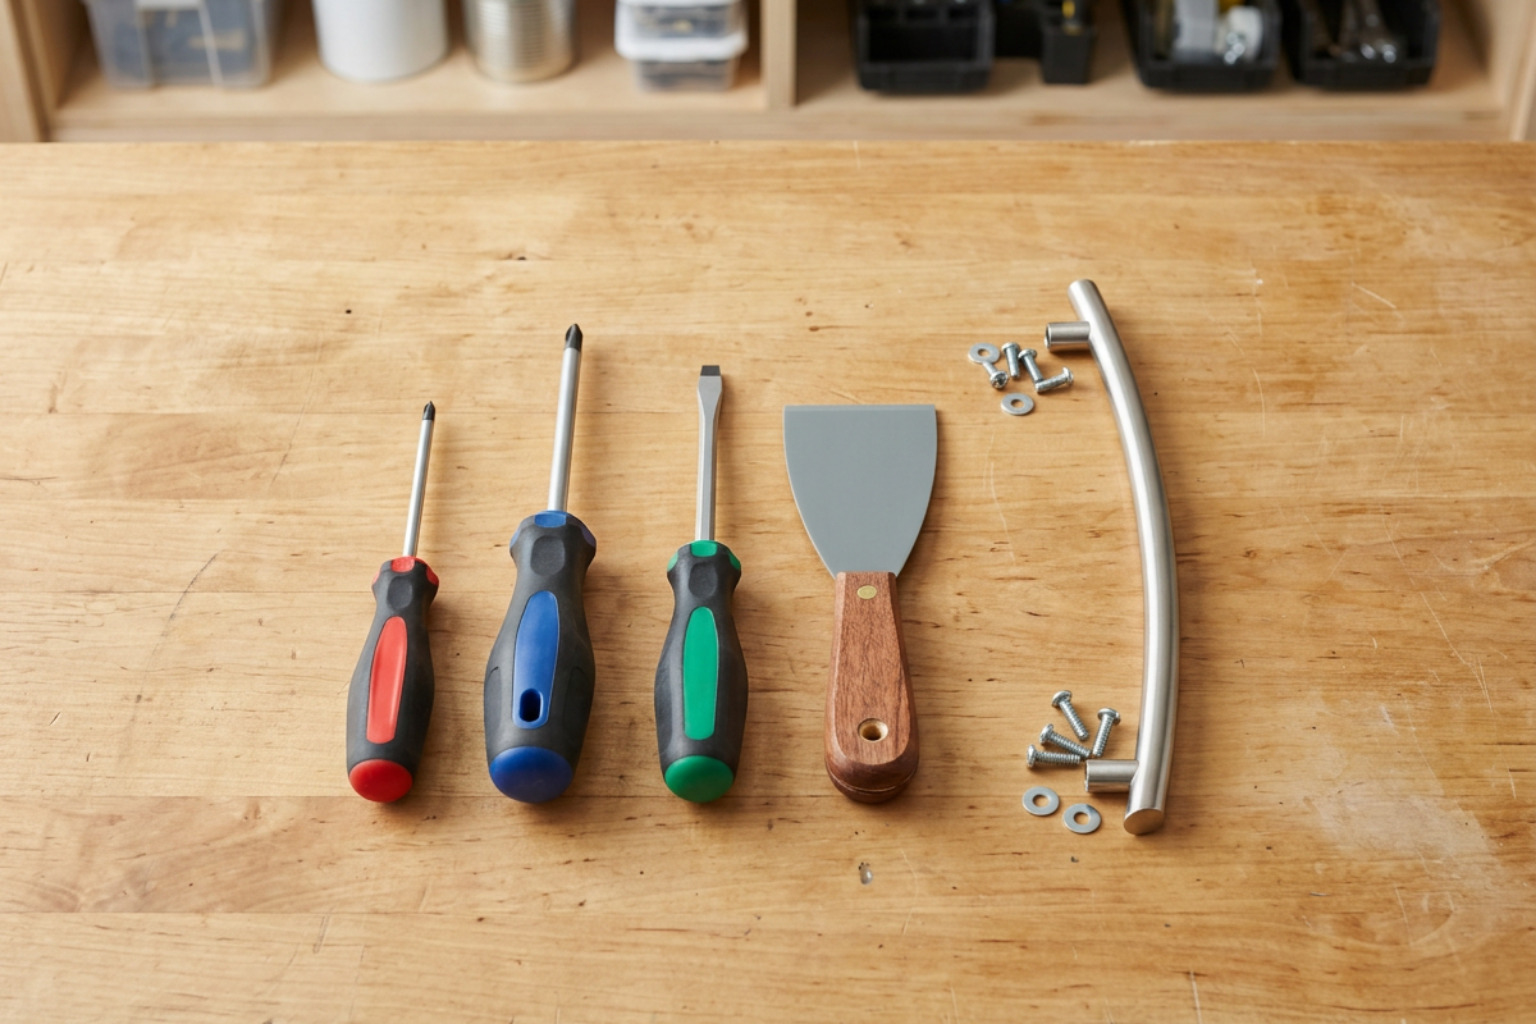
Before beginning any repair, make sure you have the right hand tools assembled. Using the wrong tool—such as an undersized screwdriver or high-torque power drill—is the fastest way to strip soft screw heads or crack expensive plastic trim.
Here is the essential toolkit I recommend having by your side:
- Manual Phillips Screwdrivers: Sizes #1 and #2 (avoid battery drills to prevent over-torquing).
- Flathead Screwdriver or Non-Marring Putty Knife: For gently popping off decorative plastic screw-cover caps.
- Metric and SAE Allen/Hex Wrench Set: Standard sizes (3/32″, 1/8″, 2.5mm, 3mm) for concealed set screws.
- Medium-Strength Threadlocker Compound (Blue): Prevents mounting screws from backing out due to vibration.
- Microfiber Cloth and Mild Cleaner: For wiping away grime behind the old handle before mounting the new one.
- Protective Work Gloves: To protect your knuckles if a stubborn screw suddenly releases.
Sourcing the Right OEM Part for a Fridge Handle Broken at the Mounts
Appliance handles might look interchangeable from across the room, but mounting hole spacing, standoff depth, and anchor bracket designs vary significantly between models—and even across revision series of the exact same model.
To order the correct part:
- Locate the official rating label inside your refrigerator compartment (typically along the upper left inner wall or behind the bottom crisper drawer).
- Record the complete model number, including any engineering letters or numbers at the end.
- Cross-reference this number on a verified OEM parts directory to ensure exact fitment.
For instance, if you have a Whirlpool unit, you may need a specialized part like the Whirlpool door handle assembly, which includes specific factory-molded end caps. If your appliance has unique architectural mounting brackets or if you need certified assistance with a Whirlpool Repair Service or dedicated GE Repair Service, matching factory parts ensures the aesthetic lines of your kitchen remain seamless.
Temporary Workarounds: Magnetic and Adhesive Solutions
If you are waiting for a replacement handle to arrive in the mail, you do not have to pry the door open with your fingernails or pull on the flexible rubber gasket.
You can use a temporary stick-on handle or an industrial rubber-coated magnetic pull handle.
- Magnetic handles: Work remarkably well on standard painted steel refrigerators. They require zero drilling, will not mar the finish, and provide enough leverage to break the door seal.
- Stainless steel limitation: Many modern 300-series stainless steel doors are non-magnetic. If you have true stainless doors, a heavy-duty suction-cup handle or temporary double-sided adhesive pull is the only non-invasive workaround.
Step-by-Step Guide to Fixing and Replacing a Refrigerator Handle
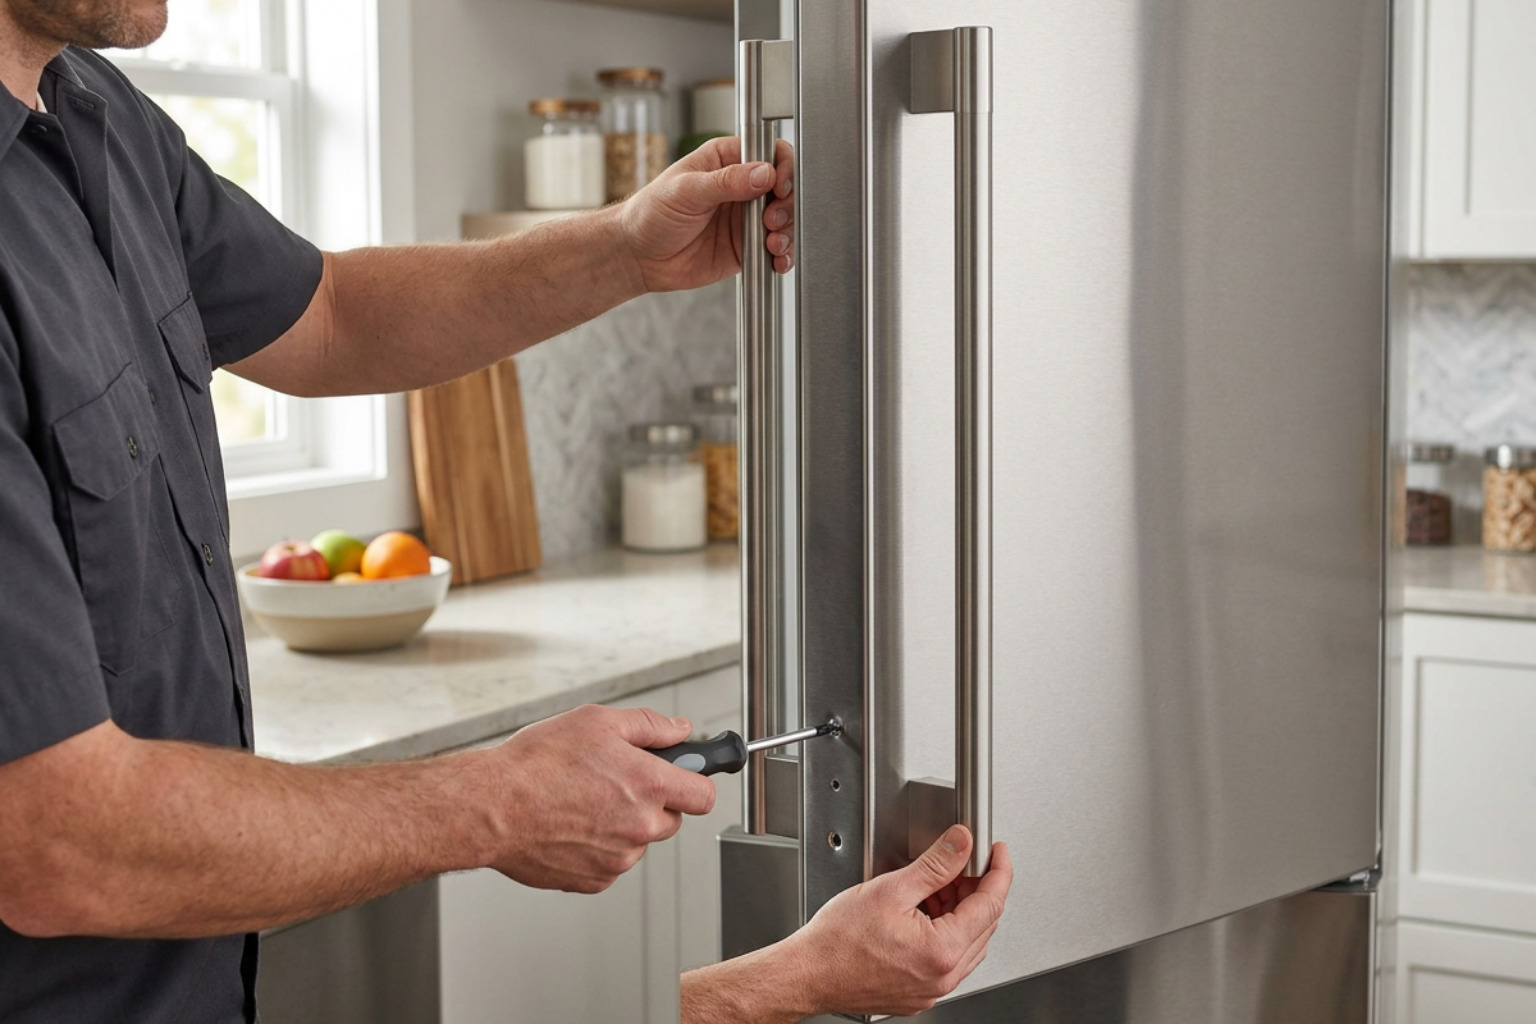
Replacing a broken refrigerator door handle is a straightforward 15-minute DIY project when done carefully. Follow these steps to ensure a rock-solid, factory-tight finish.
Removing the Damaged Handle and Accessing Concealed Fasteners
- Secure the workspace: Open the refrigerator door slightly or stabilize it so it does not swing wildly while you work. If you are working near any internal wiring harnesses on high-tech smart displays, disconnect the power to the unit first.
- Expose concealed fasteners: Most modern refrigerator handles hide their mounting screws beneath aesthetic snap-on trim pieces or rely on hidden set screws along the inner edge.
- For trim caps: Insert a thin, plastic putty knife into the small notch at the top or bottom of the handle base and gently pry the trim piece forward to reveal the screws.
- For set screws: Look closely at the inner edge facing the opposite door or the underside. Loosen the Allen set screws by turning counter-clockwise 3 to 4 full turns (do not remove them completely, as they are easy to lose on the kitchen floor).
- Disengage the handle: Slide the handle assembly up, down, or outward depending on your brand’s mounting bracket style, then lift it clear of the door anchor studs.
- Inspect the door gasket and studs: Check behind the mounting point. On some top-mount models, the main mounting screws pass through the door flange behind the magnetic door gasket. If necessary, peel back the flexible rubber seal slightly with your fingers to inspect the screw heads beneath.
Securing the Replacement Handle and Re-Sealing Door Trim
- Inspect and clean the door surface: Wipe away any accumulated kitchen grease or dust that was trapped under the old handle footprint.
- Pre-treat screws: Apply one small drop of blue medium-strength threadlocker to the screw threads. This keeps normal door-slamming vibrations from loosening the hardware down the road.
- Mount the new handle:
- Align the handle sockets directly over the door mounting studs.
- Firmly press the handle flat against the door face and slide it downward until it clicks securely into its locking detents.
- Tighten fasteners with manual torque: Tighten the set screws or face screws using your manual hand tools. Snug the screws down firmly, but avoid using aggressive force that could strip out the internal plastic threads or dimple the sheet metal door.
- Reinstall trim and realign the gasket: Snap any cosmetic end caps or screw covers back into position. If you peeled back the rubber gasket to access mounting holes, press the gasket rib firmly back into its perimeter door channel to guarantee an airtight seal. If you run into issues with complex freezer drawer handles or custom alignments on other brands, our team provides expert Frigidaire Repair Service across the Triangle area to restore your door mechanics correctly.
Repair Costs and Preventive Maintenance Tips
Repairing a broken refrigerator handle is one of the most cost-effective appliance fixes you can perform. Below is a breakdown comparing common DIY expenses with typical professional service visits:
| Repair Component / Service | DIY Cost (Self-Repair) | Professional Service Cost | Notes |
|---|---|---|---|
| Standard Plastic Handle (OEM) | $35 – $75 | $130 – $190 | Basic top-mount or side-by-side models |
| Stainless Steel Handle Assembly | $85 – $160 | $180 – $275 | French door & premium brand models |
| Crisper Pan Epoxy / Mesh Kit | $12 – $20 | N/A (Part replaced) | Reinforced DIY adhesive repair |
| Complete Replacement Kit (End Caps + Bar) | $70 – $130 | $160 – $240 | Common for GE and Whirlpool configurations |
Maintenance Practices to Prevent Handle Strain
A handle should never have to fight against excessive mechanical resistance. To keep your new handle firmly attached for years to come, integrate these simple habits:
- Distribute crisper and door bin weight: Avoid loading all your heavy condiments, gallon milk jugs, and thick beverages onto the door bins near the handle edge. Distribute heavy items across the central interior shelves to prevent door sag.
- Keep door gaskets clean: Sticky syrups, spilled juices, and built-up grime along the magnetic door seal will glue the door shut against the cabinet frame. Wash your gaskets every few months with warm water and mild dish soap to keep opening resistance smooth.
- Alleviate vacuum lock: When a refrigerator door closes, warm air quickly cools and creates a brief internal vacuum. If you need to reopen the fridge immediately after closing it, gently slip your fingertips behind the edge of the gasket to break the suction rather than yanking violently on the handle.
- Periodic screw checks: If you feel the slightest wiggle when grabbing the handle, grab your screwdriver immediately. Tightening a loose screw takes 30 seconds and prevents the plastic socket from cracking under uneven strain.
Knowing When to Call a Repair Technician
While most handle fixes are simple, certain situations call for an experienced technician:
- The internal threaded nut welded inside the door skin has broken off and fallen down inside the insulated door cavity.
- The door itself is sagging significantly on worn hinge pins, causing the latch mechanism or handle to catch on neighboring cabinetry.
- You have a built-in panel-ready luxury refrigerator (like Sub-Zero or Thermador) where heavy custom wood panels require specialized mounting hardware and counterbalancing.
If you are unsure whether your repair is safe to tackle yourself, check our helpful guide on 5 Warning Signs Your DIY Appliance Repair Is Headed for Disaster to avoid costly mistakes.
Frequently Asked Questions About Refrigerator Handle Repair
How much does it typically cost to replace a broken fridge handle?
For a standard DIY repair, a genuine OEM replacement handle typically costs between $40 and $120, depending on whether it is molded plastic or brushed stainless steel. If you choose to hire a professional appliance technician, the total cost usually runs between $130 and $250, which covers professional diagnosis, OEM part procurement, precise alignment, and labor.
Can I repair a snapped exterior fridge handle with superglue?
In almost all cases, no. Standard cyanoacrylate (superglue) and quick-set craft glues become brittle at low temperatures and possess very low shear strength. Because exterior refrigerator door handles endure repetitive 15-to-25-pound pulling forces against a sealed magnetic gasket, glued joints will almost always snap again within a few days. Exterior handles require genuine part replacement.
Why does my refrigerator handle keep coming loose repeatedly?
A handle that repeatedly loosens is usually caused by one of three issues:
- The tiny set screws are backing out from normal door vibrations (which can be resolved by applying medium-strength blue threadlocker to the threads).
- The internal mounting socket is stripped or cracked, allowing play around the door stud.
- Your refrigerator’s magnetic door gasket is dirty or sticky, creating excessive resistance that over-stresses the mounting fasteners every time the door is pulled open.
Conclusion
A loose or broken refrigerator handle is more than just an eyesore; leaving it unaddressed risks cracking your refrigerator door panel, damaging the internal liner, or compromising the magnetic seal that keeps your food fresh. With a few basic hand tools and the right OEM replacement part, you can easily restore your refrigerator’s handle stability in just a few minutes.
If your handle mounting hardware has stripped internally, your door hinges are misaligned, or you need dependable assistance from a local technician, I am always ready to help. Reach out to iFix Appliances for expert diagnostics, transparent pricing, and comprehensive refrigerator repair across Raleigh, Cary, Apex, and the greater Triangle area.

0 Comments