
Why Refrigerator Body Repair Is Worth Doing Right
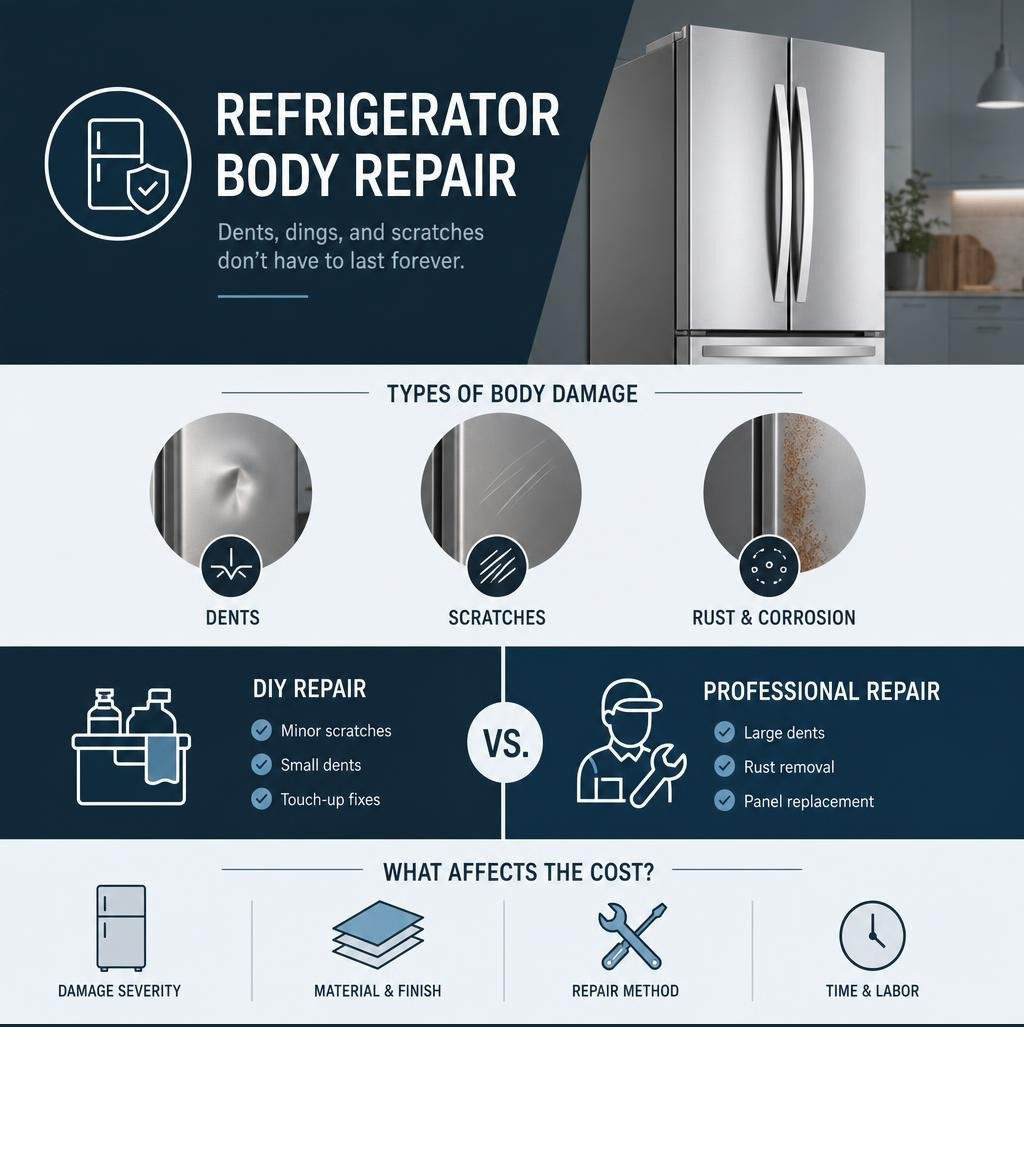
Refrigerator body repair is something most homeowners will face at some point — whether it’s a dent from moving day, a rust spot that snuck up on you, or a scratch that’s hard to ignore every time you open the kitchen.
Here’s a quick overview of your main repair options:
| Damage Type | DIY Possible? | Estimated DIY Cost | When to Call a Pro |
|---|---|---|---|
| Minor dent | Yes | $10–$40 | If suction/heat methods fail |
| Surface scratch | Yes | $5–$20 | If finish is deeply gouged |
| Surface rust | Yes | $15–$50 | If rust has spread or penetrated |
| Structural panel damage | Rarely | $100–$300+ | Almost always |
| Door misalignment | Sometimes | $0–$30 | If cooling is affected |
The good news? Many cosmetic issues are fixable without replacing the whole appliance.
But here’s the thing — not every dent is just a dent. About 30% of refrigerator repairs involve body or panel damage, and damage that looks minor on the outside can sometimes affect door seals, insulation, and energy efficiency. One real-world repair attempt ended up costing a homeowner around $300 in parts and hours of labor — and the owner later said it wasn’t worth it given the fridge’s age.
That’s why knowing what you’re dealing with before you start matters a lot.
This guide walks you through everything: how to assess the damage, what tools you’ll need, step-by-step repair methods for dents and rust, and when it makes more sense to call a certified technician than to go it alone.
Assessing Refrigerator Body Damage and Safety

Before you grab a tool or buy touch-up paint, we need to take a step back and look at the big picture. Assessing the damage isn’t just about how bad it looks; it’s about identifying potential structural, electrical, and cooling risks.
A heavy impact that leaves a deep dent in a side panel can crush the internal polyurethane foam insulation. When this insulation is compromised, it creates a thermal bridge, allowing heat to seep into the cabinet. This causes your compressor to work overtime, driving up your energy bills and shortening the lifespan of your appliance.
Safety Precautions During Refrigerator Body Repair
Safety is always our number one priority. Even though you are working on the exterior of the appliance, refrigerators are complex machines packed with high-voltage electrical components and pressurized refrigerant lines.
Before attempting any refrigerator body repair, follow these critical safety steps:
- Unplug the Appliance: Never work on a refrigerator that is connected to power. Pull the plug from the wall outlet to eliminate any risk of electrical shock.
- Beware of the Capacitor: Many modern refrigerators use a start capacitor to kickstart the compressor. Capacitors store electrical energy even after the appliance is unplugged. If your repair requires you to remove rear access covers near the compressor area, avoid touching the capacitor terminals. If you must work near it, it must be safely discharged first.
- Protect the Refrigerant Lines: The cooling system relies on copper or aluminum tubing carrying pressurized refrigerant. If you are attempting to pull a dent or sand a panel near the back or bottom of the unit, be extremely careful. Puncturing a refrigerant line is highly dangerous, releases harmful gases, and typically destroys the refrigerator beyond reasonable repair.
- Wear Protective Gear: Always wear heavy-duty work gloves to protect your hands from sharp sheet metal edges, and safety glasses when sanding, wire-brushing, or painting.
If you suspect that a dent has compromised an electrical line or punctured the sealed cooling system, do not attempt a DIY fix. It is always safer to rely on professional refrigerator repair services to diagnose and handle the problem safely.
Evaluating Panel Damage and Warranty Impact
Next, you need to understand how your refrigerator’s panels are constructed. Modern refrigerator doors are engineered systems. As detailed in the Research on Refrigerator Door Body Design, many manufacturers use sheet metal lateral frames combined with end covers and front panels (often glass or stainless steel) designed to maximize structural strength while keeping production costs down. The seams and edges are carefully engineered to prevent moisture intrusion, which is the primary cause of rust.
If a dent or scratch occurs right on a seam, edge, or near the door gasket, the structural integrity of the door body may be compromised.
Additionally, you must consider your manufacturer’s warranty. Attempting a DIY body repair — especially if it involves drilling, applying heavy heat, or structural adhesives — will almost certainly void your manufacturer’s warranty on the exterior finish and potentially the entire cabinet.
Always check your warranty terms first. If your refrigerator is still under its original warranty period (typically one year for cosmetics, and sometimes longer for the sealed system), check if the damage is covered or if an authorized repair is required to keep your warranty intact.
How to Fix Dents, Scratches, and Rust on Appliance Panels
If you’ve decided to tackle the repair yourself, you’ll need the right tools. Depending on whether you are dealing with a dent, a scratch, or a rust spot, your toolkit will vary.
The DIY Refrigerator Body Repair Toolkit:
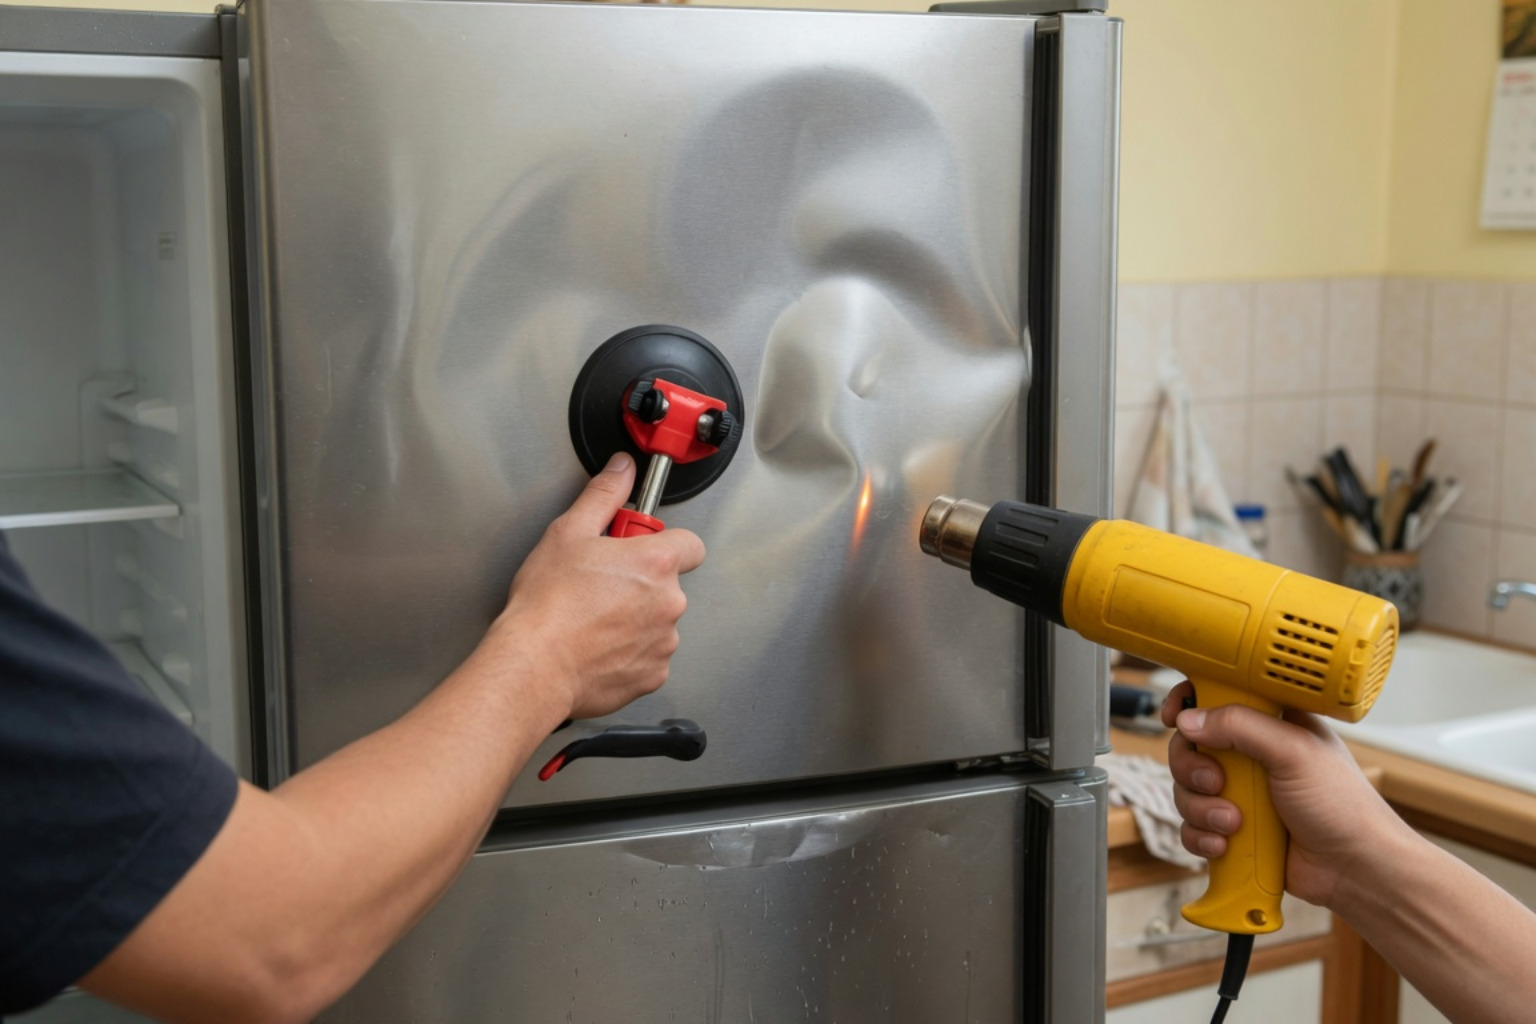
- For Dents: A high-powered hairdryer or heat gun, a can of compressed air (turned upside down), a heavy-duty suction cup or a specialized paintless dent repair (PDR) kit, and a pair of thick work gloves.
- For Rust & Paint: A wire brush, fine-grit sandpaper (400-grit and 800-grit), a high-quality rust converter, appliance primer, and matching appliance touch-up paint.
- For Deep Gouges: A specialized auto-body filler or mild abrasive paste (like non-gel white toothpaste for very micro-shallow scratches).
Step-by-Step DIY Refrigerator Body Repair for Dents
Dents are the most common cosmetic issue on refrigerator body panels. Because the outer skin of a refrigerator is made of thin sheet metal (often mild steel or aluminum), it has a “memory” and can sometimes be coaxed back into its original shape.
For a detailed walkthrough of this process, you can refer to the DIY Guide for LG Refrigerator Side Panel. Below are the two most reliable DIY methods for popping out dents.
Method 1: The Heat and Cold Technique (Thermal Expansion)
This method relies on rapid temperature changes to snap the metal back into place.
- Clean the Area: Wipe the dented area with isopropyl alcohol to remove any grease or dirt.
- Apply Heat: Use a hairdryer on its highest heat setting (or a heat gun on a low setting) to heat the dented area. Keep the heat source moving in a circular motion about 6 inches away from the panel for 30 to 60 seconds. Do not overheat the panel, as excessive heat can bubble the paint or melt the underlying foam insulation.
- Apply Extreme Cold: Immediately grab a can of compressed air. Hold it upside down and spray the liquid carbon dioxide directly onto the center of the heated dent for about 10 seconds.
- Let it Pop: As the metal rapidly contracts from the extreme cold, you should hear a “pop” as the dent snaps back out.
- Clean Up: Wipe away any remaining condensation or residue.
Method 2: The Suction Cup Method
If thermal expansion doesn’t do the trick, mechanical suction is your next best bet.
- Prep the Surface: Clean the panel thoroughly.
- Apply Heat: Warm the metal slightly with a hairdryer to make it more pliable.
- Attach the Suction Tool: Wet the rim of a heavy-duty suction cup (or a suction-based dent puller from an automotive store) and press it firmly over the center of the dent.
- Pull Gently: Pull the suction cup straight outward with steady, firm pressure. Avoid jerking motions, which can crease the metal or damage the finish. Repeat this process as needed until the surface is flush.
If you have a shallow dent that won’t pop out completely, you can use a small amount of specialized appliance epoxy filler or even plain white toothpaste (which acts as a mild abrasive filler for micro-dents). Apply it to the dent, smooth it out with a plastic putty knife, allow it to dry completely, sand it smooth with ultra-fine sandpaper, and touch it up with matching paint.
Treating Rust and Restoring the Paint Finish
Rust is the silent killer of household appliances. It usually starts in high-moisture areas, such as around the water dispenser, along the bottom edge of the door, or near the floor. If left untreated, surface rust will eventually eat through the sheet metal, destroying the panel entirely.
A classic example of how severe rust can get is documented in this Case Study on Refrigerator Door Frame Rust Repair, where a boat refrigerator’s frame completely rusted out, requiring custom stainless steel fabrication and heavy adhesives to salvage. To avoid that level of structural failure, address rust as soon as you spot it.
How to Repair Rusted Refrigerator Panels:
- Isolate the Area: Tape off the surrounding undamaged panels using painter’s tape and plastic sheeting to protect them from dust and paint overspray.
- Scrape and Wire-Brush: Use a stiff wire brush to scrape away all loose, flaking rust and bubbling paint.
- Sand Smooth: Use 400-grit wet/dry sandpaper to sand the rusted area down to bare metal. Feather the edges where the paint meets the bare metal so the transition feels completely smooth to the touch.
- Apply Rust Converter: Apply a thin layer of chemical rust converter to the sanded area. This neutralizes any microscopic rust particles left behind and converts them into a stable, paintable protective barrier. Let it dry according to the manufacturer’s instructions.
- Prime the Surface: Apply a thin, even coat of rust-inhibiting appliance primer. If you are spraying, hold the can 8 to 10 inches away and use sweeping, overlapping strokes. Let it dry completely.
- Apply the Finish Paint:
- For Painted Finishes: Use appliance epoxy paint that matches your refrigerator’s color (usually textured black, gloss white, or bisque). Apply two thin coats rather than one thick coat to prevent runs.
- For Stainless Steel: Genuine stainless steel cannot be painted. If you have a scratch or light rust on stainless steel, you must sand it out with the direction of the metal grain using a very fine abrasive pad or specialized stainless steel reconditioning kits. Never sand across the grain, or you will permanently ruin the finish.
When to Choose DIY vs. Professional Refrigerator Body Repair
While fixing a minor dent or touch-up scratch is a satisfying weekend project, major structural damage is another story. Understanding the limits of DIY repair can save you hundreds of dollars in ruined parts and wasted time.
Cost Analysis and Repair Complexity
Let’s look at the numbers. A DIY dent or rust repair kit typically costs between $15 and $50. If successful, you can save an average of $200 to $500 compared to professional cosmetic repair or panel replacement.
However, if you make a mistake — such as overheating a panel and melting the internal insulation, or using the wrong structural adhesive that fails to hold the weight of the door — you could face a much higher bill. In fact, replacing a complete refrigerator door or side panel professionally typically ranges from $100 to $300+ in parts alone, plus labor.
For automotive body repairs, technicians reference strict rules like the Body Structure Materials and Allowed Operations guide, which details how different metal grades react to heat, welding, and structural bonding.
Similarly, applying replacement components requires precise techniques, such as those outlined in automotive guides like Installing the Replacement Component, which emphasize the importance of adhesive curing temperatures and structural alignment.
While refrigerators don’t face the same high-speed road stresses as vehicles, their doors carry heavy loads of milk jugs and condiments daily, meaning structural repairs must be incredibly strong and precisely aligned.
If you are dealing with complex structural damage or door alignment issues in the Triangle area, it’s highly recommended to consult our team for expert fridge repair in Raleigh to ensure your appliance is restored correctly and safely.
When to Call a Certified Technician
You should put down the DIY tools and call a professional technician if you experience any of the following:
- The Door is Misaligned: If the door hangs unevenly, it will prevent the magnetic gasket from sealing properly, leading to frost buildup and cooling problems.
- The Refrigerator is Not Cooling: If a body dent was accompanied by a sudden drop in cooling performance, you likely have an internal issue or a refrigerant leak. Learn more about how we handle these critical issues on our refrigerator cooling repairs page.
- Deep Rust Penetration: If the rust has eaten completely through the sheet metal, the panel must be professionally replaced rather than patched.
- High-End Finishes: High-end appliances, such as built-in units, require specialized tools and color-matching techniques to preserve their luxury appearance and resale value.
Frequently Asked Questions about Refrigerator Panel Maintenance
Can you fix a dent in a stainless steel refrigerator?
Yes, but it requires extreme patience. Because stainless steel does not have the same elastic properties as painted mild steel, it is much harder to “pop” back into shape.
Minor dents can sometimes be massaged out using a professional paintless dent repair (PDR) suction tool. If you try to sand or polish out a scratch or blemish, always work in the exact direction of the factory brushed grain. Never use steel wool, as it will leave tiny iron particles behind that will eventually rust.
Does exterior body damage affect refrigerator cooling?
It absolutely can. If a dent occurs near the door frame, it can warp the door body, preventing the magnetic gasket from making airtight contact with the cabinet. This allows warm, humid kitchen air to enter the fresh food and freezer compartments.
The result is rapid frost accumulation, a warm refrigerator, and a compressor that runs constantly. If you suspect your freezer seal is compromised, check out our professional freezer repair services to get your unit running efficiently again.
How do I prevent rust on my refrigerator panels?
Prevention is much easier than repair! To keep rust at bay:
- Control Moisture: Wipe down the water dispenser tray daily to prevent standing water from corroding the panel underneath.
- Clean Regularly: Clean the exterior with a mild dish soap and warm water. Avoid harsh chemical cleaners, bleach, or abrasive pads that strip away protective clear coats.
- Apply a Protective Barrier: For stainless steel, apply a high-quality stainless steel polish or a thin coat of mineral oil once a month to repel moisture and fingerprints.
Conclusion
A dented, scratched, or rusted refrigerator doesn’t mean you need to start shopping for a new appliance. With the right tools, a little patience, and the step-by-step techniques outlined in this guide, you can successfully tackle minor cosmetic repairs and restore your fridge’s clean look.
However, when body damage crosses the line from a simple cosmetic blemish to a structural issue that threatens your door seals, insulation, or cooling efficiency, DIY methods can easily do more harm than good.
If you live in Raleigh, Cary, Durham, Wake Forest, Chapel Hill, Fuquay-Varina, Apex, Garner, Holly Springs, or Morrisville, you don’t have to tackle this alone. Our friendly, certified technicians at iFix Appliances are ready to provide fast, reliable, same-day diagnostics and upfront pricing.
Don’t let a damaged door ruin your kitchen’s aesthetic or run up your electric bill. Schedule Refrigerator Repair with us today, and let us restore your appliance to perfect working order!


0 Comments