
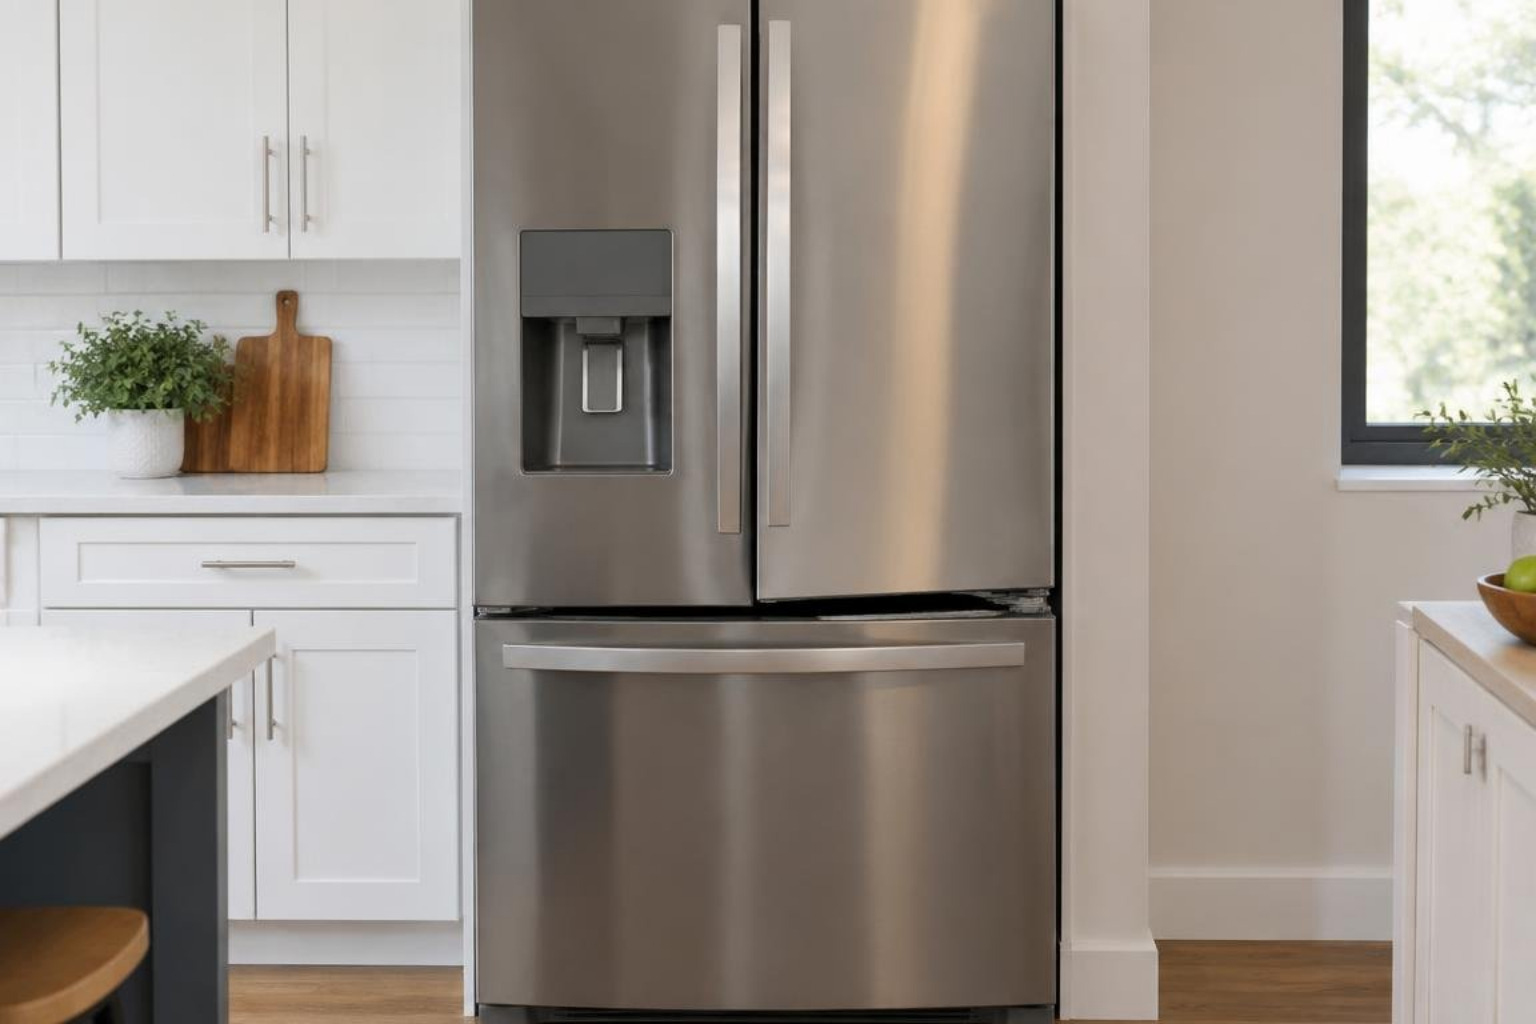
How to Fix a Sagging Refrigerator Door Hinge
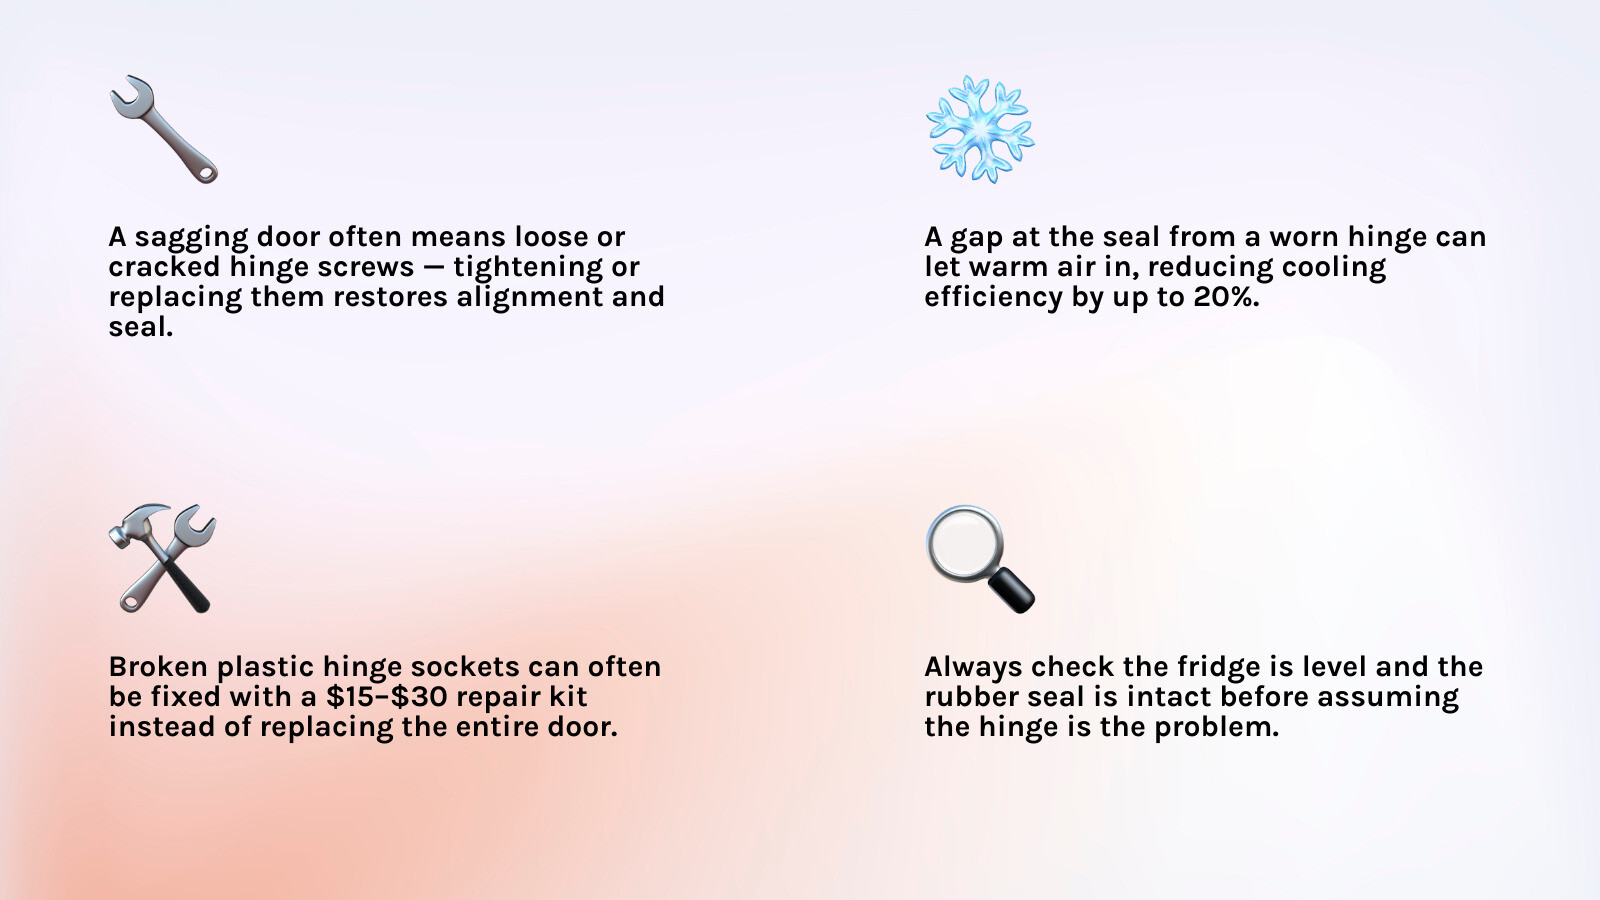
Start by checking the hinge screws, door alignment, and rubber seal. If a hinge is loose, tighten it with the door supported. If the hinge is cracked or worn, unplug the fridge, have someone help hold the door, and replace the damaged part with one made for your model. A broken plastic hinge socket may be fixable with a compatible repair kit, so you may not need a new door.
A door that sags or leaves a gap at the seal can let warm air in. Check the seal and make sure the fridge is level before buying parts; the hinge may not be the problem.
I’m Vasyl Turetsky, founder and appliance repair specialist at iFix Appliances. My work repairing refrigerators for Raleigh-area homeowners helps me explain when refrigerator door hinge repair is a practical DIY job and when a heavy or damaged door needs a technician.
Refrigerator door hinge repair word list:
- How to Re-Secure and Repair a Loose or Broken Refrigerator Door Handle
- No More Dents: The Ultimate Guide to Refrigerator Body Repair
- Book Your Annual Fridge Maintenance Service to Prevent Costly Breakdowns
Signs Your Refrigerator Door Hinge Needs Attention
A healthy refrigerator door operates smoothly, swings shut with a gentle push, and seals tightly against the cabinet frame. Over years of holding heavy gallon jugs, condiments, and groceries, the hinge hardware endures immense mechanical stress. When components begin to fail, the appliance gives off distinct warning signals.
Here are the primary symptoms that tell me a hinge requires immediate attention:
- Visible Door Sagging or Tilting: The most common sign is an uneven gap along the top or side profile of the refrigerator. When closed, the door sits visibly lower than the cabinet edge or rubs against an adjacent French door or bottom drawer.
- Gaps in the Magnetic Gasket: A sagging door pulls the flexible rubber seal away from the metal frame. Even a tiny opening lets ambient humidity seep inside, causing heavy frost buildup, ice maker malfunctions, and continuous compressor cycling.
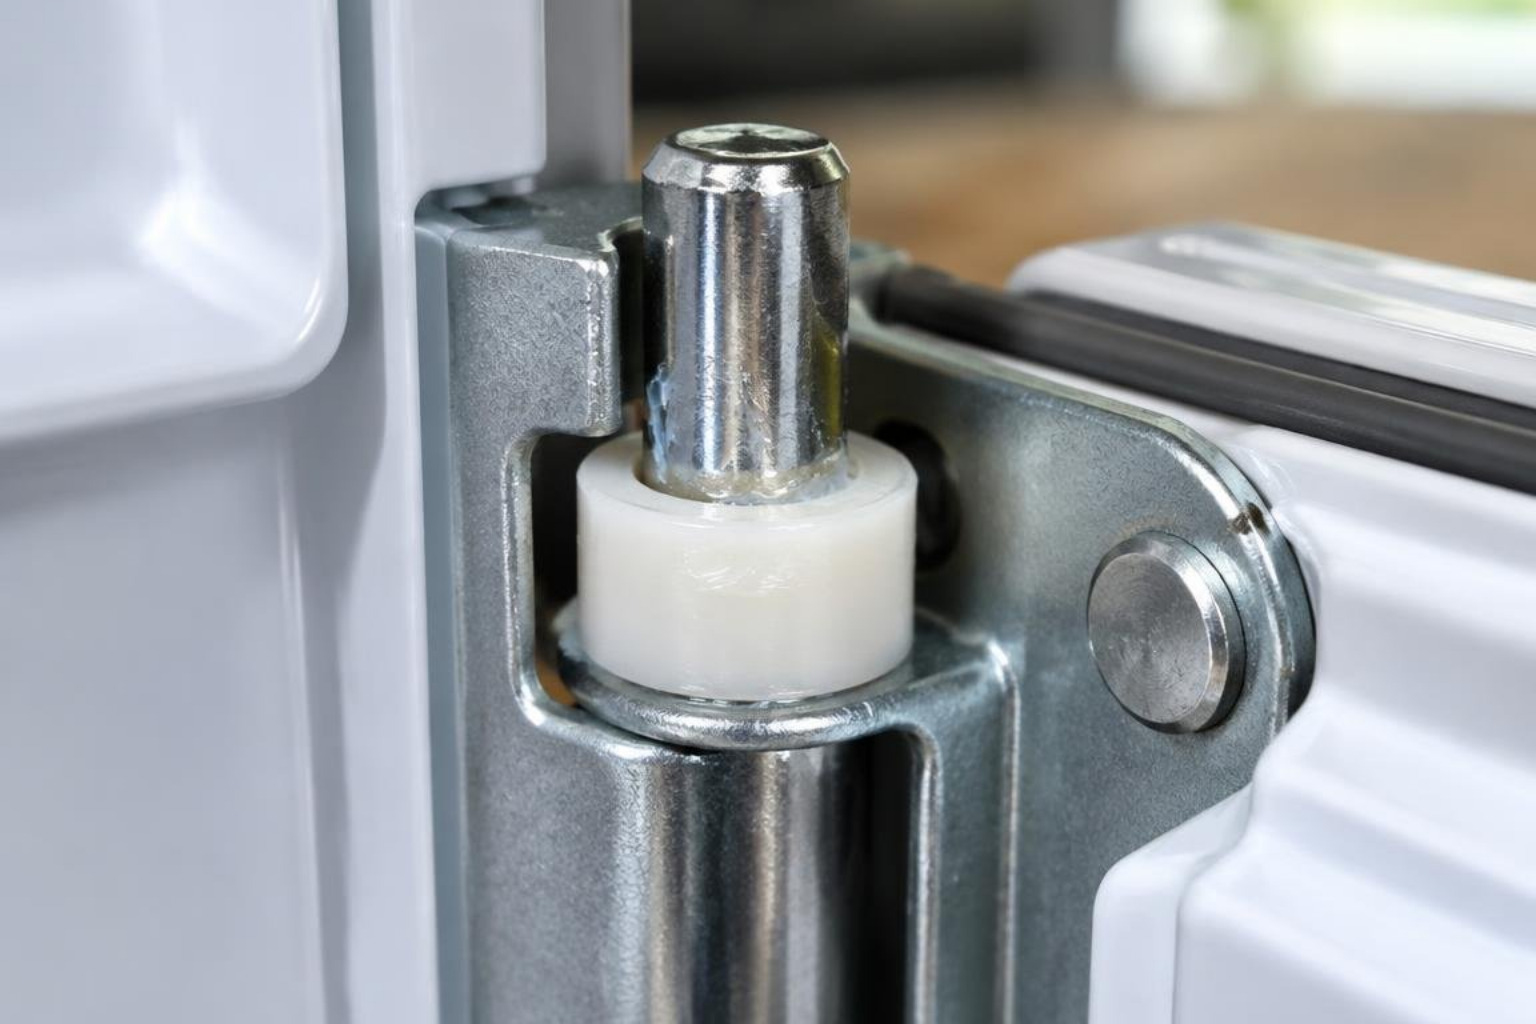
- Popping, Clicking, or Grinding Sounds: Modern refrigerators often utilize nylon or plastic cams inside the hinge to help lift and pull the door shut automatically. When these wear down or crack, you will hear a sharp popping or clunking sound every time you swing the door. If your appliance is suffering from worn cams, following a guide on How to Replace the Hinge Cam on a Kenmore Elite Refrigerator Door can help you resolve those loud mechanical snaps.
- Loose or Wobbly Feel During Operation: If pulling the door feels unstable, the issue could be worn bracket screws, wallowed-out mounting holes, or broken hinge bushings. While you examine the hinges, inspect the handle assembly as well, as loose mounting studs often mimic hinge wobble; learning how to re-secure a loose refrigerator door handle will keep your daily grip secure.
- The Door Swings Open or Refuses to Stay Closed: If the door drifts open on its own or bounces back after you push it shut, the hinge pin has likely shifted out of plumb or the bottom thrust washer has worn down completely.
Evaluating Hinge Wear vs. Gasket Failure
Before you grab a socket set to pull the hinges off, determine whether the problem stems from worn metal hardware or a degraded rubber gasket. The two issues produce similar symptoms—such as air leaks and interior condensation—but require entirely different fixes.
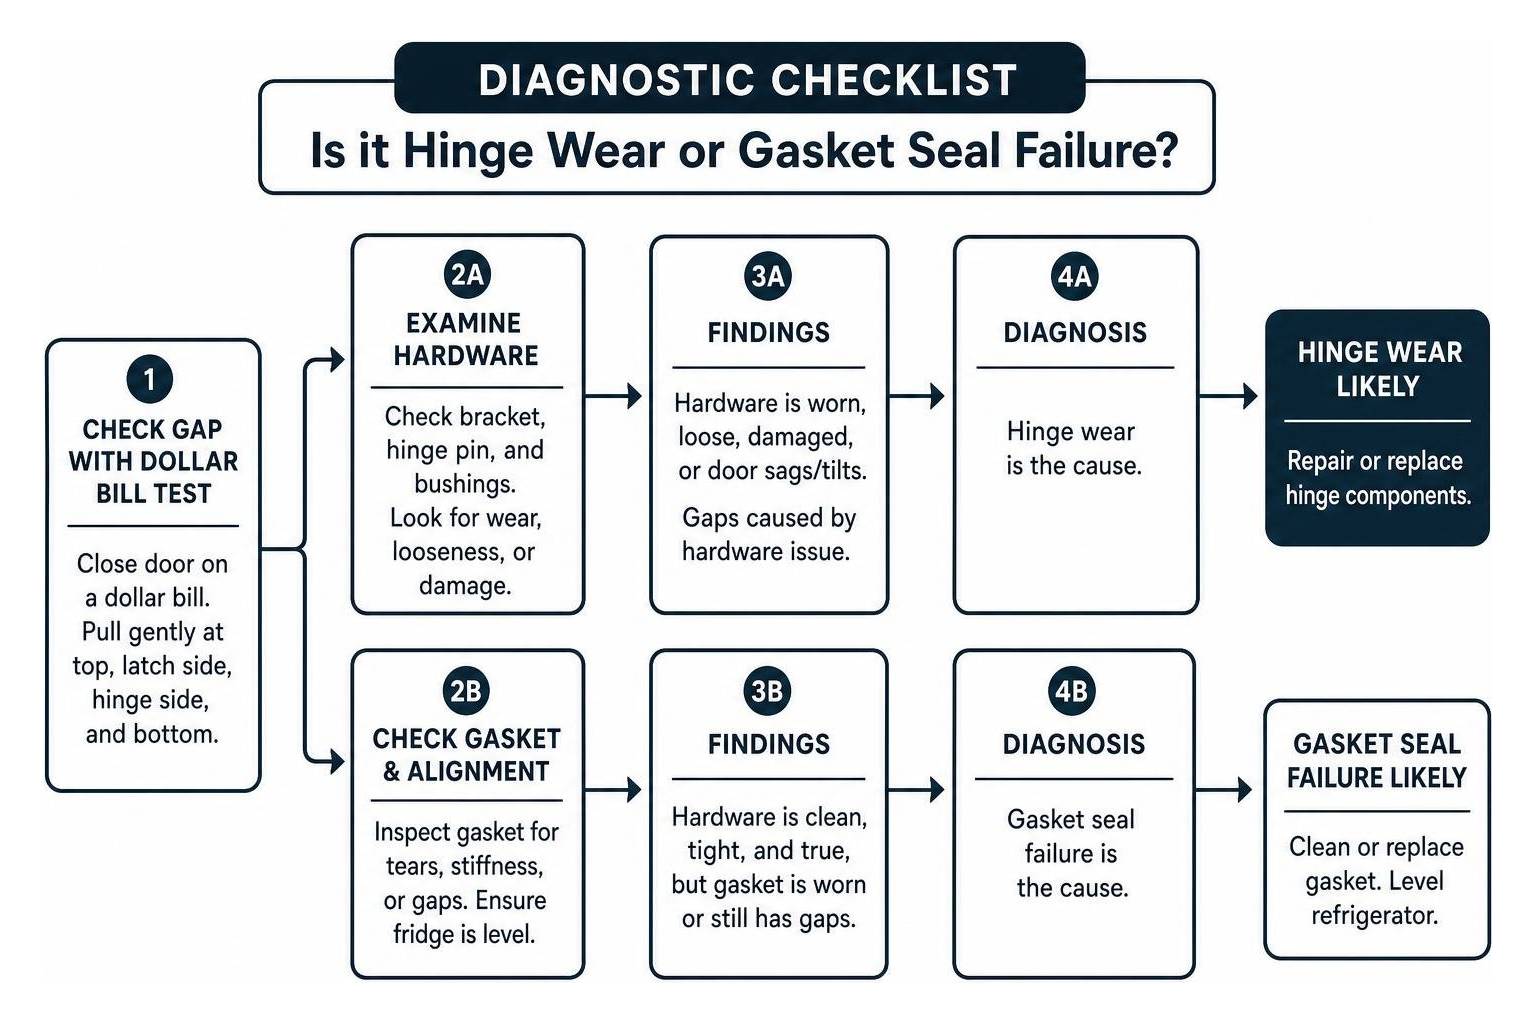
- The Dollar Bill Test: Close the refrigerator door on a dollar bill so that half sits inside and half sticks out. Gently pull the bill. If you feel firm tension, the gasket and hinge alignment in that section are solid. If the bill slides out effortlessly with zero resistance, you have a gap. Repeat this test at the top, latch side, hinge side, and bottom.
- Evaluating Suction Resistance: When you close a refrigerator door, the warm air that entered cools rapidly, creating a temporary internal vacuum. If opening the door immediately after closing it feels difficult, that is normal vacuum pressure rather than mechanical hinge binding. For details on internal air dynamics and vacuum equalization, reviewing steps for troubleshooting door suction and resistance will show you how to safely break the seal without stressing the hinges.
- Physical Inspection of Hardware: Open the door wide and inspect the metal bracket, hinge pin, and nylon bushings. Look for black plastic dust (shaved bushing residue), metal shavings, rust, or cracked support plates. If the hardware is clean, tight, and true, but air still leaks, your issue lies in an old, stiff, or torn rubber seal rather than the hinge assembly itself.
Selecting Your Fix: Repair Kits vs. Full Replacement
When a hinge fails, homeowners often assume they must order a costly complete hinge assembly or, worse, replace the entire refrigerator door. In my experience across the Triangle area, that is rarely necessary. Deciding between a minor reinforcement kit, a replacement hinge bracket, or a full OEM assembly comes down to what part of the mechanism broke.
| Feature / Scenario | DIY Hinge Repair Kit | Full OEM Hinge Replacement | Complete Door Replacement |
|---|---|---|---|
| Typical Part Cost | $12.00 – $25.00 | $20.00 – $60.00 | $300.00 – $900.00+ |
| Installation Time | 30 to 45 minutes | 20 to 30 minutes | 45 to 60 minutes |
| Best Used For | Cracked bottom plastic sockets, worn cams, stripped pivot holes | Bent metal brackets, sheared hinge pins, seized bearings | Warped door shell, crushed interior insulation, ruined frame |
| Skill Level Needed | Intermediate (light drilling) | Beginner to Intermediate | Intermediate to Advanced |
| Longevity | Excellent (reinforces weak spots) | OEM factory standard | OEM factory standard |
When to Use a Refrigerator Door Hinge Repair Kit vs. Full Replacement
Plastic fatigue is a frequent culprit on modern appliances, especially on bottom hinge sockets where the weight of loaded door bins rests directly on a molded polymer sleeve. When this plastic housing cracks or chips, the door drops downward and scrapes the floor.
A reinforcement plate kit is ideal when the original hinge socket on the bottom of the door is chipped or cracked, but enough foundational structure remains to anchor a reinforcement plate. For instance, following the official 3307896.005 and 3307910.004 Refrigerator Hinge Repair Kit Instructions demonstrates how a specialized metal plate and replacement bushing can clamp over the damaged plastic socket on compatible units (such as Dometic and Norcold models), completely restoring structural stability for under $15.
Choose a full replacement hinge when:
- The stamped steel hinge bracket is visibly bent, twisted, or cracked.
- The integrated metal hinge pin has snapped or severely grooved from years of unlubricated friction.
- The built-in electrical wiring harness on a smart door hinge is severed or damaged.
If you discover that the metal frame of the door itself is crushed, rusted through, or distorted beyond alignment, only then is a full door replacement warranted.
Step-by-Step Refrigerator Door Hinge Repair and Replacement Guide
Performing this repair requires methodical preparation. Because refrigerator doors are heavy, awkward, and packed with glass shelving, taking your time ensures a safe repair and protects your kitchen flooring.

Essential Tools and Safety for Refrigerator Door Hinge Repair
Before turning a single screw, gather your tools and review essential safety protocols.
Tools & Materials Checklist:
- Socket wrench set (specifically 8 mm, 10 mm, and 5/16-inch hex heads)
- Phillips-head and flat-head screwdrivers
- Scratch awl or center punch (for marking pilot holes if using a repair kit)
- Cordless drill with a 3/32-inch drill bit (for reinforcement kits)
- Spirit level (torpedo level)
- Food-grade silicone grease or white lithium grease
- Heavy cardboard, moving blankets, or thick drop cloths (to protect door panels)
- Protective work gloves and safety glasses
- Hair dryer (optional, for gasket reshaping)
Critical Safety Precautions:
- Disconnect Power: Always unplug the refrigerator or switch off the dedicated circuit breaker. Many modern hinges house wiring harnesses for door alarms, digital displays, and ice/water dispensers.
- Clear the Door Contents: Empty every condiment, bottle, and shelf bin from the door before you begin. Removing this weight prevents the door from twisting unexpectedly and saves your glass jars from breaking.
- Use a Two-Person Lift: Never attempt to balance, unhook, and carry a full-sized refrigerator or freezer door by yourself. Standard doors weigh between 40 and 80 pounds unloaded. Have a second person steady the door while you loosen the hinge hardware. For brand-specific disassembly steps and screw sequences, refer to the Frigidaire FFTR1022QW User Manual instructions or your appliance’s dedicated manual.
Removing the Refrigerator Door and Detaching Damaged Hinges
Follow this structured order of operations to safely remove the door and hardware:
- Prepare the Landing Zone: Lay a thick piece of cardboard or a moving blanket on the kitchen floor near the refrigerator. This prevents scratching the painted or stainless steel exterior finish of the door.
- Pry Off the Upper Hinge Cover: Using a flat-head screwdriver taped with painter’s tape (to avoid marring the finish), gently pry off the decorative plastic top hinge cover.
- Disconnect Wire Harnesses and Water Lines: If your door features a dispenser, carefully unclip the plastic wiring connectors. If a water line runs through the top hinge pin, release the quick-connect collet collar and slide the plastic tubing out.
- Remove the Top Hinge Bracket: While your helper firmly holds the door against the refrigerator cabinet, use a socket wrench to remove the mounting bolts securing the top hinge. Lift the top hinge straight up off the door’s pivot bushing and set it aside.
- Lift the Door Off the Lower/Middle Pin: Have your helper tilt the door slightly forward and lift it straight upward to disengage it from the center hinge pin (on multi-door models) or bottom hinge bracket. Place the door face-up on your padded floor area.
- Detach the Middle or Bottom Hinge: If you are replacing the lower or center hinge bracket, unscrew the mounting bolts from the main refrigerator frame and remove the damaged hardware.
Installing the New Hinge or Reinforcement Plate
With the door safely resting on the padded work surface, you can now address the damaged hardware or cracked socket:
- Installing a Reinforcement Plate (For Damaged Sockets):
- Clean any dirt or grease from the corner socket area on the bottom of the door.
- Place the reinforcement bracket over the cracked socket to test fit.
- Using a scratch awl, mark the pilot hole positions into the sheet metal edge.
- Drill 3/32-inch pilot holes, taking care not to drill deeper than 3/8 inch.
- Apply a thin bead of silicone adhesive if recommended by your kit instructions, insert the new nylon bushing, and secure the metal plate tightly using the included flat-head screws. Ensure the screws sit flush so they do not collide with the lower bracket.
- Replacing the Hinge Hardware:
- If installing a new OEM hinge bracket onto the refrigerator cabinet, clean the mounting pad on the frame.
- Position any factory alignment shims between the bracket and the cabinet frame.
- Thread in the original mounting bolts by hand to prevent cross-threading, then tighten them snugly with your socket wrench. Do not fully torque them yet; leave a tiny amount of play for final alignment.
- Apply a dab of food-grade silicone grease to the hinge pin and inside the door bushing.
Rehanging and Aligning the Door for a Tight Seal
Reinstalling the door requires precision to ensure the magnetic seal closes evenly on all sides.
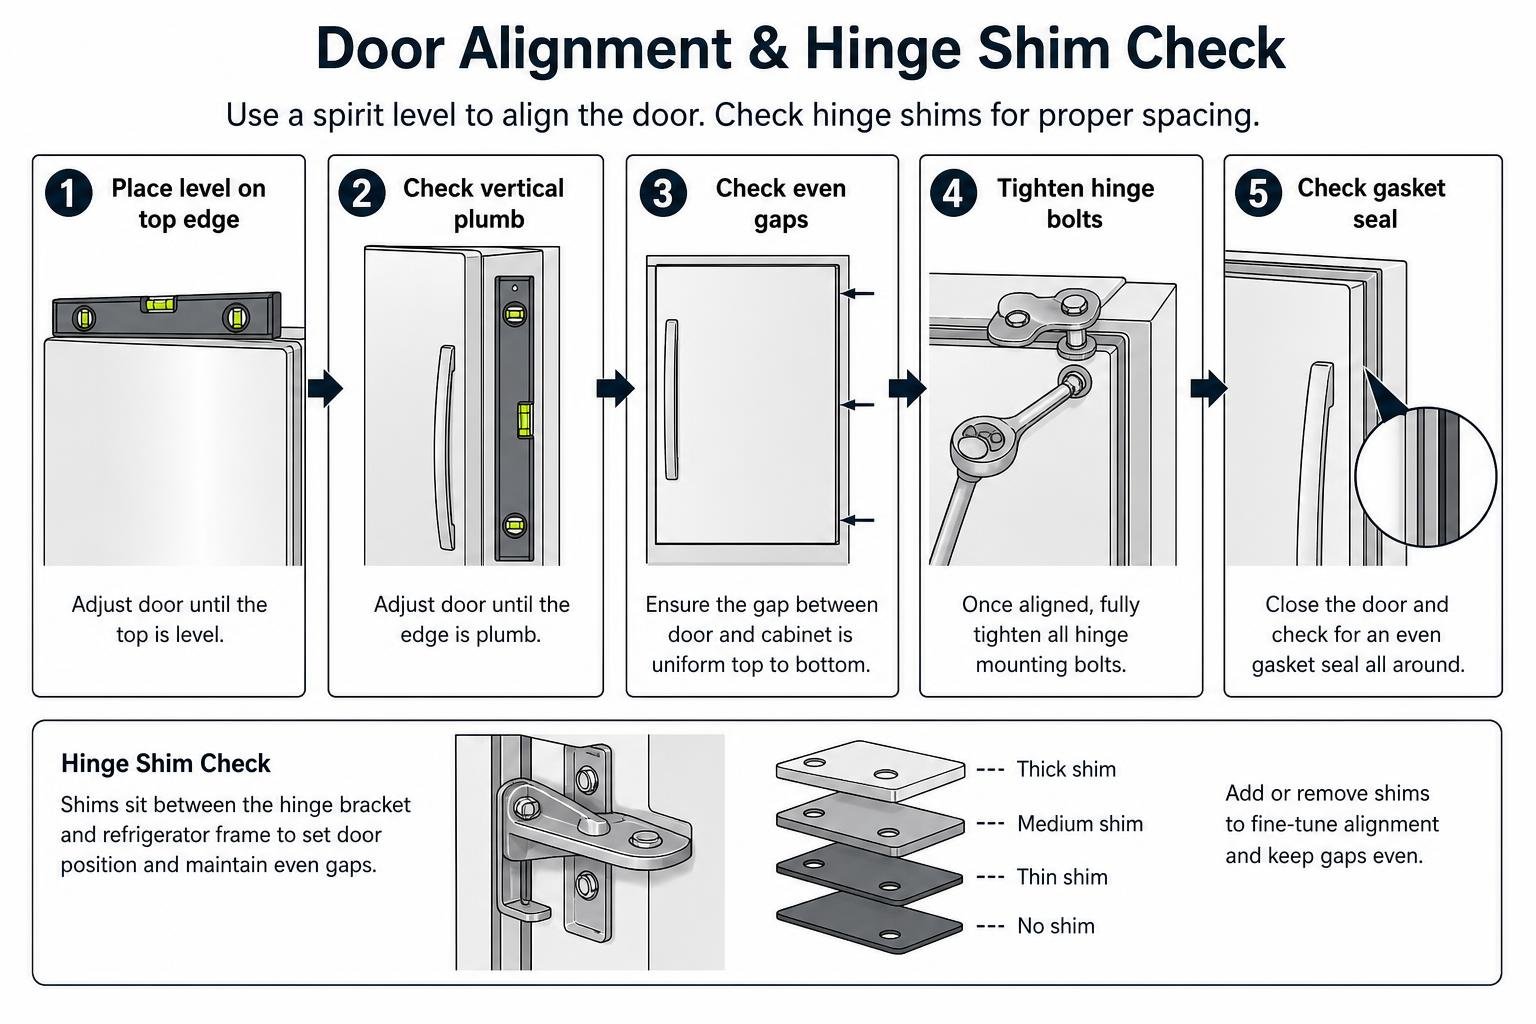
- Mount the Door on the Bottom/Middle Pin: With your assistant, lift the door and guide the bottom socket down onto the greased lower hinge pin. Ensure the nylon thrust washer is positioned on the pin.
- Engage the Top Hinge: Hold the door closed against the cabinet. Lower the top hinge pin into the upper door bushing, align the bracket with the cabinet screw holes, and start the bolts by hand.
- Check Horizontal and Vertical Plumb: Place a spirit level along the top edge of the door and vertically along the outer edge. Adjust the door until it is level and plumb. Ensure the gap between the door and the cabinet is completely uniform from top to bottom.
- Torque the Mounting Hardware: Once the door is properly positioned, fully tighten all hinge bolts securely. Reconnect any electrical wire harnesses and water lines, then snap the top hinge cover back in place.
- Address Gasket Gaps: If you notice small gaps in the rubber seal after hanging the door, warm the gasket gently with a hair dryer on medium heat. As the vinyl warms, use your fingers to pull it slightly outward so it meets the metal frame. When the door is closed, the cooling gasket will settle against the cabinet. If an unsealed door has allowed your appliance to run continuously without cooling, resolving mechanical misalignments will aid in preventing refrigerator cooling issues and protect the compressor.
Common Mistakes and Long-Term Hinge Maintenance
Hinge repair is straightforward, but minor installation errors can cause repeat failures or stripped hardware. Keep these practical tips in mind:
- Avoid Over-Tightening Frame Screws: Refrigerator frames use relatively thin sheet metal backed by structural foam. Over-torquing bolts will strip the threads. Tighten firmly with a hand ratchet rather than an aggressive power impact driver.
- Never Rehang a Door Without Bushings: Stamped steel hinges should never rotate directly against metal door frames. Always ensure the low-friction nylon or Delrin bushings are in place. Operating metal-on-metal will quickly shave the hinge pin and cause severe sagging.
- Don’t Overload Door Bins: The easiest way to break a bottom hinge socket is loading door shelves with excessive weight. Store heavy items like gallon milk jugs and wine bottles on interior main glass shelves rather than door door caddies whenever possible.
- Annual Cleaning and Lubrication: Every 12 months, wipe down the hinge pins with a damp microfiber cloth to remove old grease, dust, and debris. Apply a small drop of food-grade silicone grease or white lithium grease to the pivot points to maintain smooth, silent operation. Scheduling regular maintenance or booking annual fridge maintenance will catch loose hinge brackets, dirty condenser coils, and failing door seals before they lead to expensive breakdowns.
Frequently Asked Questions About Refrigerator Door Hinges
Can I fix a broken plastic hinge socket without replacing the entire door?
Yes. On many refrigerator brands, a cracked or broken lower plastic hinge socket can be repaired using an aftermarket or manufacturer-approved hinge reinforcement kit. These kits include a durable steel or aluminum reinforcement plate that fits over the broken plastic corner and anchors directly into the door’s internal metal frame using self-tapping screws. As long as the door’s outer metal shell is intact, a reinforcement plate will restore structural strength and save you hundreds of dollars compared to purchasing an entire door assembly.
How much does it cost to repair or replace a refrigerator door hinge?
A DIY repair using an aftermarket hinge reinforcement kit typically costs between $12.00 and $25.00 for parts. If you need to replace an individual OEM hinge bracket or hinge cam, expect to pay between $20.00 and $60.00 per part. If you choose to hire a local appliance technician, professional service generally ranges from $120.00 to $250.00, which includes diagnostic inspection, precision door leveling, hardware replacement, and full gasket sealing.
When is it better to replace the refrigerator instead of fixing the hinge?
If your refrigerator is more than 10 to 12 years old, exhibits systemic cooling problems, has a failing sealed system (compressor/evaporator), or suffers from a warped main cabinet frame where the hinge mounting points have pulled completely out of the cabinet shell, replacing the appliance is generally more cost-effective. However, if the refrigerator cools reliably and the issue is simply a loose, bent, or cracked hinge, repairing or replacing the hardware is the best and most economical choice.
Conclusion
A sagging or sticking refrigerator door does not have to disrupt your kitchen or drive up your monthly electric bill. With basic hand tools, a helper, and the right replacement hardware, you can complete a refrigerator door hinge repair in under an hour. By verifying alignment, lubricating hinge pins, and ensuring a tight perimeter seal, your refrigerator will open smoothly and keep your food properly preserved.
If you run into stubborn stripped bolts, severe frame damage, or prefer a certified technician to handle heavy French doors, our local team is here to help. Contact iFix Appliances today for honest diagnostics, fast turnaround, and professional refrigerator repair services throughout Raleigh, Cary, Apex, Durham, and the surrounding Triangle communities.
0 Comments