
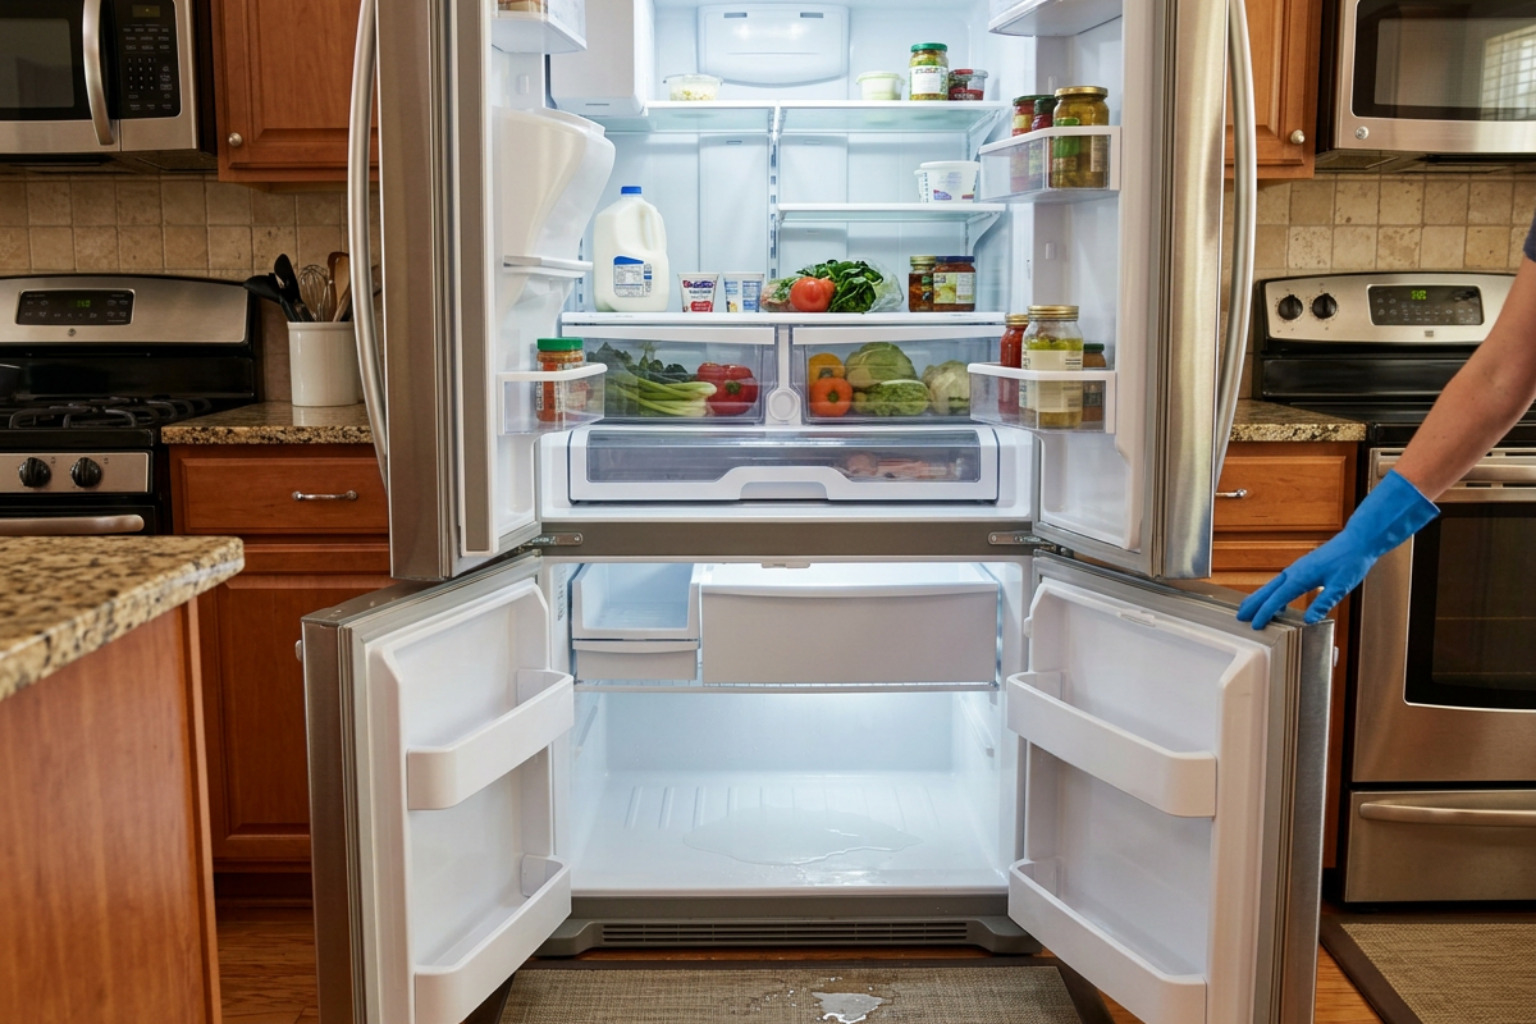
Stop Water Pooling Inside Your Refrigerator
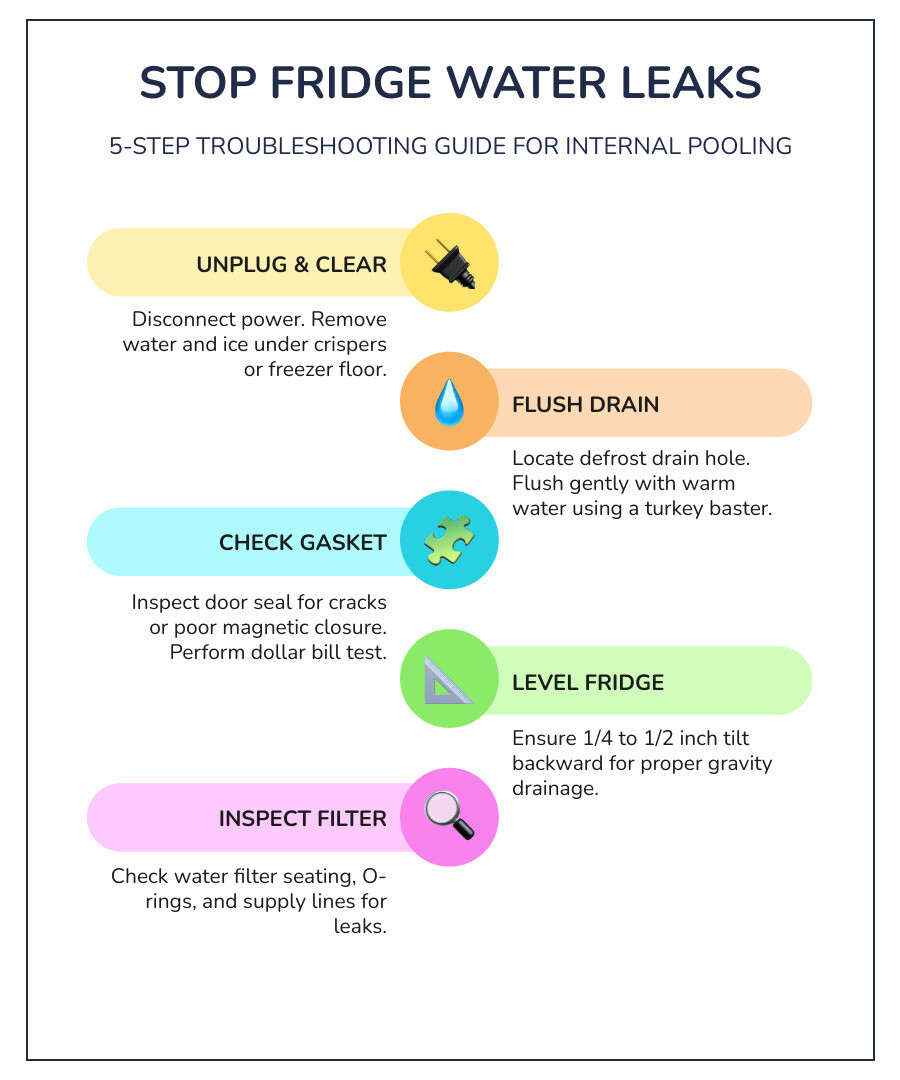
A refrigerator leaking water inside is most often caused by a clogged or frozen defrost drain. Start by unplugging the appliance, removing water and ice from under the crisper drawers or freezer floor, and checking the drain hole for debris or an ice plug. Flush the drain gently with warm water using a turkey baster. If water still appears, inspect the door gasket, refrigerator level, water filter, and visible internal water lines.
Do not ignore the puddle. Standing water can spoil food, cause odors or mold growth, and eventually spill onto the kitchen floor.
I am Vasyl Turetsky, Founder and Appliance Repair Specialist at iFix Appliances. I diagnose refrigerator leaking water inside issues for homeowners across the Raleigh area, including recurring drain clogs, failed seals, filter leaks, and ice-maker water-line problems.
Refrigerator leaking water inside terms you need:
Common Culprits Behind a Refrigerator Leaking Water Inside
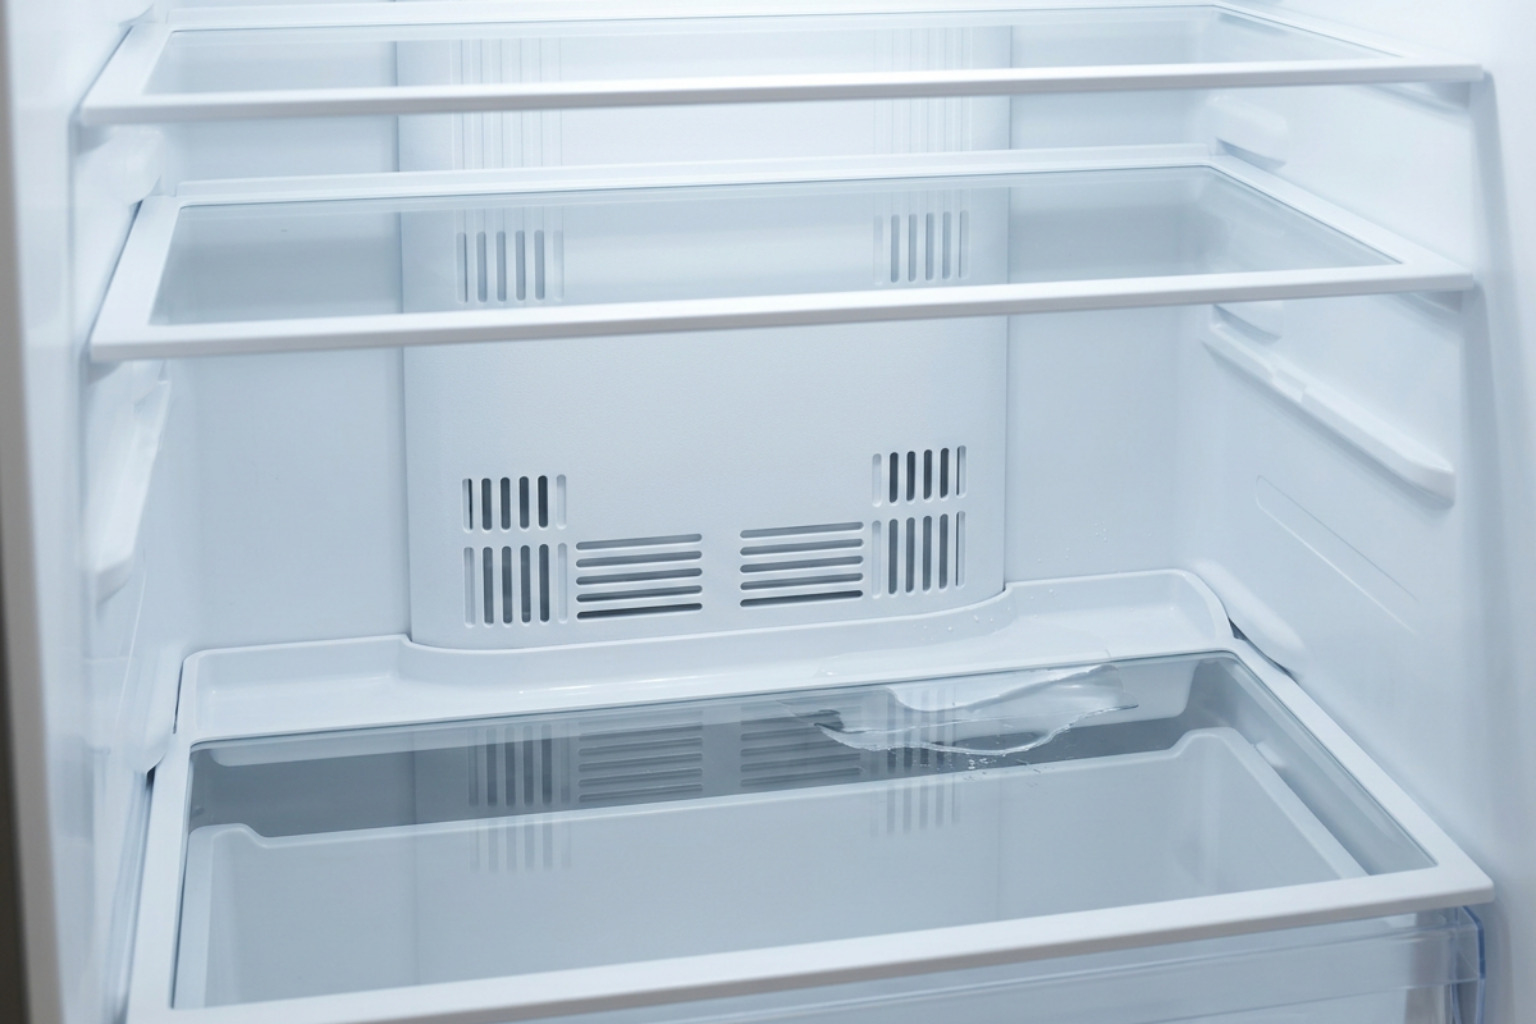
When water pools inside your fresh food compartment, it is easy to assume the worst. Thankfully, internal puddles are rarely caused by a catastrophic compressor failure. Instead, they usually stem from a simple plumbing or airflow disruption within the appliance’s self-regulating cooling system.
Every modern refrigerator relies on a continuous balance of temperature, humidity management, and drainage. When any part of this closed system is interrupted—whether by an ice dam, worn rubber, or a misaligned fitting—meltwater and condensation have nowhere to go except straight onto your glass shelves and into the crisper pans.
Why a Blocked Defrost Drain Causes a Refrigerator Leaking Water Inside
A clogged defrost drain is the cause of water pooling inside the refrigerator in 90% of cases. Modern frost-free refrigerators run an automatic defrost cycle multiple times each day. A heating element activates near the evaporator coils to melt away accumulated frost. This meltwater drops into a collection trough and flows down a small drain line to an exterior pan beneath the unit, where normal motor heat evaporates it into the room.
When food crumbs, mineral scale, or ice crystals plug that drain line, the meltwater cannot escape. It fills the trough, overflows the rear interior wall, and cascades into the lowest part of your fridge. If you are looking for practical WikiHow instructions on fixing internal fridge leaks, understanding this drainage path is the essential starting point for an effective repair.
Door Gasket Failures and Condensation Buildup
Your refrigerator’s door gasket creates an airtight seal that keeps cold air locked inside while blocking warm, humid room air. Over time, these rubber gaskets can warp, crack, tear, or lose their magnetic pull. When the seal fails, warm kitchen air constantly enters the compartment.
As that humid air meets the cold interior plastic and glass shelves, it instantly condenses into moisture droplets. If you live in an area with muggy summers, this problem accelerates dramatically; in fact, there are distinct reasons why appliances break faster in North Carolina’s climate, where ambient indoor humidity frequently overloads domestic cooling equipment. This excess moisture eventually overwhelms the cabinet’s internal airflow channels and collects in stagnant pools.
Water Filter Housing and Line Connection Faults
Refrigerators equipped with built-in ice dispensers and filtered water lines introduce another potential leak source. The water filter head assembly utilizes small rubber O-rings and push-connect fittings to maintain high water pressure without leaking.
If a filter is installed crookedly, if generic aftermarket filters are used, or if the plastic housing develops hairline stress fractures, water will drip continuously behind your upper shelves. Because internal tubing often routes toward the freezer ceiling, any crack in a supply line can simulate a defrost issue while also requiring specialized ice maker repair to restore balanced water pressure.
Step-by-Step Guide to Unclogging a Blocked Defrost Drain
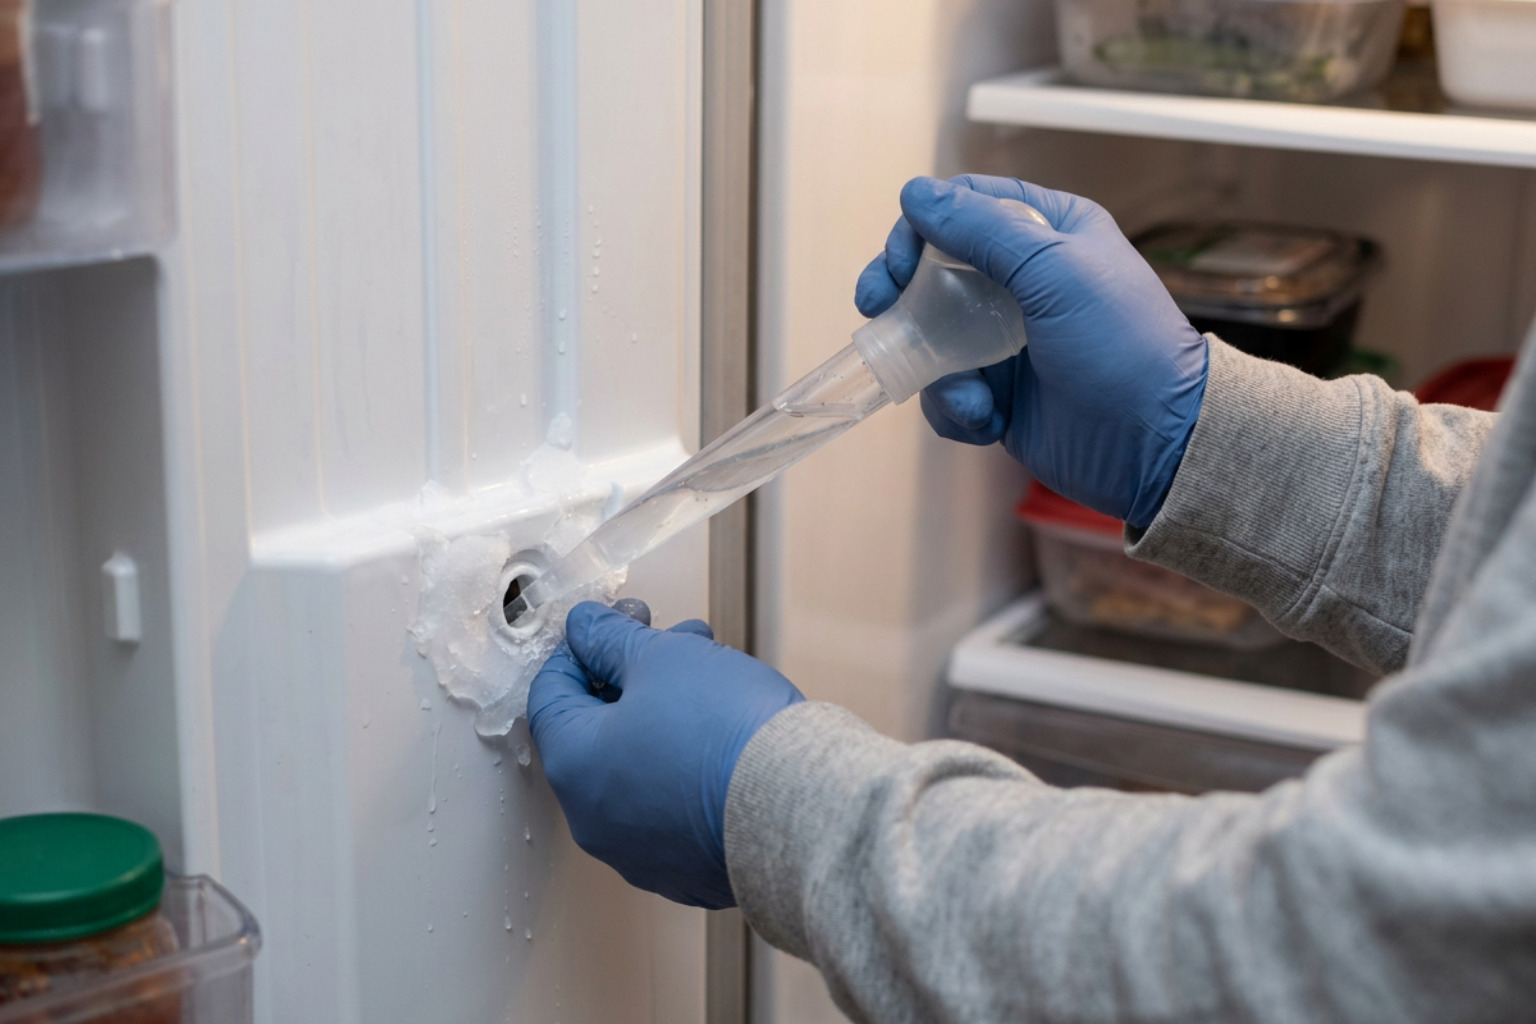
Clearing a blocked defrost line is a manageable DIY task that takes roughly 20 to 45 minutes. Here is the process I use in the field to safely clear the line and restore proper drainage.
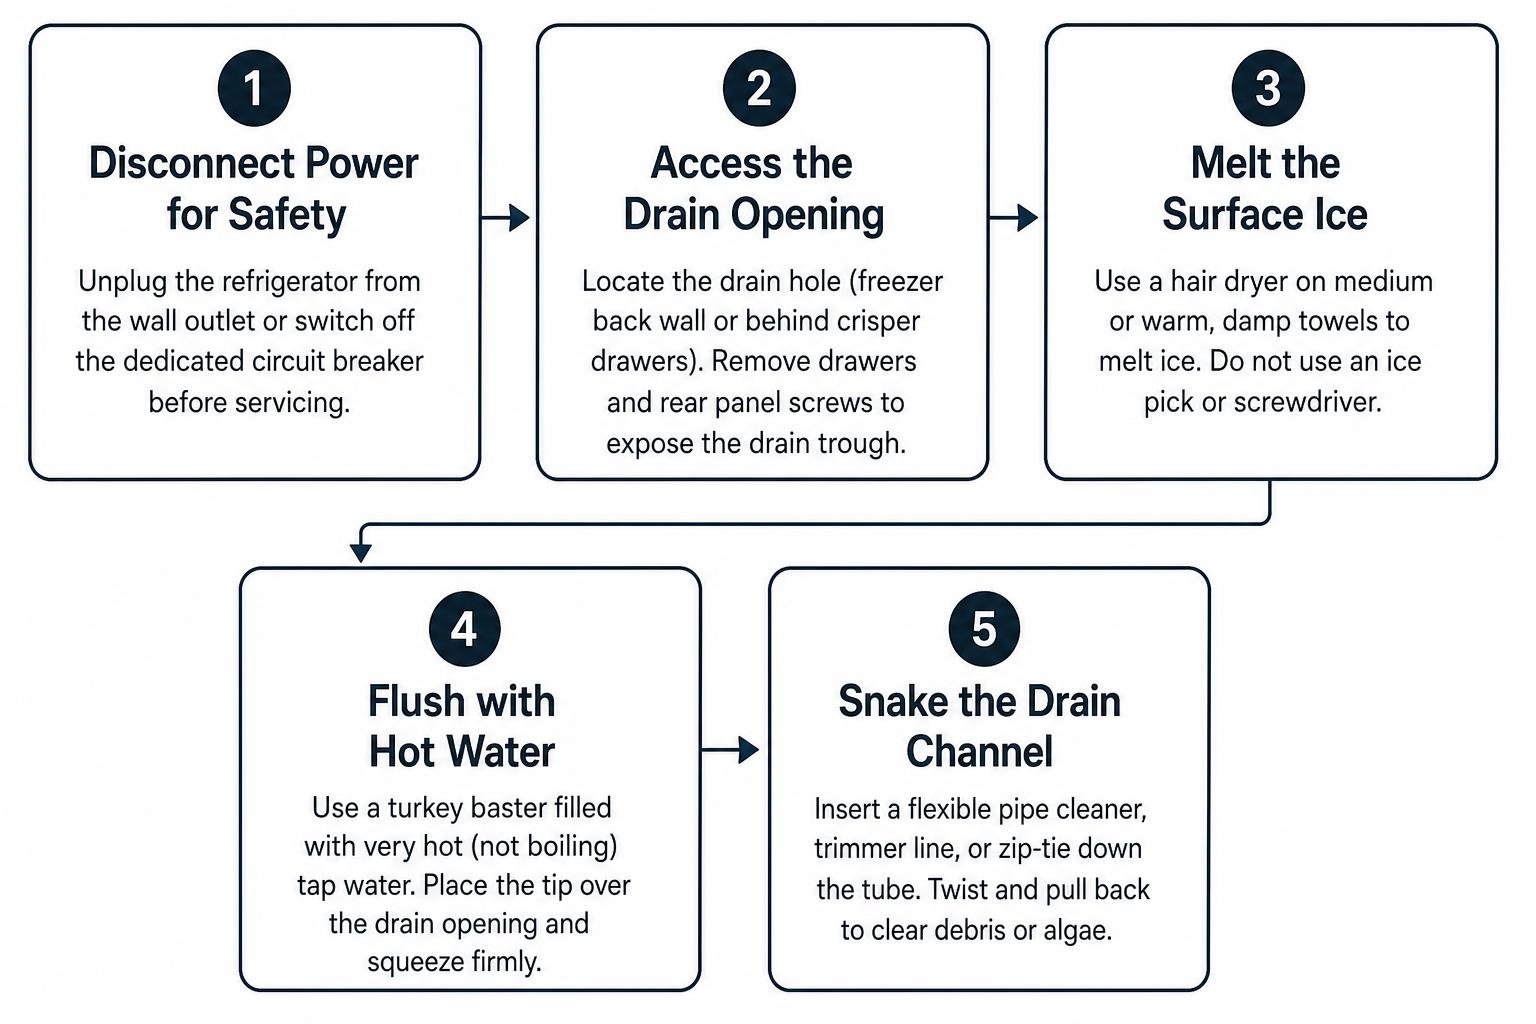
- Disconnect Power for Safety: Always unplug your refrigerator from the wall outlet or switch off the dedicated circuit breaker before servicing internal components.
- Access the Drain Opening: In bottom-freezer and French-door models, the drain hole is typically located at the bottom center of the back wall inside the freezer compartment. In standard top-mount units, it sits behind the lower crisper drawers in the fresh food section. You may need to remove plastic drawers and unthread a couple of hex screws on the rear access panel to expose the drain trough beneath the evaporator coils.
- Melt the Surface Ice: If the drain trough is filled with a solid sheet of ice, do not use an ice pick or screwdriver, as puncturing the evaporator coils will ruin the sealed refrigerant system. Instead, use a hair dryer on a medium-warm setting, keeping it moving constantly, or place warm, damp microfiber towels over the ice until the drain hole is visible.
- Flush with Hot Water: Fill a standard kitchen turkey baster with very hot (not boiling) tap water. Position the tip directly over the drain opening and squeeze firmly. The hydraulic pressure and heat will dissolve the internal ice plug.
- Snake the Drain Channel: To clear solid debris or stubborn algae, feed a flexible 24-inch nylon pipe cleaner, trimmer line, or zip-tie gently down the tube. Twist and pull back to pull out obstructions.
- Apply a Baking Soda Rinse: Mix one teaspoon of baking soda into two cups of warm water. Flush this solution down the drain hole using your turkey baster. This deodorizes the line and retards future bacterial slime growth.
- Inspect the “Duckbill” Valve: Pull the refrigerator forward and examine the drain tube exiting above the lower pan. Many brands feature a flattened rubber “duckbill” valve designed to stop pests from crawling up the tube. These rubber lips frequently stick together with residue. Squeeze the valve clean with warm soapy water to ensure it opens freely under water weight.
| Method / Tool | Best Used For | Pros | Precautions |
|---|---|---|---|
| Turkey Baster & Hot Water | Dissolving primary ice plugs in drain opening | Inexpensive, gentle on plastic tubes | Requires multiple flushes for deep clogs |
| Flexible Pipe Cleaner / Zip-Tie | Removing physical food debris and slime | Clears lower tube blockages directly | Do not force around sharp 90-degree elbows |
| Baking Soda Flush | Post-clearing sanitation and deodorizing | Prevents mold and biological buildup | Always dissolve powder completely in warm water |
| Duckbill Valve Cleaning | Recurring clogs at exterior tube base | Eliminates the root cause of backpressure | Requires moving the fridge to access the back |
How to Inspect and Fix Secondary Leak Sources
If your defrost drain is completely clear but you still notice water accumulating, evaluate these mechanical and physical factors.
Leveling the Appliance for Proper Drainage
Refrigerators rely on gravity to direct defrost runoff backward toward the drain pan. If an appliance tilts slightly forward or sits crooked on uneven flooring, water will spill out of the shallow interior trough before reaching the drain hole.
To check this, place a spirit level flat across the top edge of your refrigerator cabinet (not the doors). Modern appliances perform best when the front leveling legs are adjusted so the front sits approximately 1/4 to 1/2 inch higher than the back. This subtle backward pitch ensures the doors self-close smoothly and gravity keeps all condensation moving toward the rear drain channel, as outlined in the official Whirlpool guide to fixing refrigerator water leaks.
Testing and Replacing Worn Door Seals
A failing door seal allows constant humidity infiltration, causing frost on the coils and excess water on your shelves. You can evaluate your gasket using the classic “Dollar Bill Test.”
Close the refrigerator door on a dollar bill so that half is inside and half sticks out. Pull the bill gently. You should feel noticeable drag. If the bill slides out freely without resistance, the magnetic seal is compromised.
Inspect the rubber perimeter for food residue, tears, or folded corners. Cleaning the gasket with warm soapy water and applying a thin coat of food-grade petroleum jelly along the hinge side can often restore flexibility. However, if the rubber is brittle or warped, replacing the gasket is necessary to prevent persistent moisture problems and avoid broader freezer repair issues.
Inspecting Internal Water Lines and Filter Seals
Water line leaks can begin as faint trickles that pool invisibly beneath plastic covers. To verify your water connections:
- Examine the Filter Seating: Remove the internal water filter and inspect the dual rubber O-rings on the stem. If they are nicked, dry, or missing, water will leak inside the filter housing every time the dispenser runs.
- Inspect Push-Connect Fittings: Check the small 1/4-inch plastic lines that route from the filter to the water valve and reservoir. Ensure the tubing is cut perfectly square and pushed fully into the quick-connect collet past the internal mark.
- Flush Trapped Air: Whenever you install a new filter, dispense two to three gallons of water continuously. Purging trapped air stabilizes internal pressure and prevents water from dribbling out of the dispenser head into the door bin, matching the official LG refrigerator leak troubleshooting instructions.
Preventive Maintenance and Temperature Optimization
Maintaining Optimal Conditions to Avoid a Refrigerator Leaking Water Inside
Preventing leaks is far easier than drying out saturated floorboards and spoiled groceries. Follow these operational best practices:
- Maintain Exact Temperatures: Keep your fresh food compartment set precisely at 40°F (4°C) and your freezer at 0°F (-18°C). If the fresh food section is too warm, condensation increases; if the freezer is set too warm, automatic defrost routines become irregular.
- Keep Air Vents Clear: Avoid pushing large boxes or bags directly against the rear interior wall. Leaving two inches of clear clearance ensures balanced airflow and prevents moisture from condensing on the back panel.
- Cover Stored Foods: Open liquids, cut fruit, and uncovered containers release substantial moisture into the air. Always store food in sealed containers, and let hot leftovers cool to room temperature before placing them in the fridge.
Long-Term Inspection Schedule for Kitchen Refrigeration
A regular maintenance routine keeps your cooling system efficient and leak-free year-round:
- Monthly: Wipe down door gaskets with warm water and mild dish soap to remove sticky syrups that pull seals out of alignment.
- Every 6 Months: Replace your internal water filter with an original equipment manufacturer (OEM) part, and flush the defrost drain hole with a cup of warm water and baking soda.
- Annually: Pull the refrigerator out, vacuum the dust from the condenser coils and exterior drain pan, and confirm the leveling legs remain firmly planted. If you operate premium appliances, scheduling routine GE Profile refrigerator service ensures sensitive electronic dampers and dual-evaporator systems are calibrated properly.
When to Call an Appliance Repair Specialist
While most drain clogs and leveling issues are straightforward DIY projects, certain symptoms require professional diagnostic tools:
- Recurring Drain Freeze-Ups: If your defrost drain freezes over again within a few days of being cleared, your defrost thermostat, bi-metal sensor, or electronic control board may be failing to run full defrost cycles.
- Leaks Near Electrical Components: If water is pooling near the evaporator fan motor harness, main circuit board housing, or interior light assemblies, avoid touching the moisture to prevent shock hazards.
- Cracked Internal Water Reservoirs: Replacing internal chilled-water storage coils or water inlet valves involves pressurized lines that, if improperly fitted, can cause severe water damage to kitchen flooring and subfloors.
- Sealed System and Ice Dam Failures: If ice builds up unevenly across the back freezer panel while the fridge stops cooling efficiently, you may be dealing with a refrigerant restriction or fan failure. In these situations, contacting a reliable refrigerator repair service ensures the root mechanical cause is safely resolved.
Frequently Asked Questions About Internal Fridge Leaks
Why is water pooling specifically under my vegetable crisper drawers?
Water gathers under the crisper drawers because they sit at the lowest point of the fresh food compartment. When the defrost drain clogs behind the freezer wall, gravity pulls the overflowing meltwater down the back panel behind the air duct. It naturally settles beneath the plastic bins, remaining hidden until you slide the drawers out.
Can I use chemical drain cleaners or bleach in my refrigerator drain line?
No. You should never use commercial chemical drain openers, caustic lye, or bleach in a refrigerator drain line. These harsh chemicals can melt or crack thin plastic and vinyl drain hoses, damage rubber valves, and leave toxic chemical fumes inside an enclosed space where you store fresh food. Stick exclusively to hot water, baking soda, or mild vinegar.
Why does my defrost drain keep freezing over repeatedly after I clear it?
If a drain freezes repeatedly shortly after being flushed, the drain trough heater or aluminum heat-sink probe may be missing, bent, or broken. Modern refrigerators use a small metal clip attached to the defrost heating element that extends directly into the top of the drain hole. If this probe is displaced, the drain entrance stays cold, causing the very first drops of meltwater to freeze and block the channel all over again.
Conclusion
Finding standing water inside your refrigerator is frustrating, but it does not have to turn into a costly kitchen emergency. In most cases, a methodical flush of the defrost drain, a quick door gasket tune-up, and proper cabinet leveling will clear the blockage and restore reliable drainage.
If you have cleared the drain line, adjusted the leveling legs, and checked your filter connections but the puddle continues to return, the experienced team at iFix Appliances is ready to help. We provide prompt, honest diagnostics and lasting solutions for homeowners across Raleigh, Cary, Durham, Apex, and surrounding communities. Contact us today for dependable, professional refrigerator repair and get your kitchen running smoothly again.

0 Comments