
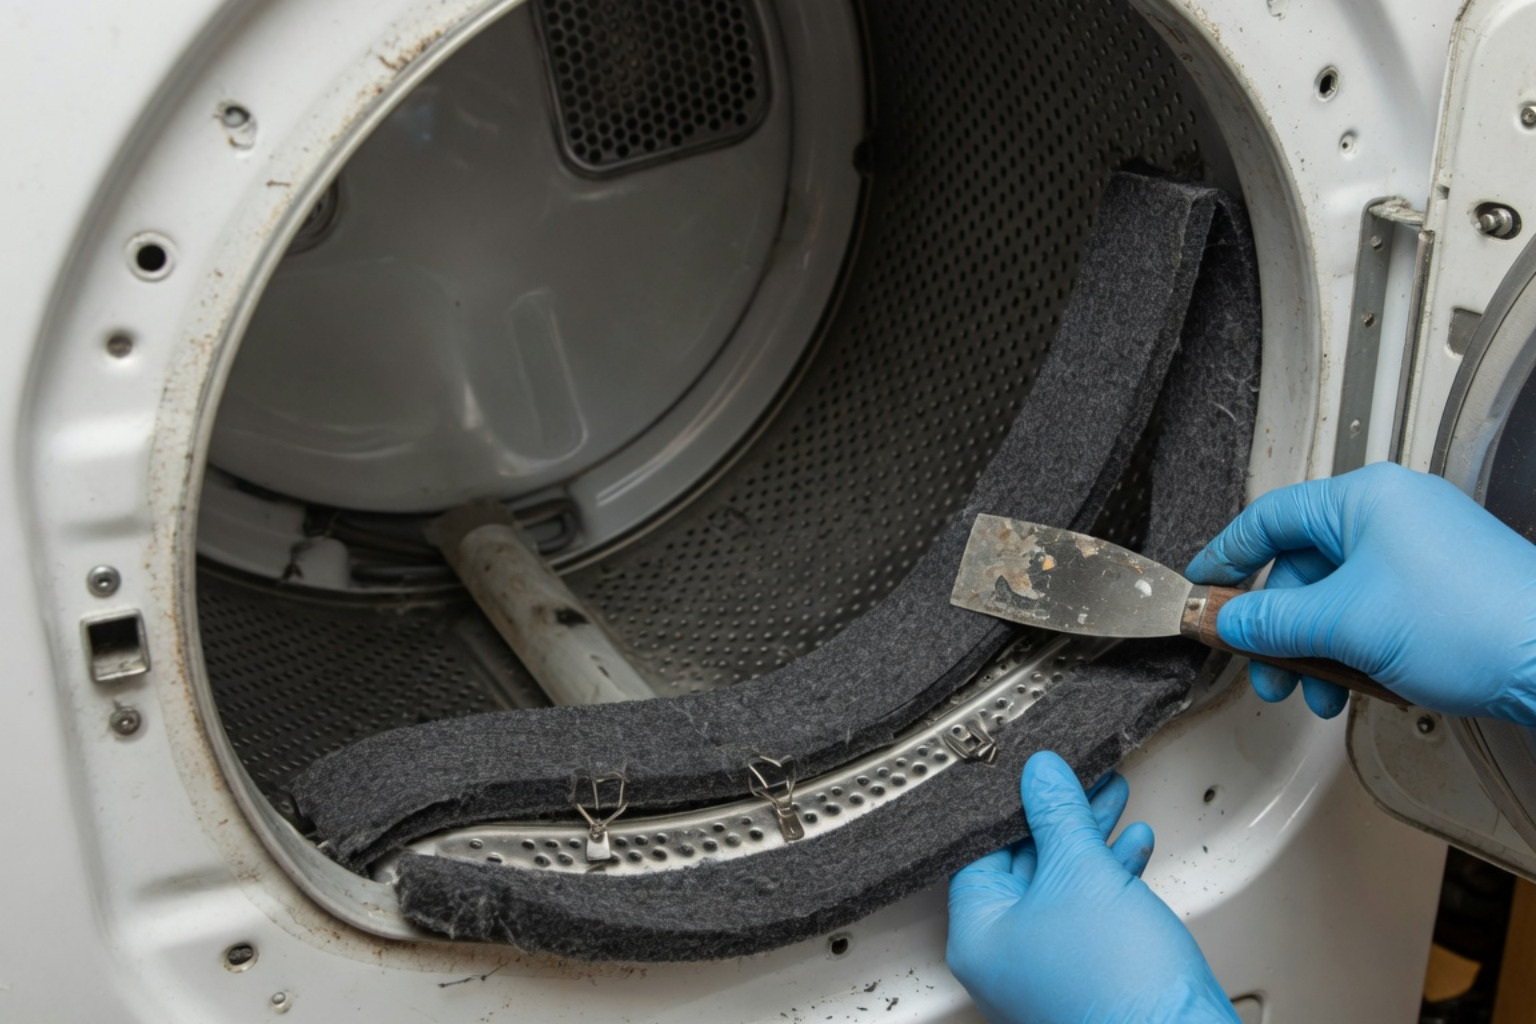
When Your Dryer Starts Scraping, Squeaking, or Taking Forever to Dry
Dryer drum felt seal replacement is one of the most common dryer repairs homeowners face — and the good news is it’s very doable yourself in 1–2 hours with basic tools.
Here’s the quick version:
- Unplug your dryer
- Remove the top and front panels to access the drum
- Release the drive belt and lift the drum out
- Peel off the old felt seal and clean off adhesive residue
- Glue the new felt seal onto the drum with high-temperature adhesive
- Wait 4–6 hours for the adhesive to cure before reassembling
- Reinstall the drum, belt, and panels and run a test cycle
Most replacement felt seals cost $15–$40 for parts. Professional repair adds $100–$200 in labor on top of that.
That scraping sound your dryer makes? It’s not just annoying. It’s your dryer telling you something is wrong.
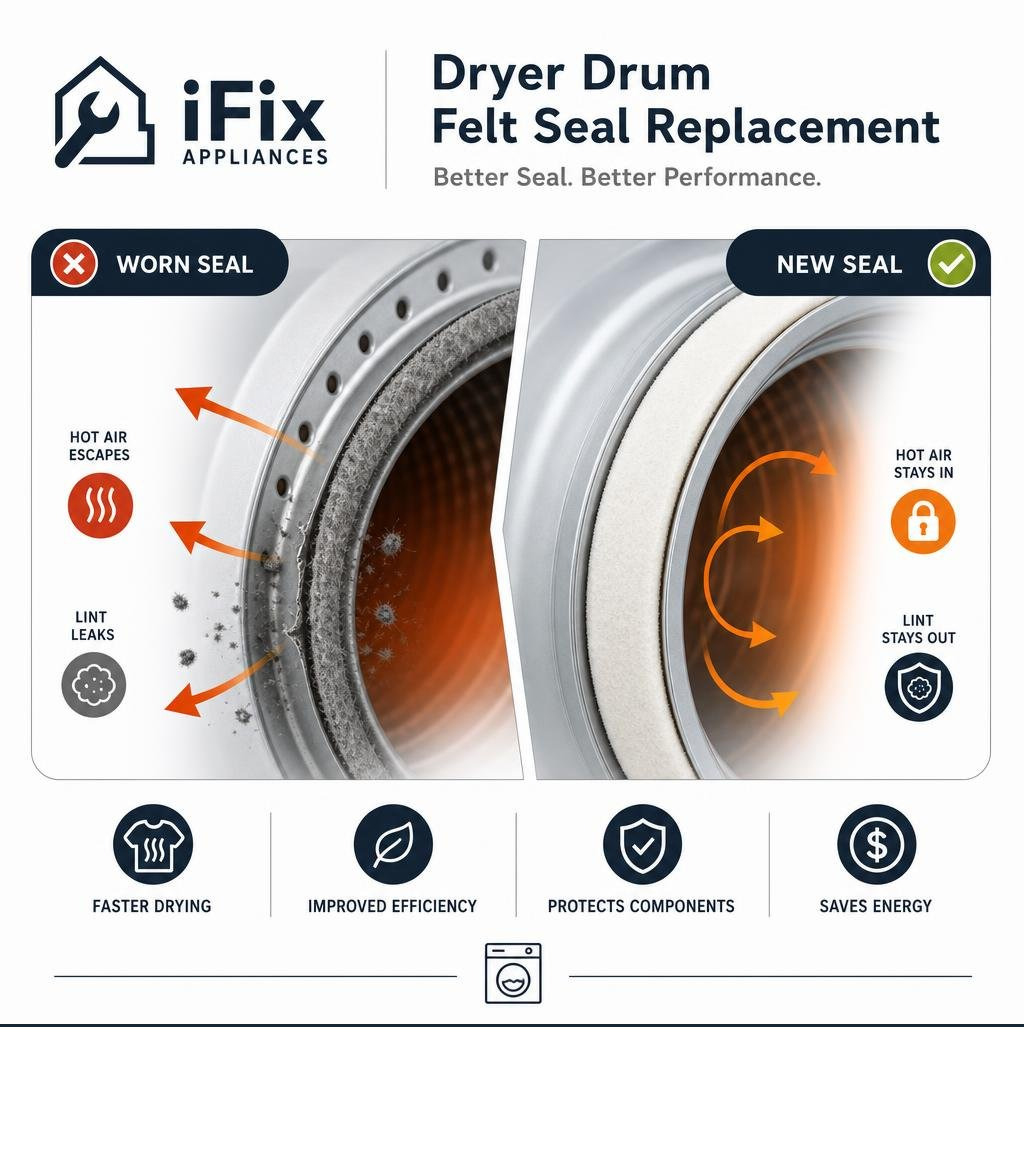
The felt seal sits between the drum and the dryer cabinet. When it wears out, hot air escapes, lint builds up in places it shouldn’t, and your dryer works harder than it needs to. Left alone, a worn seal can cause longer drying cycles, damaged heating elements, and in serious cases — a fire hazard.
The frustrating part is that it usually starts small. A faint squeak here. Clothes taking a little longer to dry there. By the time most people notice, the seal has been failing for weeks.
The fix isn’t complicated — but getting it right matters.
What is a Dryer Drum Felt Seal and What Does It Do?
At its core, a dryer drum felt seal is a specialized, heat-resistant felt strip that wraps around either the front, the rear, or both rims of the dryer drum. It acts as a critical gasket and a physical cushion between the rapidly spinning metal drum and the stationary front and rear bulkheads of your dryer cabinet.
But this simple strip of felt does some incredibly heavy lifting during every drying cycle:
- Hot Air Containment: The seal creates an airtight barrier that keeps the superheated air inside the drum. Without it, precious heat would escape into the dryer cabinet, forcing your machine to run longer and hike up your utility bills.
- Lint Barrier: It prevents stray lint and fabric fibers from migrating out of the drum and into the internal cabinet, where they could accumulate near the heating element or motor and create a serious fire hazard.
- Friction Reduction: As the drum rotates at high speeds, the felt provides a smooth, lubricated surface for the metal drum to glide against. This prevents metal-on-metal scraping and keeps the dryer running quietly.
If you are working on a Whirlpool, Maytag, or Kenmore unit, you might need a highly compatible kit like the Whirlpool Dryer Drum Felt Seal (replaces 8557277, W10116344, W10521119) 280140 to restore this airtight, quiet barrier.
Why Felt Seals Fail and How to Spot the Warning Signs
Like any component subjected to constant friction, high temperatures, and moisture, a dryer’s felt seal has a limited lifespan. Over time, the felt fibers naturally break down, compress, and lose their elasticity.
There are several reasons these seals degrade:
- Friction and Heat: The constant spinning of the drum against the seal under high heat eventually wears the felt down to a paper-thin layer.
- Heavy or Overloaded Cycles: Overloading the dryer puts downward pressure on the drum, causing it to ride unevenly against the seal and tearing the felt.
- Age and Chemical Wear: Over the years, fabric softener sheets, residual laundry detergents, and pocket debris (like coins, keys, or pens) can tear the felt or break down the adhesive backing.
When the seal begins to separate or wear thin, your dryer will start dropping hints. Ignoring these early warning signs can lead to cascading system failures. For instance, a worn seal allows excess hot air to bypass the drum, which can overheat the heater unit and cause your thermal fuse to blow repeatedly. To understand the true cost of letting these issues linger, check out our guide on Why Ignoring Dryer Problems Can Cost You More in 2025.
Signs You Need a Dryer Drum Felt Seal Replacement
If you notice any of the following symptoms, it is highly likely you need a dryer drum felt seal replacement:
- A Loud Scraping or Thumping Noise: This is the classic symptom. When the felt wears away, the metal drum begins to rub directly against the front bulkhead or rear support. This produces a harsh, metallic scraping or screeching sound.
- Black Marks on Your Clothes: If your clothes are coming out of the cycle with black streaks or grease marks, they are likely getting pinched in the gap created by a sagging or torn seal, where they pick up grease from the drum rollers or bearings.
- Excessive Lint Inside the Dryer Cabinet: If you open up your dryer cabinet and find a thick blanket of lint covering the motor and bottom panel, your felt seal is no longer acting as a barrier.
- Significantly Longer Drying Times: Because a failing seal allows hot air to escape, your dryer loses its thermal efficiency. A load of towels that used to take 45 minutes might now take two hours.
- Visible Gaps or Tears: If you shine a flashlight inside the drum and look closely at the front and rear seams, you may see pieces of black or grey felt fraying, hanging down, or completely missing.
If you own an Amana, Jenn-Air, or Magic Chef unit, parts like the WP37001132 Dryer Drum Felt Seal | Genuine Whirlpool OEM In Stock are designed to resolve these exact issues and prevent further structural damage to your appliance.
Step-by-Step Dryer Drum Felt Seal Replacement Guide
Replacing a felt seal is a straightforward DIY project, but it requires patience and attention to detail. Let’s walk through the entire process step-by-step.
Preparing for Your Dryer Drum Felt Seal Replacement
Before you begin tearing your dryer apart, you need to gather the right tools and ensure you have the correct replacement part.
Tools and Materials Needed:
- A new, model-specific dryer drum felt seal kit (which usually includes the high-temperature adhesive)
- Screwdrivers (typically a Phillips head and a 1/4-inch nut driver)
- Putty knife or paint scraper
- Rubbing alcohol or a mild degreaser
- A clean rag
- A vacuum cleaner (to clean out lint while the dryer is open)
- Work gloves
First, locate your dryer’s model number (usually found on a sticker just inside the door or on the back of the cabinet). Use this number to order a genuine OEM replacement part. For many popular Kenmore and Whirlpool models, a great option is the 110.675326 Genuine Dryer Drum Felt Seal and Glue Kit – PartsDiscount.com.
Once you have your parts, unplug the dryer from the wall outlet or shut off the corresponding circuit breaker. Safety first!
Step 1: Access and Remove the Drum
To get to the felt seal, you must remove the drum from the cabinet. While the exact steps vary slightly by brand, the general process is highly consistent:
- Remove the Top Panel: Use your putty knife to release the spring clips at the front seam, or remove the screws at the back of the top cover, then slide the top panel off.
- Disconnect the Control Panel and Front Door Switch: Unplug the wire harnesses connecting the control panel and door switch to avoid tearing the wires.
- Remove the Front Panel: Remove the mounting screws holding the front panel to the cabinet frame. Lift the panel off and set it aside.
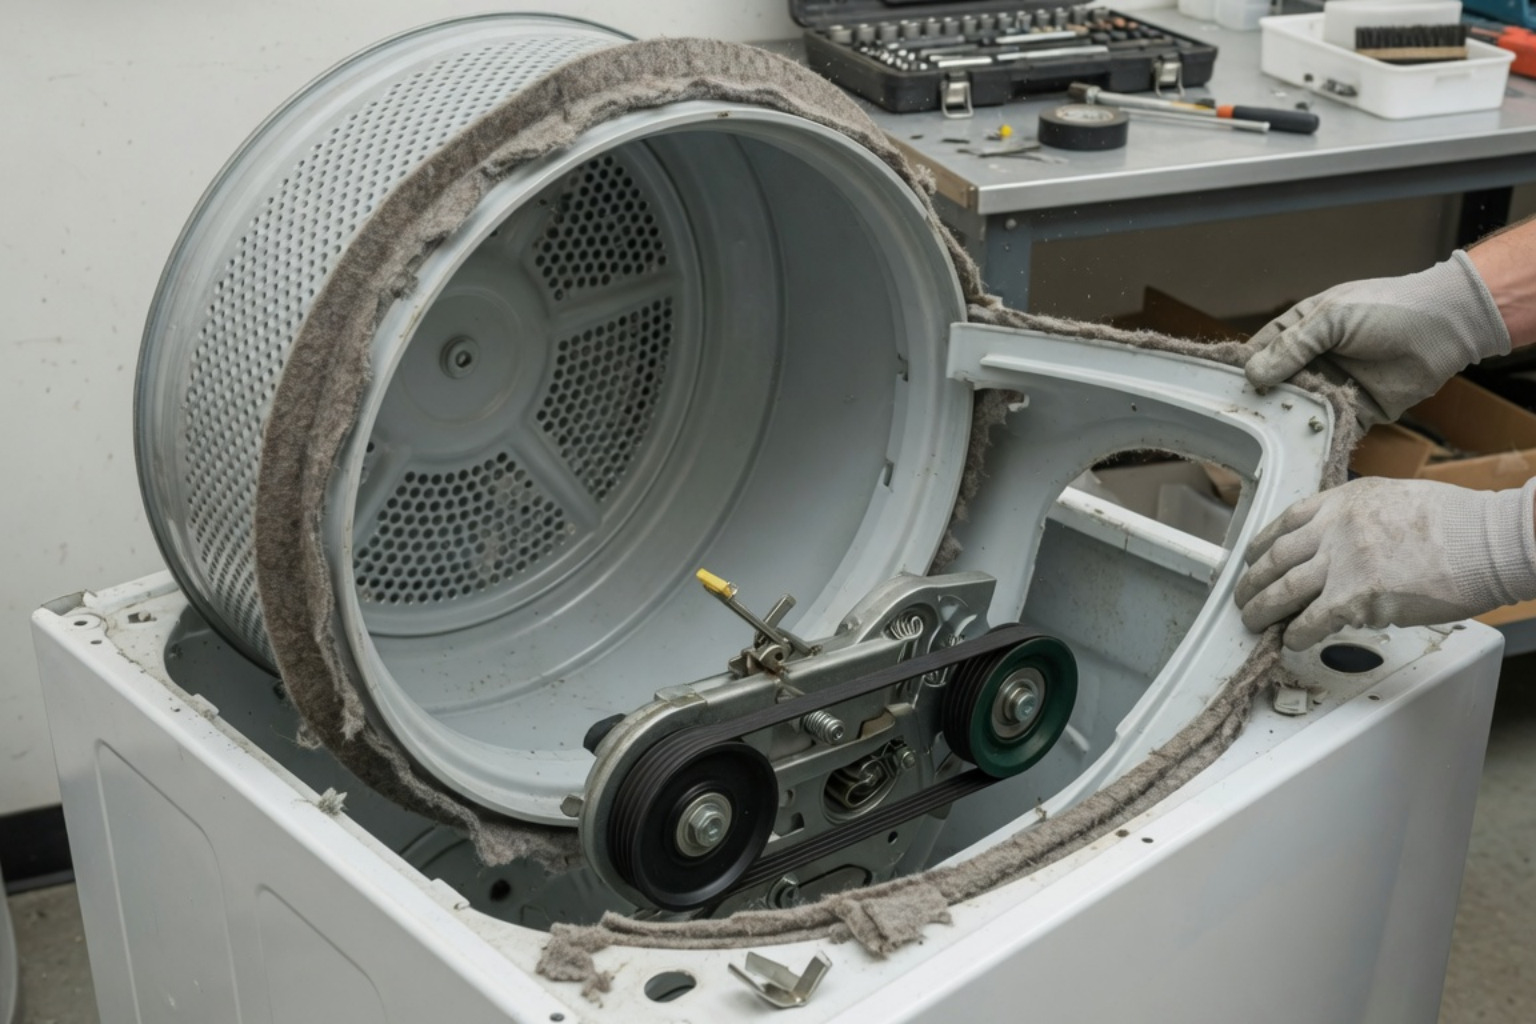
- Release the Drive Belt: Reach under the drum near the motor. Push the spring-loaded idler pulley to release tension on the drive belt, then slip the belt off the motor pulley.
- Extract the Drum: Loop the drive belt around your hand to use as a handle, and carefully lift the drum up and out through the front of the dryer cabinet.
Pro Tip: While the dryer is open, take a few minutes to vacuum out all the built-up lint from the bottom of the cabinet and around the motor.
Step 2: Prep the Surface and Remove the Old Seal
With the drum removed, you can clearly see the worn felt seal.
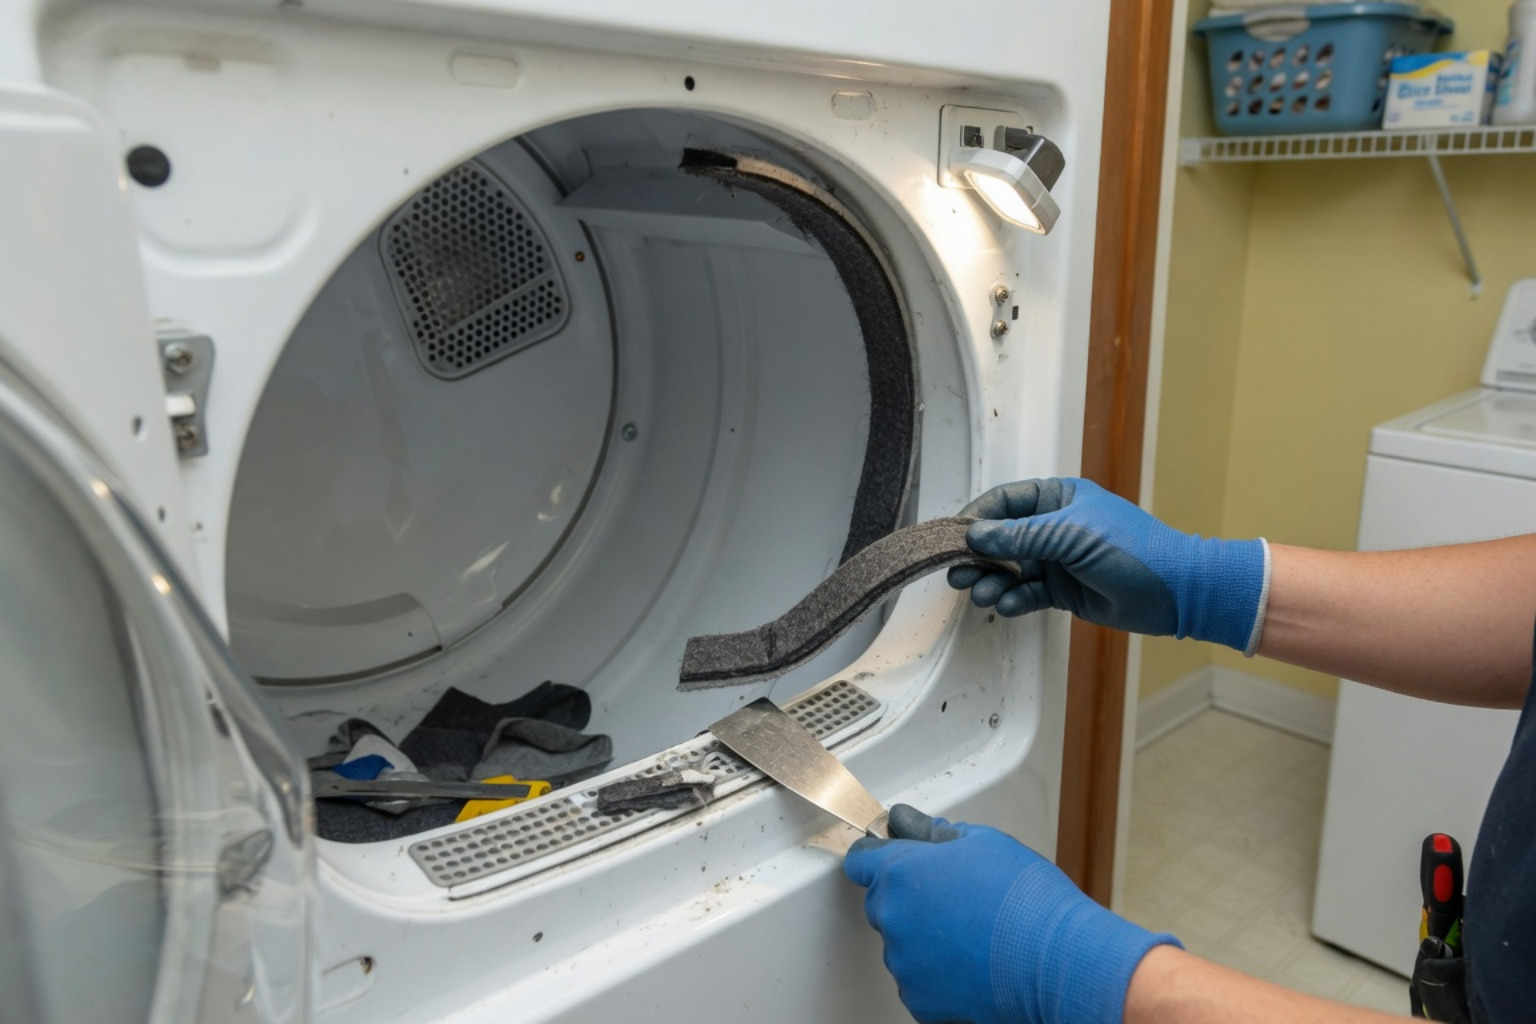
- Peel Off the Old Felt: Pull the old felt strip off the drum rim or the bulkhead.
- Scrape Away Old Glue: Use a putty knife or scraper to remove the hardened adhesive residue. You want the metal surface to be as smooth as possible.
- Degrease the Rim: Wipe down the channel with a rag soaked in rubbing alcohol. This removes any lingering grease, oil, or soap residue, ensuring the new adhesive bonds perfectly to the metal.
Step 3: Install the New Felt Seal
Now it’s time to apply the new seal. For a visual walkthrough of this process, you can refer to the How to replace the felt seal in your dryer – iFixit Repair Guide.
- Apply the Adhesive: Squeeze a thin, continuous bead of high-temperature adhesive into the channel where the new seal will sit.
- Position the Seal: Carefully press the new felt seal into the adhesive. Make sure you orient it correctly. If your seal has a black neoprene or rubberized side, that side typically faces down toward the drum, with the soft felt facing outward to ride against the bulkhead.
- Work Around the Circumference: Press the felt firmly into place as you wrap it around the drum. Ensure it is snug and level, with no folds, bumps, or twists.
- Let It Cure: Secure the seal with spring clamps or clothes pins if necessary, and let the adhesive cure for at least 4 to 6 hours (24 hours is ideal) before reassembling. Running the dryer before the glue cures can cause the seal to shift, ruin the adhesive bond, and jam the drum.
Comparing Front vs. Rear Felt Seals
Depending on your dryer model, you might have a front seal, a rear seal, or both. Here is a quick reference table to help you understand the differences:
| Feature | Front Drum Felt Seal | Rear Drum Felt Seal |
|---|---|---|
| Primary Location | Mounted on the front bulkhead or the front rim of the drum. | Mounted on the rear bulkhead or the rear rim of the drum. |
| Common Symptoms of Failure | Squeaking, clothes getting pinched near the door, lint escaping into the front area. | Loud metal-on-metal scraping, black marks on clothes, thermal fuse failure. |
| Installation Method | Often secured with adhesive or built-in metal tabs. | Almost always secured with high-temperature adhesive. |
| Replacement Frequency | Highly frequent due to door-opening friction and user interaction. | Moderate, but highly critical for proper drum alignment. |
Frequently Asked Questions About Dryer Drum Seals
We get a lot of questions from homeowners in Raleigh, NC, and across the Triangle Area about managing this common repair. Here are some of the most frequent queries we receive:
How much does a dryer felt seal replacement cost?
If you decide to tackle this as a DIY project, a high-quality replacement felt seal kit typically costs between $15 and $40, depending on your dryer’s brand and model.
If you prefer to leave it to the professionals, the total cost generally ranges from $120 to $250. This includes a professional diagnostic fee, the cost of the OEM part, and about an hour of labor. Many homeowners find that hiring a certified technician is well worth the investment to avoid the physical strain of lifting the heavy drum and the risk of misrouting the drive belt.
If your dryer is exhibiting other issues alongside a bad seal, such as failing to spin or heat, take a look at our comprehensive guide on Dryer Not Heating or Spinning: Causes, Fixes, and When to Call a Professional in Raleigh, NC.
Can I use any adhesive for a dryer felt seal?
Absolutely not. You must use the specialized, high-temperature adhesive that is either included in your OEM felt seal kit or specifically rated for appliance repairs.
Dryers operate at extremely high temperatures. Standard household glues, contact cements, or hot glue will melt, fail, and release toxic fumes into your home. Always ensure the adhesive you use is rated to withstand temperatures of at least 300°F to 400°F.
What happens if I ignore a worn felt seal?
Ignoring a failing felt seal is a recipe for disaster. What starts as a minor squeak can quickly escalate into:
- Motor Burnout: The increased friction of metal-on-metal rubbing puts massive strain on the drive motor, eventually burning it out.
- Heating Element Damage: Escaping hot air causes the heating element to run continuously, shortening its lifespan.
- A Serious Fire Hazard: When the seal fails, highly flammable lint escapes the drum and accumulates directly on the hot heating element or the electric motor.
If you are thinking about cutting corners on your appliance repairs, check out our warning guide on 5 Warning Signs Your DIY Appliance Repair Is Headed for Disaster.
Conclusion
Replacing a worn dryer drum felt seal is one of the most effective ways to restore your dryer’s efficiency, eliminate annoying scraping noises, and protect your home from potential lint fires. While it is a highly manageable DIY project with a little patience, it does require a complete teardown of the appliance and a steady hand with high-temperature adhesive.
If you live in Raleigh, Cary, Durham, Wake Forest, Chapel Hill, Fuquay-Varina, Apex, Garner, Holly Springs, or Morrisville, NC, and you’d rather not spend your weekend wrestling with a heavy dryer drum, we are here to help!
At iFix Appliances, our family-owned team offers same-day diagnostics, upfront pricing, and certified technicians who can get your dryer running quietly and efficiently in no time.
Ready to get your laundry routine back on track? Schedule your service today with our local experts on our Dryer Repair page!

0 Comments