
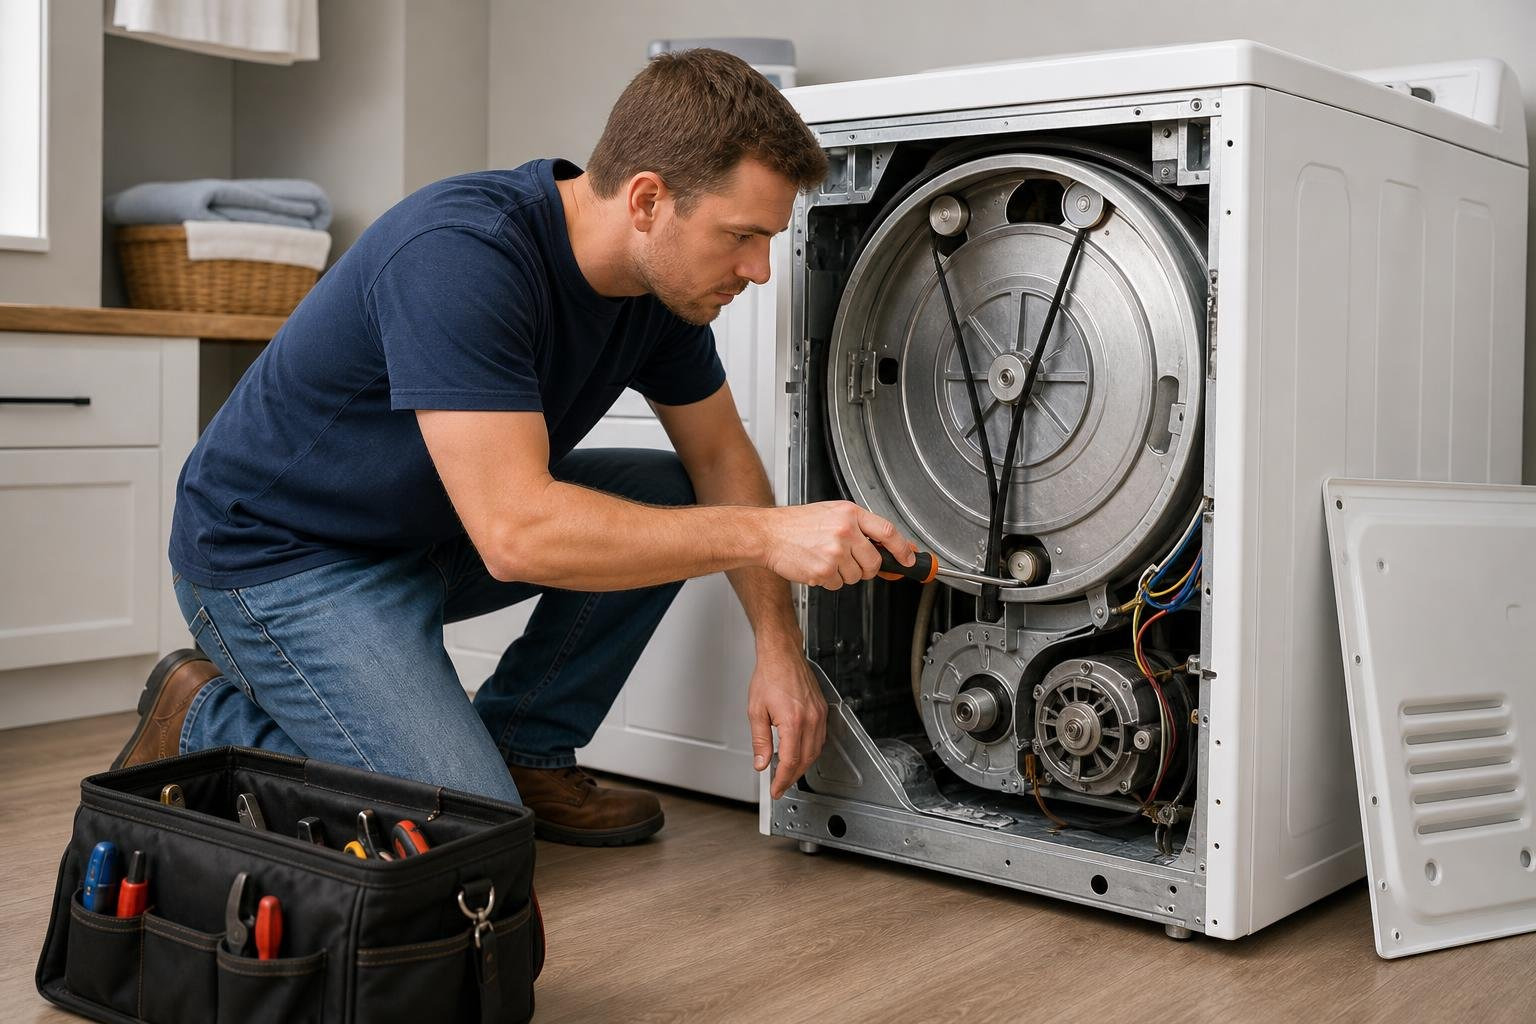
Is It Worth Trying to Fix a Dryer Yourself?
Knowing how to fix a dryer yourself can save you hundreds of dollars — and in most cases, it’s simpler than you think.
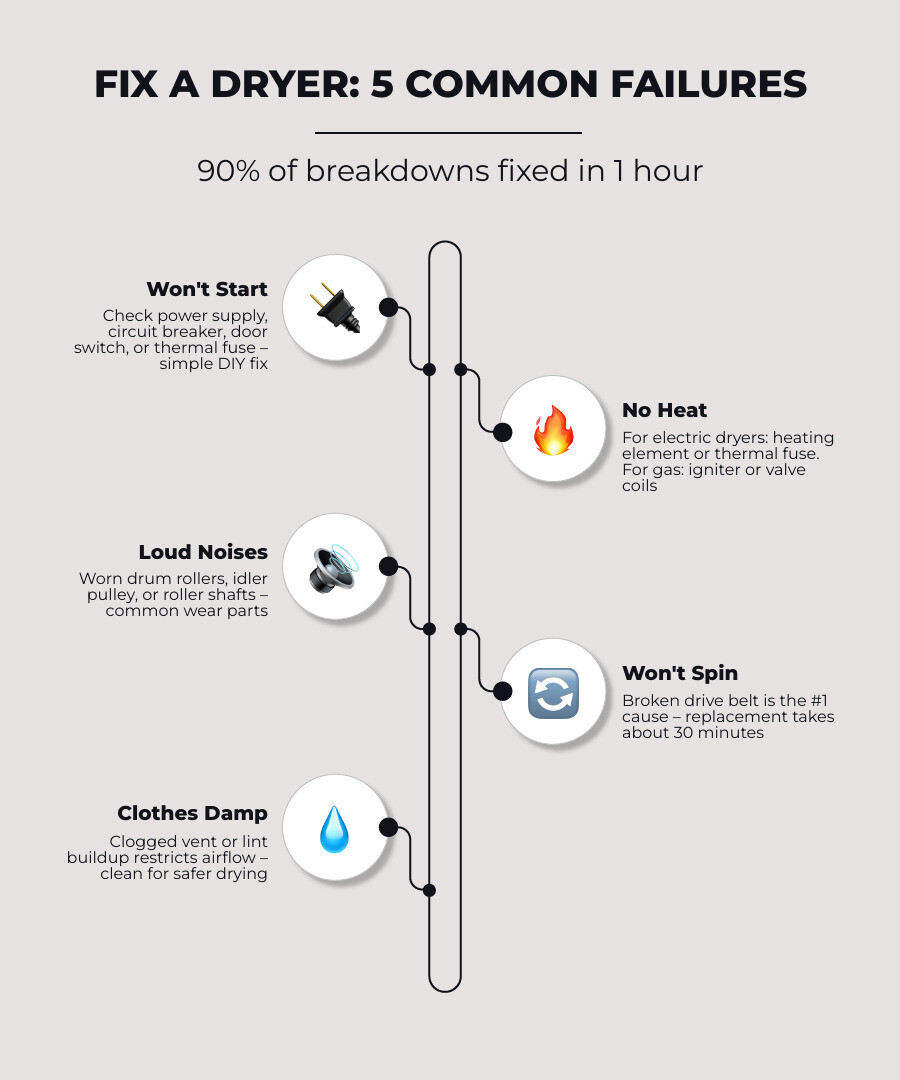
Here’s a quick look at the most common dryer problems and what usually fixes them:
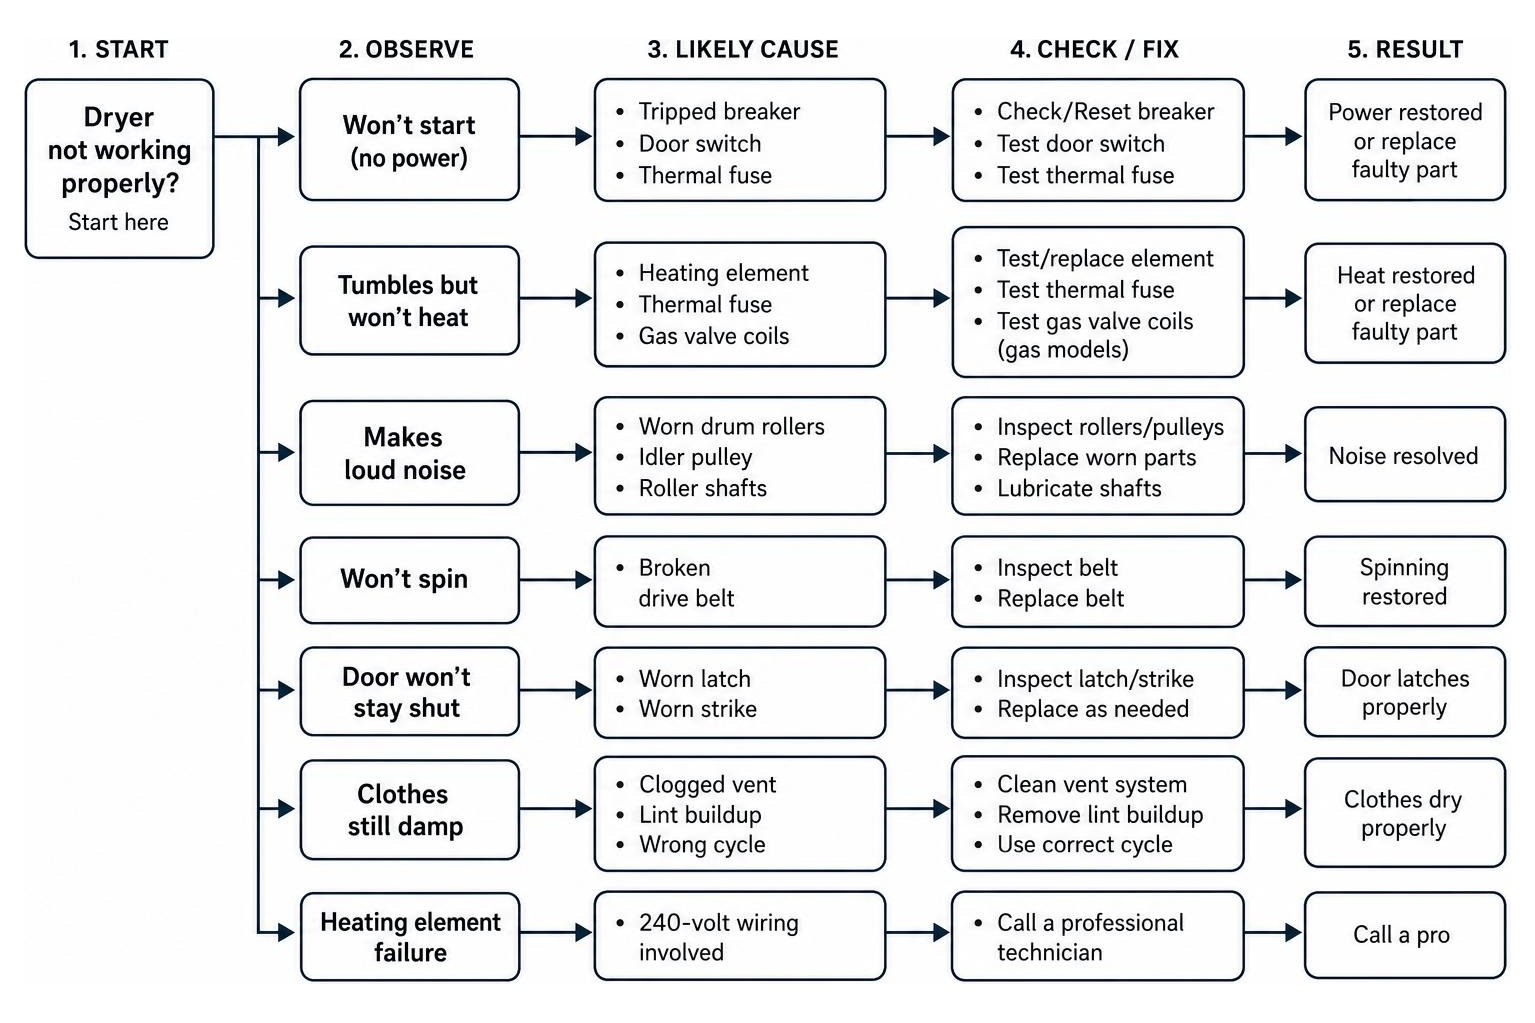
| Problem | Most Likely Cause | DIY Friendly? |
|---|---|---|
| Dryer won’t start | Tripped breaker, door switch, thermal fuse | Yes |
| Dryer tumbles but won’t heat | Heating element, thermal fuse, gas valve coils | Yes (electric); caution (gas) |
| Dryer makes loud noise | Worn drum rollers, idler pulley, roller shafts | Yes |
| Dryer won’t spin | Broken drive belt | Yes |
| Door won’t stay shut | Worn latch or strike | Yes |
| Clothes still damp | Clogged vent, lint buildup, wrong cycle | Yes |
| Heating element failure | 240-volt wiring involved | Call a pro |
The good news: the repairs covered in this guide resolve roughly 90% of all dryer breakdowns, and most take about an hour with basic hand tools.
Dryers are relatively straightforward machines — far simpler than washers. But a dryer that stops working mid-cycle isn’t just inconvenient. Left unfixed, problems like clogged vents or a failing thermal fuse can become fire hazards.
This guide walks you through every common failure, step by step — from diagnosing why your dryer won’t start to safely replacing a broken belt or testing a thermal fuse with a multimeter.
I’m Vasyl Turetsky, Founder and Appliance Repair Specialist at iFix Appliances, and I’ve spent years helping Raleigh-area homeowners fix a dryer — from simple belt replacements to stubborn heating issues across brands like Whirlpool, Samsung, LG, and GE. In this guide, I’ll share exactly what I look for when diagnosing the most common dryer failures, so you can tackle the repair with confidence — or know when it’s time to call a pro.
Common Dryer Problems and How to Troubleshoot Them
When your dryer stops working, laundry day grinds to a painful halt. Fortunately, we can troubleshoot most issues by understanding a few basic mechanical and electrical principles. Before you panic and start shopping for a brand-new appliance, let’s look at how to run a systematic diagnostic check.
What to Check First if Your Dryer Won’t Start (and How to Fix a Dryer That Won’t Power On)
If you press the start button and nothing happens—no hum, no click, no movement—don’t assume the motor is dead. More often than not, the culprit is a simple safety or power delivery issue.
First, check the power supply. It sounds obvious, but unplugged cords or partially tripped breakers are leading causes of sudden “breakdowns.” Go to your home’s main electrical panel. Electric dryers run on a double-pole circuit breaker (drawing 240 volts). Sometimes, only one half of the breaker trips, leaving the dryer with enough juice to power the console lights but not enough to turn the motor. Flip the breaker completely off, then back on.
Next, inspect the door switch. This little spring-loaded plunger tells the dryer it is safe to run. Over time, normal wear and tear—accelerated by slamming the door—will cause the switch to fail. If the plunger is broken or the switch has lost electrical continuity, the dryer will think the door is wide open and refuse to start.
If both the power and door switch check out, the issue is highly likely a blown thermal fuse. This is a critical safety device designed to cut power to the motor or heating circuit if the dryer overheats. If you ignore minor symptoms, you might end up paying much more down the road. For a deeper dive into the long-term consequences of neglecting these warnings, read our guide on Why Ignoring Dryer Problems Can Cost You More in 2025.
How to Fix a Dryer That Tumbles but Won’t Heat
It is incredibly frustrating to pull out a load of clothes after an hour only to find them soaking wet and freezing cold. If your dryer spins but produces zero heat, the diagnosis depends on whether you have an electric or gas model.
For electric dryers, the primary suspect is a broken heating element. These elements work similarly to a hair dryer or space heater, utilizing a coiled wire that glows hot when electricity passes through it. Over time, the metal coil becomes brittle and breaks, interrupting the circuit.
For gas dryers, the heat is generated by a burner assembly. If the igniter glows but no flame is produced, the gas valve coils have likely failed. When these small solenoids wear out, they cannot open the gas valve to release fuel to the burner. You may also need to adjust the gas flame shutter using its thumbscrew. If the flame is completely yellow, it isn’t getting enough air; if it is whistling and deep blue, it is getting too much. You want to aim for a steady, quiet blue flame.
Regardless of fuel type, a blown thermal fuse, a faulty operating thermostat, or a failed radiant sensor can also cut the heat mid-cycle. To understand the relationship between spinning and heating failures, check out our article on Dryer Not Heating or Spinning? Causes, Fixes, and When to Call a Professional in Raleigh NC.
Diagnosing Loud Noises, Squeaks, and Thumping
Dryers should hum along quietly. If yours sounds like a pair of sneakers in a blender, something is worn out inside the cabinet.
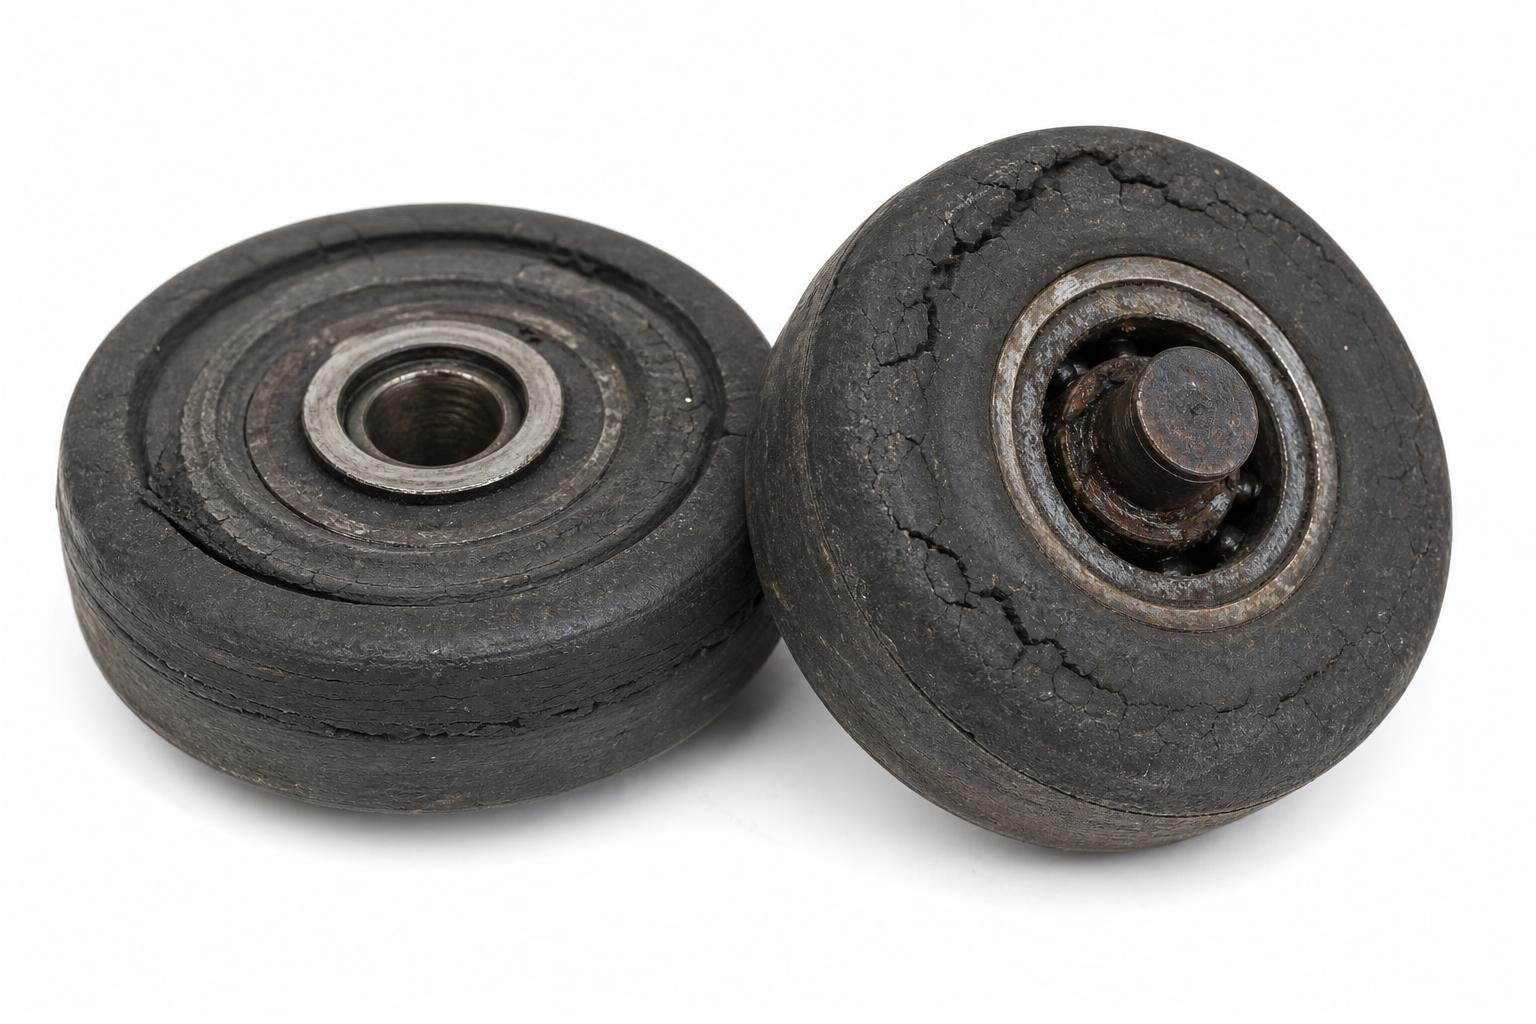
The most common sources of structural noises are:
- Drum Support Rollers: These are small rubber wheels that hold the heavy drum in place as it spins. When the rubber wears thin or the internal bearings seize, they cause a loud, rhythmic thumping or rumbling sound.
- Idler Pulley: This spring-loaded wheel maintains tension on the drive belt. If the pulley wheel gets clogged with lint or the bearing fails, it will emit a high-pitched squealing or screeching noise.
- Roller Shafts: Located on the back wall of the dryer cavity, these metal shafts support the rollers. If they are damaged or dry, they will cause a metal-on-metal scraping sound.
- Drum Felt Seals: The front and rear of the drum are sealed with felt to prevent clothes from getting pinched and to keep hot air contained. If the felt wears away, you’ll hear a scraping sound and might notice black marks on your clothes. Replacing this is a common task, and you can learn how to do it yourself by reading our detailed walkthrough, How to Replace a Dryer Drum Felt Seal Without Losing Your Mind.
Step-by-Step Guide: How to Safely Disassemble and Fix a Dryer
Ready to roll up your sleeves and fix a dryer? Before you touch a single screw, remember: safety first. Always unplug the power cord from the wall outlet. If you have a gas dryer, close the gas supply valve completely to prevent leaks.
Disassembly Methods Based on Lint Filter Location
The trick to disassembling a dryer without breaking plastic clips is knowing where the lint filter is located. Manufacturers design the cabinet structure around the lint duct.
- Lint Filter on Top Panel: If your lint filter slides out of the top of the dryer cabinet, you will need to remove the screws inside the lint filter housing first. Once those are out, insert a stiff putty knife into the gap between the top panel and the front panel, about three inches from each corner. Press inward to release the spring catches, then tilt the top panel up and back like a car hood.
- Lint Filter Inside the Front Door: If the lint filter is inside the door opening, the top panel is usually secured by screws at the rear of the machine. Remove these screws, slide the top panel backward, and lift it off.
For more visual guidance on cabinet styles, you can refer to the troubleshooting steps outlined in How to Fix a Dryer | Lowe’s .
Testing the Door Switch and Thermal Fuse for Continuity
To determine if an electrical component is broken, you cannot rely on visual inspection alone. You must test it for electrical continuity using a digital multimeter. Continuity means there is a continuous, unbroken path for electricity to flow.
- Set your digital multimeter to the lowest Ohm setting or the continuity setting (which looks like a sound wave and will beep when the probes touch).
- Disconnect the wires from the component you are testing to prevent “back-feeding” through the rest of the wiring harness.
- Testing the Door Switch: Touch one probe to the common terminal and the other to the normally open terminal. With the switch plunger released (door open), the meter should show “OL” (open loop / no continuity). Depress the plunger (door closed)—the meter should beep or show a reading close to 0 Ohms. If the switch does not change states, replace it.
- Testing the Thermal Fuse: Touch a probe to each terminal of the fuse. If the fuse is good, the meter will beep and show a low resistance reading. If the screen displays “OL” or does not beep, the fuse is blown and must be replaced.
For a deeper look at utilizing meters on other parts of the machine, check out How to Repair a Dryer: 8 Steps (with Pictures) – wikiHow .
Replacing a Broken Drive Belt and Tensioner
If you can hear your dryer motor running but the drum isn’t spinning, your drive belt has likely snapped.
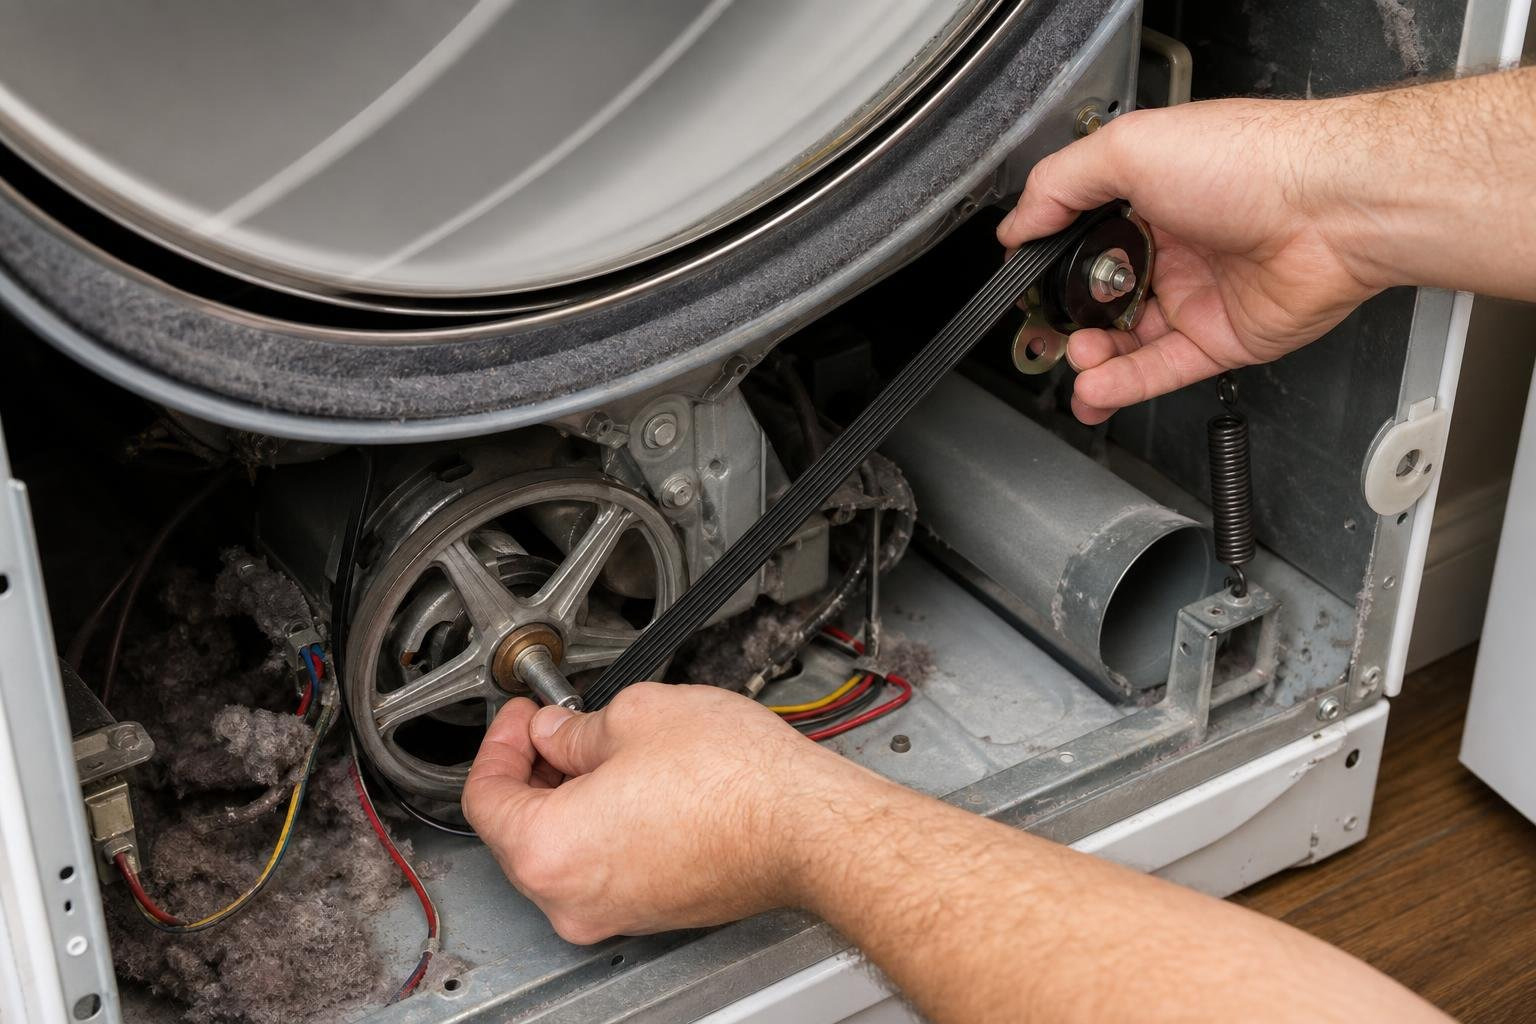
To replace it, you must remove the front panel of the dryer. Unplug the door switch wire harness, remove the front panel mounting screws, and lift the panel away.
Next, drape the new belt over the dryer drum, ensuring the grooved side (ribs) faces directly against the drum surface. Now comes the tricky part: you must reach under the drum, near the drive motor, and route the belt through the idler pulley wheel and around the motor drive pulley. This is typically done by feel. Pull the idler pulley to the side to create tension, slip the belt loop over the motor pulley, and release the idler.
While you have the cabinet open, take advantage of the opportunity to vacuum out all the accumulated lint from the bottom of the cabinet and the blower wheel housing. This reduces fire hazards and improves airflow.
DIY vs. Professional Repair: When to Call an Expert
While we love empowering homeowners to take on DIY projects, some repairs carry risks that require professional training. Knowing where to draw the line can protect your family, your warranty, and your wallet.
Evaluating Safety Risks and Repair Costs
As a general rule, you should call a professional when dealing with high-voltage 240-volt electrical circuits, gas line connections, or complex main control board failures. Working on a gas line carries the risk of gas leaks and carbon monoxide poisoning if not sealed perfectly.
Let’s look at a quick cost-benefit analysis of DIY vs. Professional repair in the Triangle Area:
| Component | Average DIY Part Cost | Average Professional Repair Cost (Parts + Labor) | Recommended Action |
|---|---|---|---|
| Thermal Fuse | $10 – $20 | $120 – $180 | DIY |
| Drive Belt | $15 – $30 | $140 – $200 | DIY / Pro (if tight space) |
| Drum Rollers (Set) | $20 – $40 | $160 – $240 | DIY |
| Heating Element | $30 – $70 | $180 – $280 | Pro (High Voltage) |
| Gas Valve Coils | $20 – $40 | $170 – $250 | Pro (Gas Safety) |
| Control Board | $120 – $250 | $300 – $450 | Pro |
If you decide that a repair is too complex or involves high-voltage risks, our team at iFix Appliances is here to help. Explore our main Dryer Repair page to see how we handle these complex issues safely.
Airflow Issues and Vent Maintenance
If your clothes are consistently damp after a full cycle, the problem might not be the dryer itself, but rather the vent line leading out of your home. A clogged dryer vent is one of the leading causes of slow drying times and represents a significant household fire hazard.
When lint builds up in the exhaust duct, it restricts airflow. The hot, moisture-laden air cannot escape the drum, forcing the heating element to work overtime. This causes the internal temperature to spike, which repeatedly trips the thermal fuse.
To prevent this:
- Clean your lint screen after every single load.
- Avoid flexible vinyl or foil ducting, as these materials easily sag, trap lint, and can catch fire. Replace them with rigid metal or semi-rigid metal ducts.
- Once a year, disconnect the vent from the back of the dryer and use a rotary vent cleaning brush to sweep out the entire length of the duct to the exterior wall cap.
For more maintenance tips and troubleshooting tricks, check out our Category: Dryer Repair blog archive.
Frequently Asked Questions About Dryer Repair
Can I fix my dryer myself?
Yes! Simple issues like an unplugged power cord, a tripped circuit breaker, a worn-out door latch, or a blown thermal fuse are highly DIY-friendly. If you have basic hand tools and a digital multimeter, you can safely complete about 90% of common dryer repairs yourself in about an hour.
Why does my dryer keep blowing thermal fuses?
A thermal fuse blows because the dryer is overheating. This is almost always caused by restricted airflow. Check your lint screen, the blower wheel, and the entire length of your exterior vent exhaust pipe for blockages. A failing high-limit thermostat that fails to shut off the heating element can also cause repeated fuse failures.
How many years does a dryer last?
On average, a clothes dryer lasts about 10 to 13 years. You can easily maximize its lifespan through regular maintenance, such as cleaning the lint filter after every load, vacuuming the interior cabinet, and keeping the exhaust vent system clear of obstructions.
Conclusion
Taking the time to fix a dryer on your own is a highly rewarding way to save money and keep your household running smoothly. By checking the power supply first, testing safety switches with a multimeter, and keeping your exhaust vents clean, you can prevent and resolve the vast majority of dryer breakdowns.
However, if you run into a complex electrical issue, feel uncomfortable working around gas lines, or simply don’t have the time to disassemble your machine, we are here to help. At iFix Appliances, we provide fast, honest, and reliable Dryer Repair services throughout Raleigh, Cary, Durham, Apex, Wake Forest, Chapel Hill, Fuquay-Varina, Garner, Holly Springs, and Morrisville.
Our experienced technicians specialize in resolving complex heating, spinning, and noise issues for all major appliance brands. Don’t let laundry pile up—visit our Location Raleigh page or head directly to our Contact page to schedule a professional, transparently priced diagnostic visit today!

0 Comments