
Fast Microwave Repair Starts With a Safe Diagnosis
Microwave repair starts with one simple rule: unplug the unit and identify the symptom before deciding whether it needs service or replacement.
| What you notice | Likely issue | Best next step |
|---|---|---|
| Microwave runs but food stays cold | Magnetron, diode, capacitor, thermal fuse, or door switch fault | Schedule professional diagnosis |
| Sparks, popping, or a burning smell | Dirty or damaged waveguide cover, chipped cavity paint, or metal inside | Stop using it and unplug it |
| Door will not close, unit stops mid-cycle, or fuse blows | Door interlock switch or latch problem | Do not use it until repaired |
| Display or buttons do not respond | Control board, keypad, fuse, or power issue | Check power source, then arrange service |
A microwave may look like a simple countertop appliance, but it uses high-voltage parts that can hold a dangerous charge after the plug is removed. Problems such as arcing, smoke, a loud hum, or a door that does not latch correctly are safety concerns, not issues to ignore.
For a low-cost countertop model, replacement can be smarter than paying for a major internal part. But over-the-range, built-in, drawer, and premium microwaves are often worth fixing because replacement also involves installation, cabinetry, venting, or matching the existing kitchen setup.
I’m Vasyl Turetsky, Founder and Appliance Repair Specialist at iFix Appliances, and I help homeowners across the Raleigh area make clear, practical decisions about microwave repair and other major appliance problems. I have experience diagnosing common microwave heating, door, control, and ventilation faults, so the next sections will help you understand what may be happening before you choose a safe next step.
High-Voltage Safety Guidelines
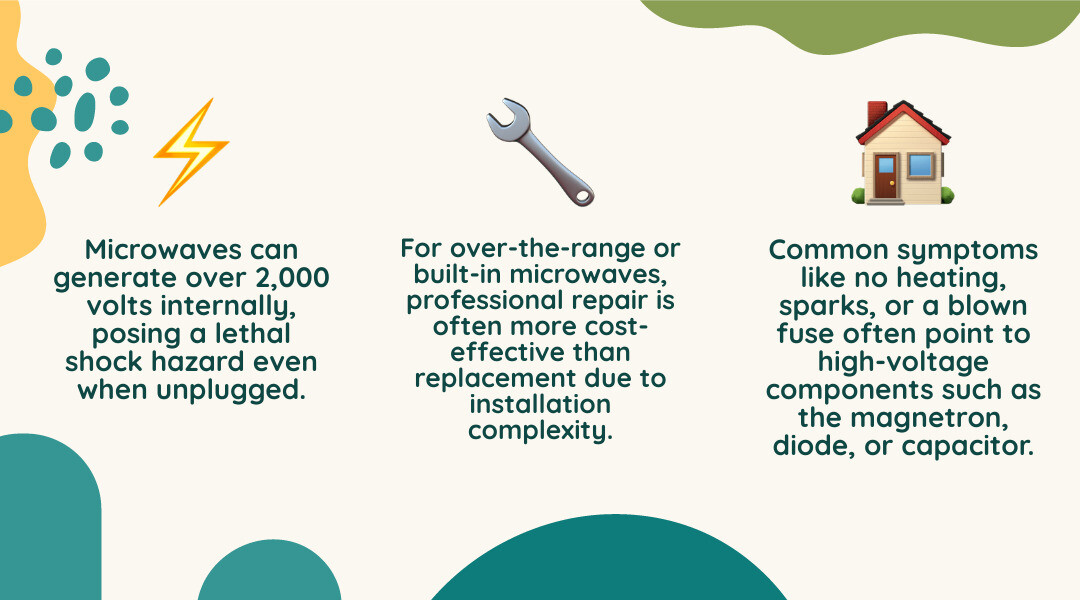
When it comes to microwave repair, respect for high-voltage electricity is rule number one. Standard household outlets deliver 120 volts of alternating current, but your microwave takes that energy and steps it up significantly. Operating at power levels between 800 and 1,500 watts, internal components like the high-voltage transformer boost electrical current to over 2,000 volts—and in some circuits, up to 5,000 peak volts!
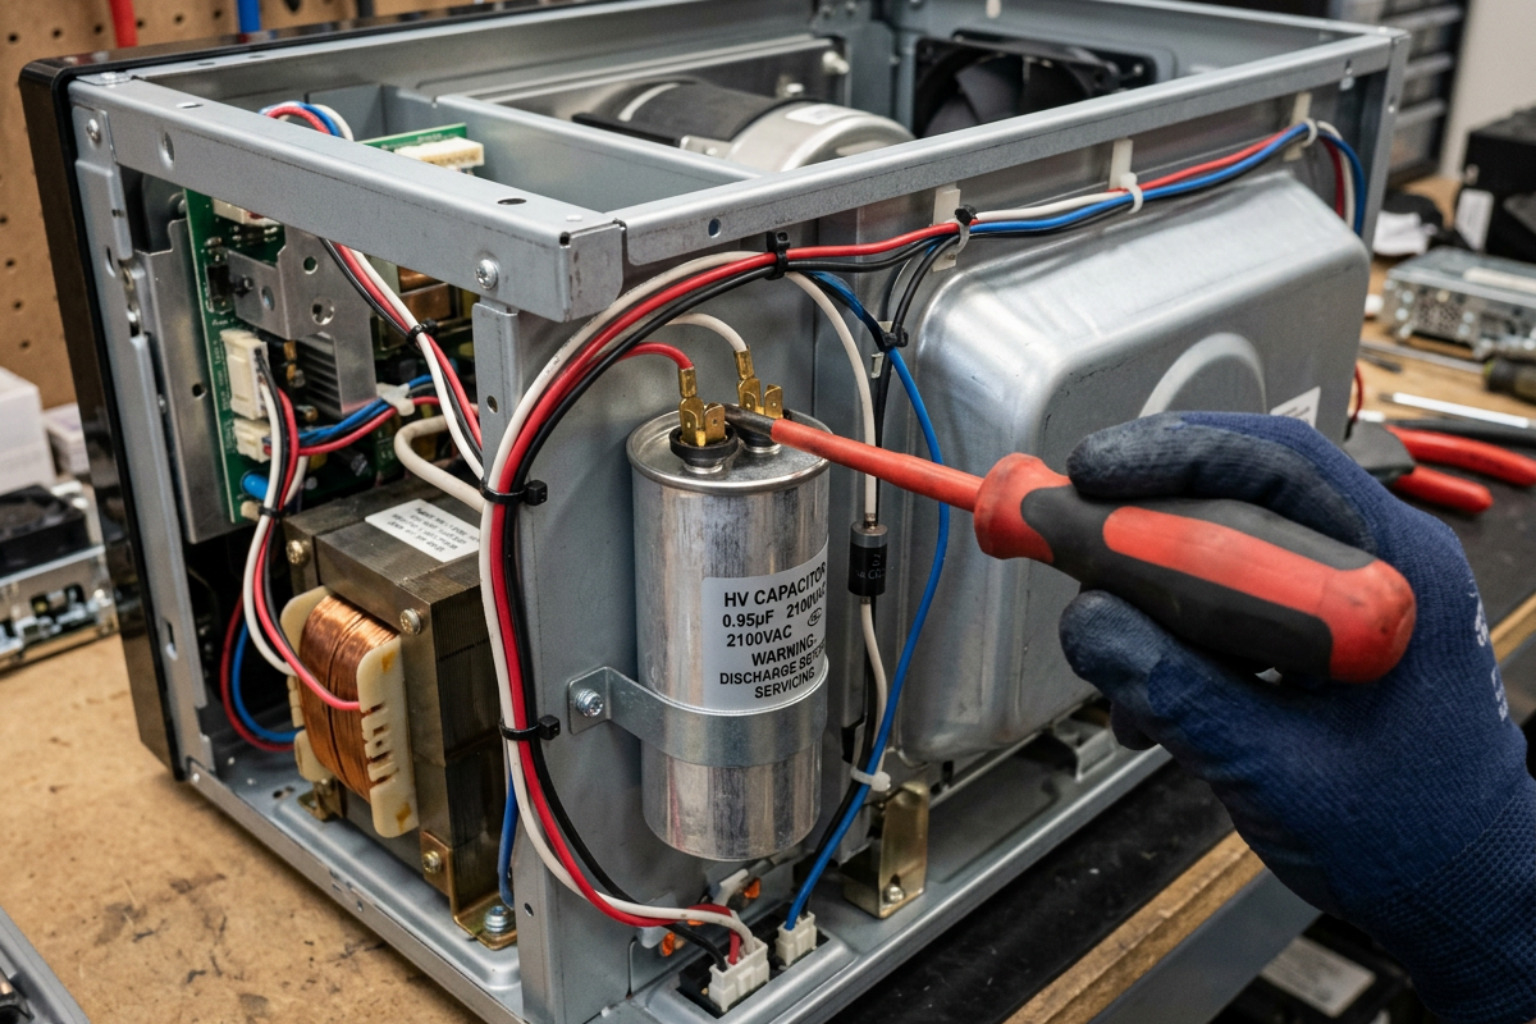
What makes a microwave uniquely dangerous compared to a toaster or blender is its high-voltage capacitor. Even long after you unplug the machine from the wall, this capacitor holds stored energy. In fact, a typical high-voltage capacitor retains a dangerous charge of 2,000+ volts for several minutes or even hours after power is removed. Touching internal electrical connections without verifying that the system is completely discharged can lead to severe electric shocks or life-threatening injuries.
Before anyone opens a microwave cabinet, strict safety steps must be observed:
- Always Unplug the Power Cord First: Never attempt internal diagnostics or part replacements with the appliance plugged into an active outlet.
- Keep One Hand Pocketed: When working near high-voltage circuits during initial testing, keeping one hand in your pocket prevents forming a direct path across your chest if accidental electrical contact occurs.
- Never Run the Unit Uncovered: Operating a microwave with its metal outer housing removed exposes anyone nearby to high voltages and unfiltered microwave radiation.
- Consult Trusted Resources: Detailed technical protocols, such as those detailed in the Notes on Microwave Troubleshooting, highlight why professional safety equipment and insulated shunts are necessary during service.
At iFix Appliances, we always prioritize home safety. If you ever feel unsure about handling high-voltage components, calling experienced technicians is the smartest move you can make.
Diagnosing Microwave Heating and Arcing Problems
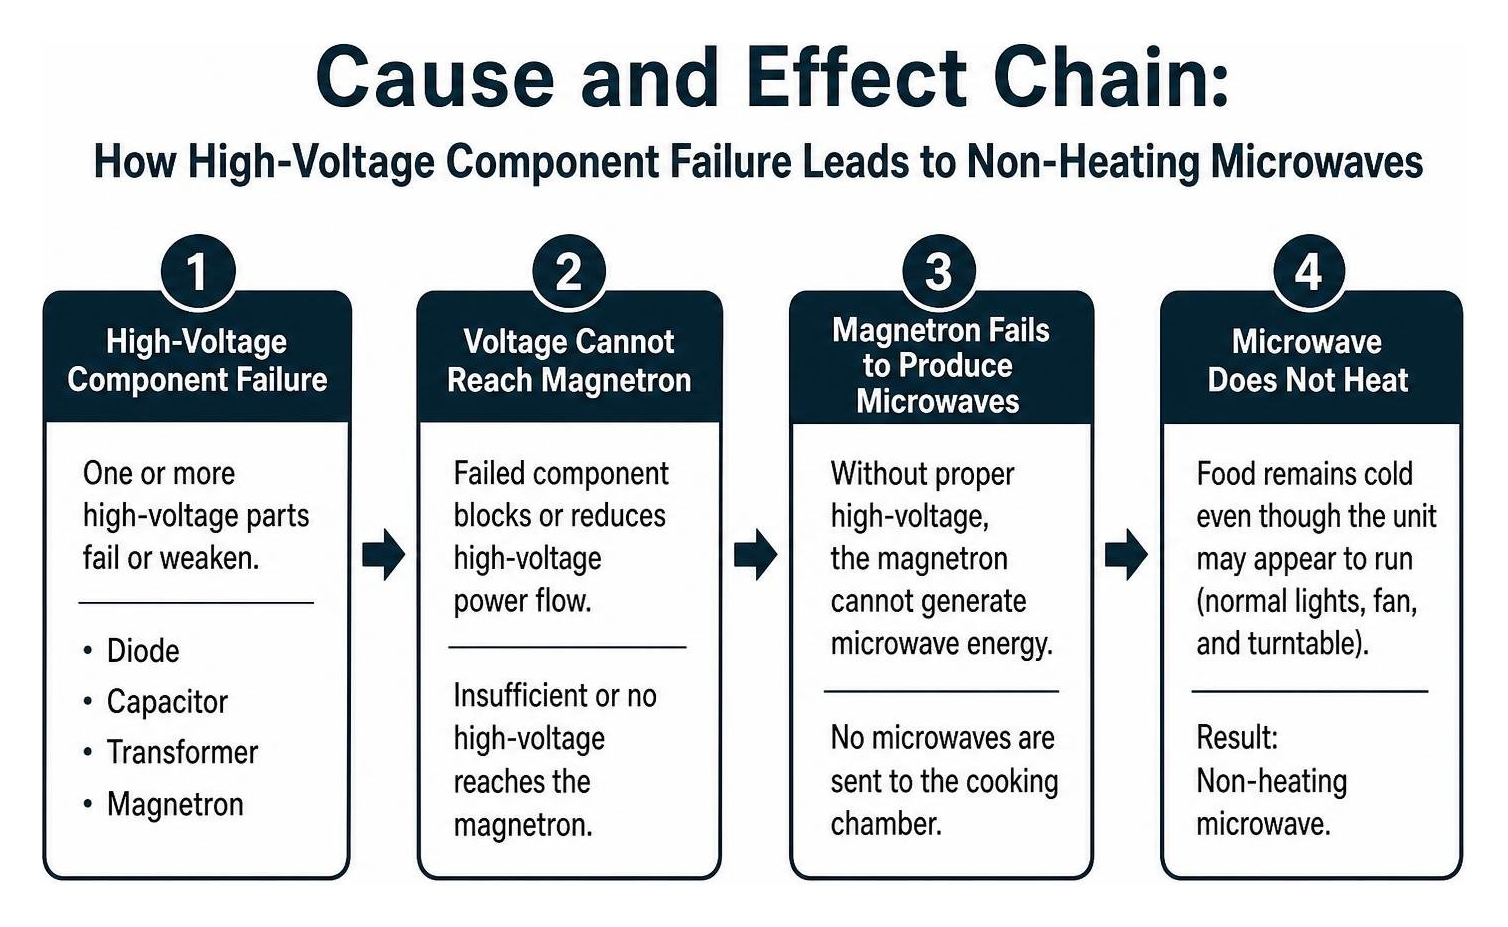
When a microwave turns on, light bulbs illuminate, and the turntable spins, it is easy to assume everything is working fine—until you pull out a bowl of soup three minutes later only to find it bone-cold. Diagnosing why a unit fails to heat or begins producing terrifying sparks requires understanding how power flows through its internal components.
When you encounter general breakdown symptoms, starting with fundamental Appliance Repair diagnostic principles helps narrow down the problem safely.
Causes of Internal Arcing and Sparks
Seeing bright blue or yellow flashes inside your microwave chamber is guaranteed to get your heart pumping. Kitchen appliances are involved in nearly half of all home fires, and microwave arcing or burning smells are top triggers. However, arcing does not always mean your microwave is beyond saving.
Common causes of sparks inside the cavity include:
- Damaged Waveguide Cover: The waveguide cover (often made of thin mica material) shields the microwave generator aperture from food spatters. Over time, grease and food bits build up on this cover. When heated, carbonized food debris conducts electricity, causing the mica sheet to burn and spark.
- Chipped Interior Paint: Moisture and acidic food spatters can erode the metal lining of the cavity, chipping away protective paint. Bare, exposed metal edges concentrate electrical fields, causing sparks to jump across the chamber.
- Metallic Food Remnants and Foil: Forgetting a twist tie, a foil-lined container, or a stray fork inside the oven creates sharp metal edges that react violently with microwave radiation.
Fixing minor arcing often involves thoroughly cleaning the interior cavity, replacing a charred mica waveguide cover, or applying food-safe touch-up paint to exposed metal spots.
Signs of a Failing Door Interlock Switch
Your microwave door is not just a barrier to keep heat inside; it is a critical safety shield containing a primary switch, secondary switch, and monitor switch working in tandem. This door interlock switch assembly ensures that high-voltage energy cuts off instantly when the door handle is pulled.
Signs that an interlock switch is failing include:
- The microwave starts humming or running as soon as you close the door, without pressing START.
- Opening the door mid-cycle instantly blows the internal power fuse or trips your home’s circuit breaker.
- The timer counts down normally, but the appliance fails to heat.
- The door latch feels loose, preventing the switches from fully depressing.
When one door switch fails, safety guidelines dictate testing and often replacing all three switches in the assembly, as they undergo identical physical wear over time.
Step-by-Step Diagnostic Procedures
Troubleshooting microwave problems systematically prevents unnecessary component replacement and keeps diagnostic testing organized.
Discharging the High-Voltage Capacitor
Because a capacitor stores lethal energy, discharging it is the single most vital step before touching internal parts. Professional technicians use a dedicated high-wattage resistor shunt (typically 25k to 100k ohms rated for at least 5 kV) attached to an insulated tool grounded directly to the metal frame.
- Unplug the microwave power cord from the wall.
- Remove the outer metal cabinet housing.
- Using an insulated tool grounded against the metal chassis, short across the capacitor terminals through a high-voltage discharge resistor for several seconds.
- After initial resistor discharge, confirm zero residual voltage by touching an insulated screwdriver blade across both terminals simultaneously.
Testing Magnetrons, Diodes, and Thermal Fuses
With the capacitor safely discharged, a digital multimeter set to check resistance or continuity helps pinpoint broken parts:
- Testing the High-Voltage Diode: A high-voltage diode converts AC power to DC power while doubling voltage. Standard multimeter resistance settings often cannot read an HV diode because it requires higher forward voltage (usually around 6 to 9 volts) to conduct. A continuity test or specialized battery setup verifies whether current flows in only one direction. A diode reading shorted in both directions is blown and must be replaced.
- Testing the Magnetron: The magnetron valve generates the actual high-frequency electromagnetic waves that cook food. Measure resistance across the two filament terminals using a multimeter; a healthy reading is very low (typically under 1 ohm). Next, measure resistance between each terminal and the magnetron’s outer metal case. Any reading other than open circuit (infinite resistance) indicates an internal short to ground.
- Testing Thermal Cutouts and Power Fuses: Thermal fuses protect the machine from overheating if cooling fans fail. Place multimeter probes across thermal fuse terminals; a good fuse shows direct continuity (0 ohms). An open circuit reading means the fuse opened to protect your home from an thermal event and must be replaced.
When to Call a Professional for Microwave Repair
While minor fixes like replacing a turntable motor coupler or swapping out a scorched waveguide cover are simple, high-voltage component replacement demands professional training. Knowing the economic tipping point helps you decide whether to schedule a service call or visit an appliance store.
| Microwave Type | Average Replacement Cost | Average Professional Repair Cost | Economic Decision |
|---|---|---|---|
| Basic Countertop | $60 – $150 | $160 – $220 | Replace unit |
| Over-the-Range (OTR) | $300 – $800 | $160 – $320 | Repair unit |
| Built-In / Drawer | $500 – $2,500 | $180 – $380 | Repair unit |
| High-End / Luxury | $1,000 – $3,000+ | $200 – $400 | Repair unit |
Professional repair insights highlight that high-end models consistently offer outstanding return on investment when repaired rather than replaced. If you own brand-specific units such as a GE Repair Service candidate, repairing built-in hardware keeps your kitchen layout intact.
DIY Microwave Repair vs Professional Service
Where should you draw the line between DIY efforts and professional service?
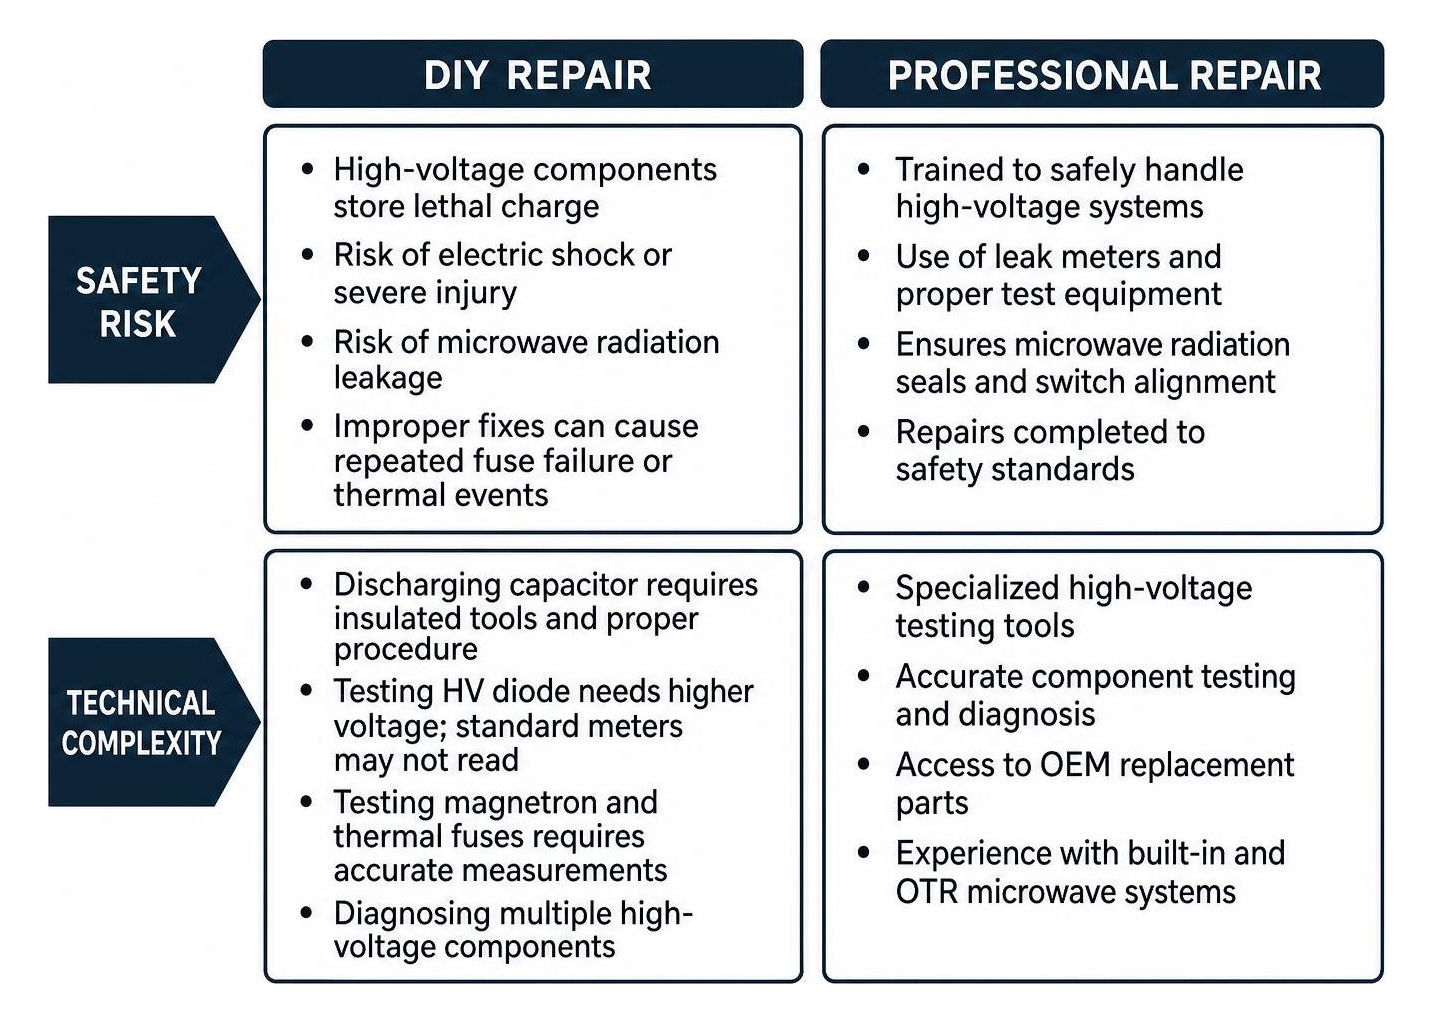
Attempting DIY repairs on high-voltage circuitry without formal electrical training carries severe safety risks. Beyond personal injury, improper switch alignment can cause microwave radiation leakage or repeated fuse failure. Professional technicians possess specialized leak meters, high-voltage testing tools, and original equipment manufacturer (OEM) replacement parts to ensure safe operation.
Complex Built-In Microwave Repair Considerations
Built-in and over-the-range (OTR) microwaves are structurally integrated into kitchen cabinets, vent ducts, and backsplashes. Removing a 60-pound OTR microwave requires two people, unmounting hardware, and disconnecting exhaust ducts.
When servicing high-end built-in or drawer models—such as those covered under our KitchenAid Repair Service—professional handling protects custom trim kits and surrounding cabinetry from scratches or structural strain. Most professional repairs take just 45 to 90 minutes once diagnosed, restoring full convenience with minimal disruption.
Frequently Asked Questions
Understanding error codes and cost benchmarks gives you peace of mind when unexpected breakdowns occur.
Why is my unit running but failing to heat food?
When the timer ticks down and lights turn on, but food remains cold, the high-voltage generation system has lost power. The primary suspects are a burned-out magnetron, a shorted high-voltage diode, a blown high-voltage thermal fuse, or a failed capacitor. Faulty door interlock switches can also prevent high-voltage components from energizing while allowing lower-voltage turntable lights and motors to run.
How much does it cost to fix a microwave?
For most residential models, professional microwave repair across our service areas typically ranges between $160 and $380, depending on the failed part (such as a control board, magnetron valve, or interlock assembly). Most repairs are completed in a single visit of 45 to 90 minutes once properly diagnosed.
Is it better to repair or replace an over-the-range microwave?
For built-in, over-the-range, or luxury brands, repair almost always makes economic sense. Replacing these models costs anywhere from $500 to $2,500 when factoring in purchase price, custom duct alignment, tile work, and removal of old hardware. Spending $160 to $380 to repair high-end units restores full function while saving hundreds of dollars.
Conclusion

Fixing a malfunctioning microwave does not have to turn into an overwhelming headache. By keeping basic safety steps in mind, identifying symptoms early, and knowing when to seek expert help, you can keep your kitchen running smoothly for years to come.
When high-voltage hazards, complex installation steps, or stubborn error codes make DIY repairs impractical, trust the local experts at iFix Appliances. We proudly serve homeowners across Raleigh, Cary, Apex, Garner, Durham, Morrisville, Wake Forest, Chapel Hill, Fuquay-Varina, Holly Springs, and the entire Triangle Area in North Carolina.
Whether you need quick assistance near our Location Raleigh hub or need comprehensive oven and stove repair services, our team provides clear diagnostics, upfront pricing, and long-term repair solutions. Contact iFix Appliances today to get your kitchen back on track!

0 Comments