
Is Your Dishwasher Leaking at the Bottom? Here’s What You Need to Know
Dishwasher bottom door seal replacement is one of the most common DIY appliance fixes — and for good reason. A worn or cracked seal along the bottom of your dishwasher door is often the hidden culprit behind puddles on your kitchen floor.
Quick answer: How to replace a dishwasher bottom door seal
- Shut off power to the dishwasher at the breaker
- Open the door fully and remove the outer door panel screws
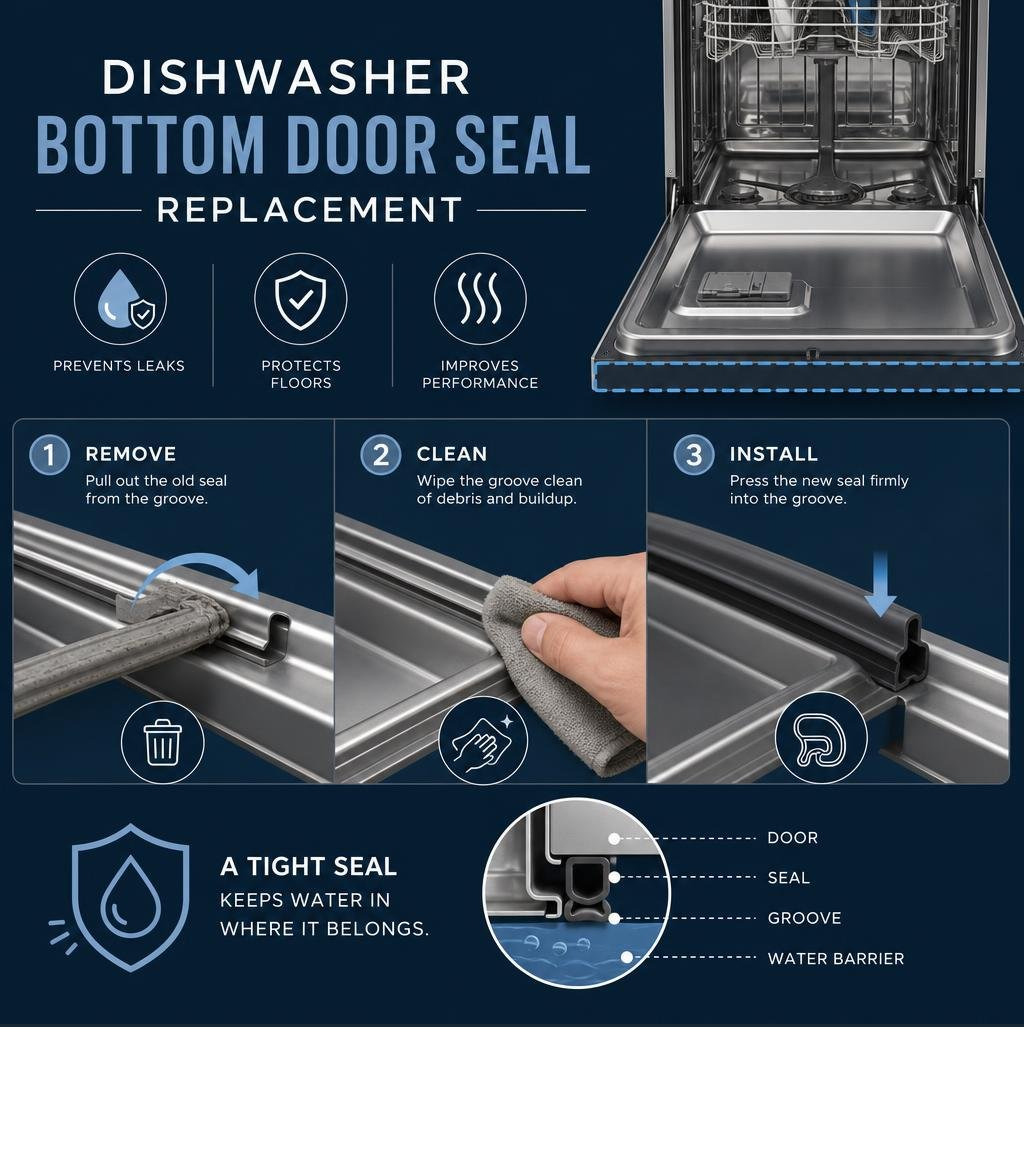
- Pull out the old seal from the groove along the bottom edge
- Clean the groove thoroughly to remove debris and buildup
- Press the new seal firmly into place, starting from the center and working outward
- Reassemble the door panel and run a short test cycle to check for leaks
Most homeowners complete this repair in 15 to 60 minutes with basic tools.
The bottom door seal — sometimes called a lower door gasket — creates a watertight barrier along the base of your dishwasher door. Over time, heat cycles, detergent exposure, and normal wear cause the rubber or plastic seal to crack, harden, or gap. When that happens, water escapes onto your floor during every wash cycle.
The good news? Replacement seals are affordable (often $6 to $100 depending on brand and model), and the repair is well within reach for most homeowners. This guide walks you through everything — from spotting the problem to finishing the fix.
What is a Dishwasher Bottom Door Seal and Why Does It Fail?
To understand why your kitchen floor looks like a miniature water park, we first have to look at how your dishwasher seals itself.
Many homeowners don’t realize that a dishwasher actually has two completely different sealing systems:
- The Tub Gasket: This is the continuous, U-shaped rubber strip that runs along the top and sides of the dishwasher tub. It is highly visible when you open the door.
- The Bottom Door Seal: This is a separate, straight seal (often made of hard plastic with a flexible rubber lip, or a thick rubber strip) mounted directly to the bottom edge of the inner door panel.
The bottom door seal acts as a critical horizontal barrier. During a wash cycle, high-velocity water jets spray in every direction. The lower seal keeps that water from splashing forward and slipping through the tiny gap where the door hinges meet the tub.
Why Do Bottom Seals Fail?
Because this seal lives at the very bottom of the machine, it bears the brunt of every wash. Over years of heavy use, several factors cause it to fail:
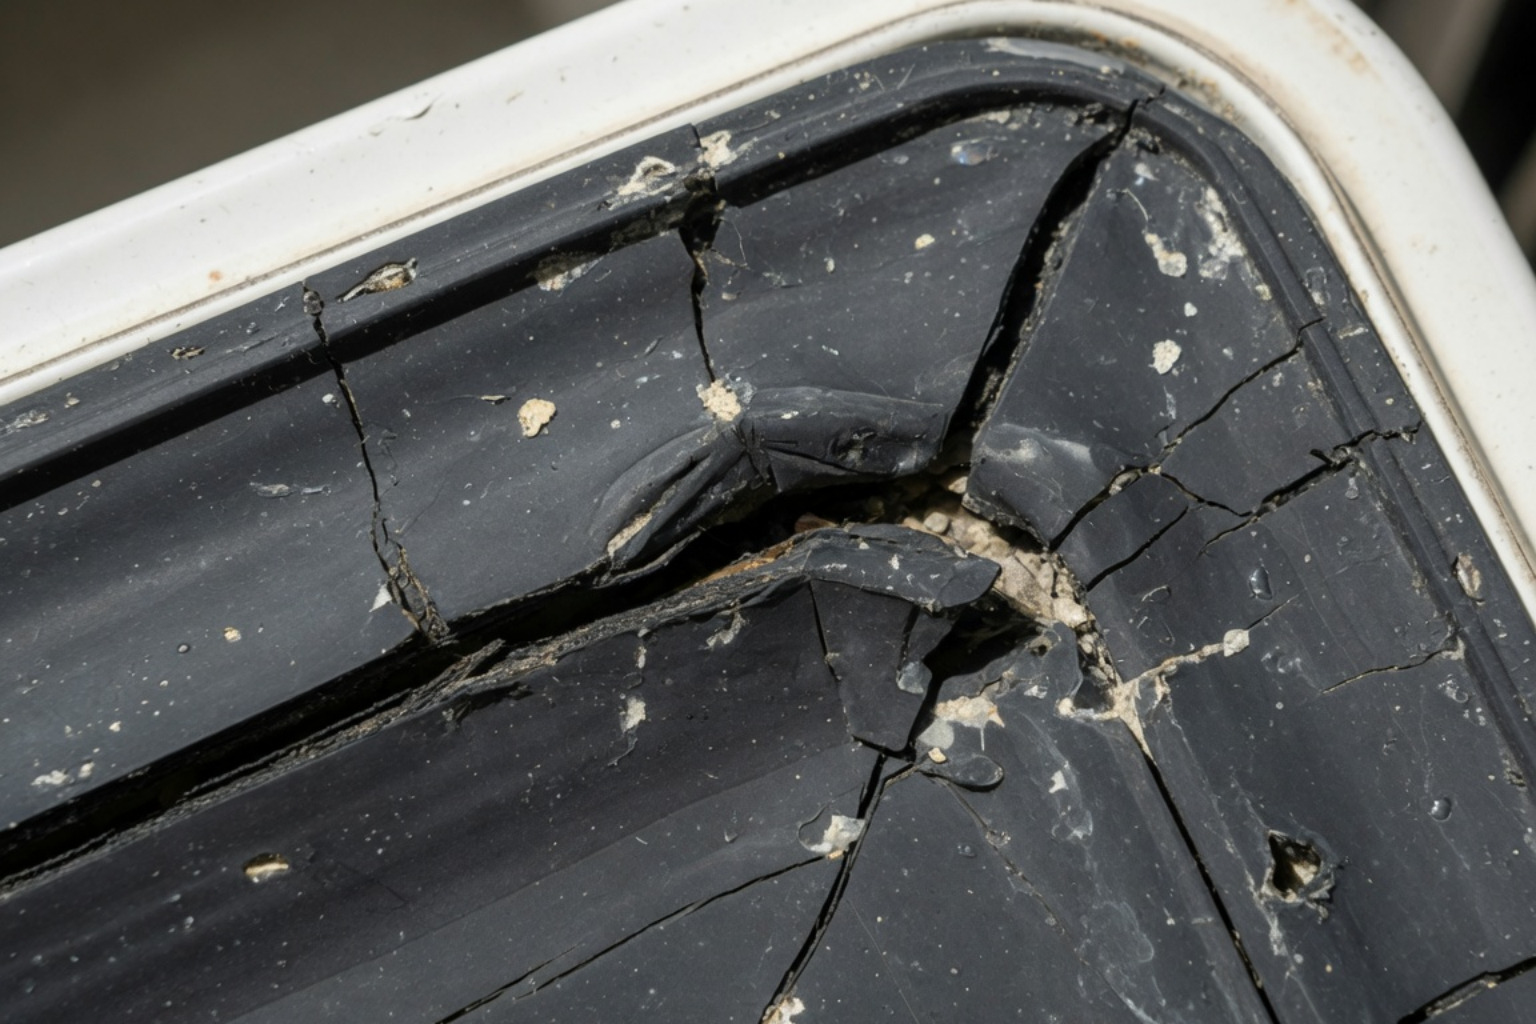
- Extreme Heat Cycles: The intense heat from water heaters and heated dry cycles eventually bakes the rubber, making it brittle, rigid, and prone to cracking.
- Chemical Detergent Exposure: Modern dishwashing detergents are highly alkaline. Constant exposure slowly breaks down the chemical integrity of the seal.
- Food Debris and Grease: Heavy grease, hard water minerals, and food particles can settle into the groove of the seal, creating small gaps or physical tears.
- Mechanical Friction: Every single time you open and close the dishwasher door, the bottom seal slides against the lower tub frame, causing natural friction wear.
When these issues strike, you will start seeing classic Raleigh appliance problems like mysterious damp spots on the hardwood or vinyl directly under your unit.
Signs You Need a Dishwasher Bottom Door Seal Replacement
How do you know if your lower seal is actually the problem, or if you are dealing with a different issue like a dishwasher not draining?
Look for these telltale signs:
- Puddles Directly in Front of the Unit: If water is pooling on the kitchen floor right beneath the door during the middle of a wash cycle, the bottom seal is almost always to blame.
- Mineral Deposits and Corrosion: Look closely at the metal frame at the bottom of the door. If you see white, chalky mineral deposits or rust spots, water has been slowly escaping and drying there.
- Black Residue on Dishes or Hands: As rubber gaskets deteriorate, they often begin to disintegrate. If touching the bottom of your door leaves a black, smeary residue on your fingers, the seal is toast.
- Visible Gaps or Tears: Open the door halfway and inspect the lower edge. If you see pieces of rubber hanging loose, visible splits, or a warped shape, it is time for a dishwasher bottom door seal replacement.
- Steam Escaping During Cycles: If you notice an unusual amount of steam rising from the bottom of the door while the machine is running, the seal is no longer airtight.
If you hear your machine struggling or making strange sounds while leaking, you might also want to check out our guide on Dishwasher Making Strange Noises: What It Means & When to Call a Pro in Raleigh to ensure a larger mechanical issue isn’t at play.
Tools and Materials Needed for the Job
Before you roll up your sleeves, gather your tools. Having everything nearby prevents you from having to run to the garage with a half-disassembled dishwasher door hanging open.
Essential Tools Checklist:
- Screwdriver or Nut Driver Set: Most dishwasher outer doors are held together by Torx screws (usually T15 or T20) or small hex-head screws (such as 1/4-inch or 5/16-inch).
- Flathead Screwdriver or Putty Knife: Useful for gently prying out the old seal from its channel.
- Cleaning Cloth and Toothbrush: To clean out years of accumulated gunk inside the seal groove.
- Mild Dish Soap or Warm Water: Acts as a lubricant to help slide the new seal into place.
- Vice Grips (Optional): Helpful for holding door hinges open on certain models if you choose to remove the door completely.
Choosing Your Part: OEM vs. Aftermarket
When shopping for a replacement seal, you will face a choice between an Original Equipment Manufacturer (OEM) part and a generic aftermarket alternative.
| Feature | OEM (Original Equipment Manufacturer) | Aftermarket (Generic) |
|---|---|---|
| Fit & Alignment | Perfect, guaranteed match with pre-drilled holes | May require trimming, stretching, or manual hole alignment |
| Material Quality | High-grade, heat-resistant rubber/plastic | Varies; can be thinner or degrade faster under high heat |
| Warranty | Typically backed by a 1-year manufacturer warranty | Varies; often limited or no warranty |
| Average Cost | $30 – $100 | $10 – $25 |
While aftermarket kits are tempting due to their low price, we highly recommend using genuine OEM parts. A poorly fitting seal will continue to leak, potentially causing thousands of dollars in water damage to your kitchen floor.
Step-by-Step Guide to Dishwasher Bottom Door Seal Replacement
Replacing the seal is a highly satisfying DIY project. While the exact steps can vary slightly by brand, the core process remains the same across Whirlpool, GE, Bosch, and Frigidaire models.
If you learn best by watching, you can reference this How to replace your dishwasher door seal video to visualize the spatial layout before diving in.
Preparing for Your Dishwasher Bottom Door Seal Replacement
Safety is paramount. Never work on an appliance that is still connected to live electricity.
- Cut the Power: Head to your home’s main circuit breaker panel and flip the switch that controls the dishwasher.
- Open the Door Fully: Open the door all the way down.
- Remove the Outer Door Panel: Locate the screws along the inner door liner (usually on the sides and top edge). Remove these screws while holding the outer door panel so it doesn’t fall. Once the screws are out, gently lift and pull the outer door cover away from the machine. Set it aside safely.
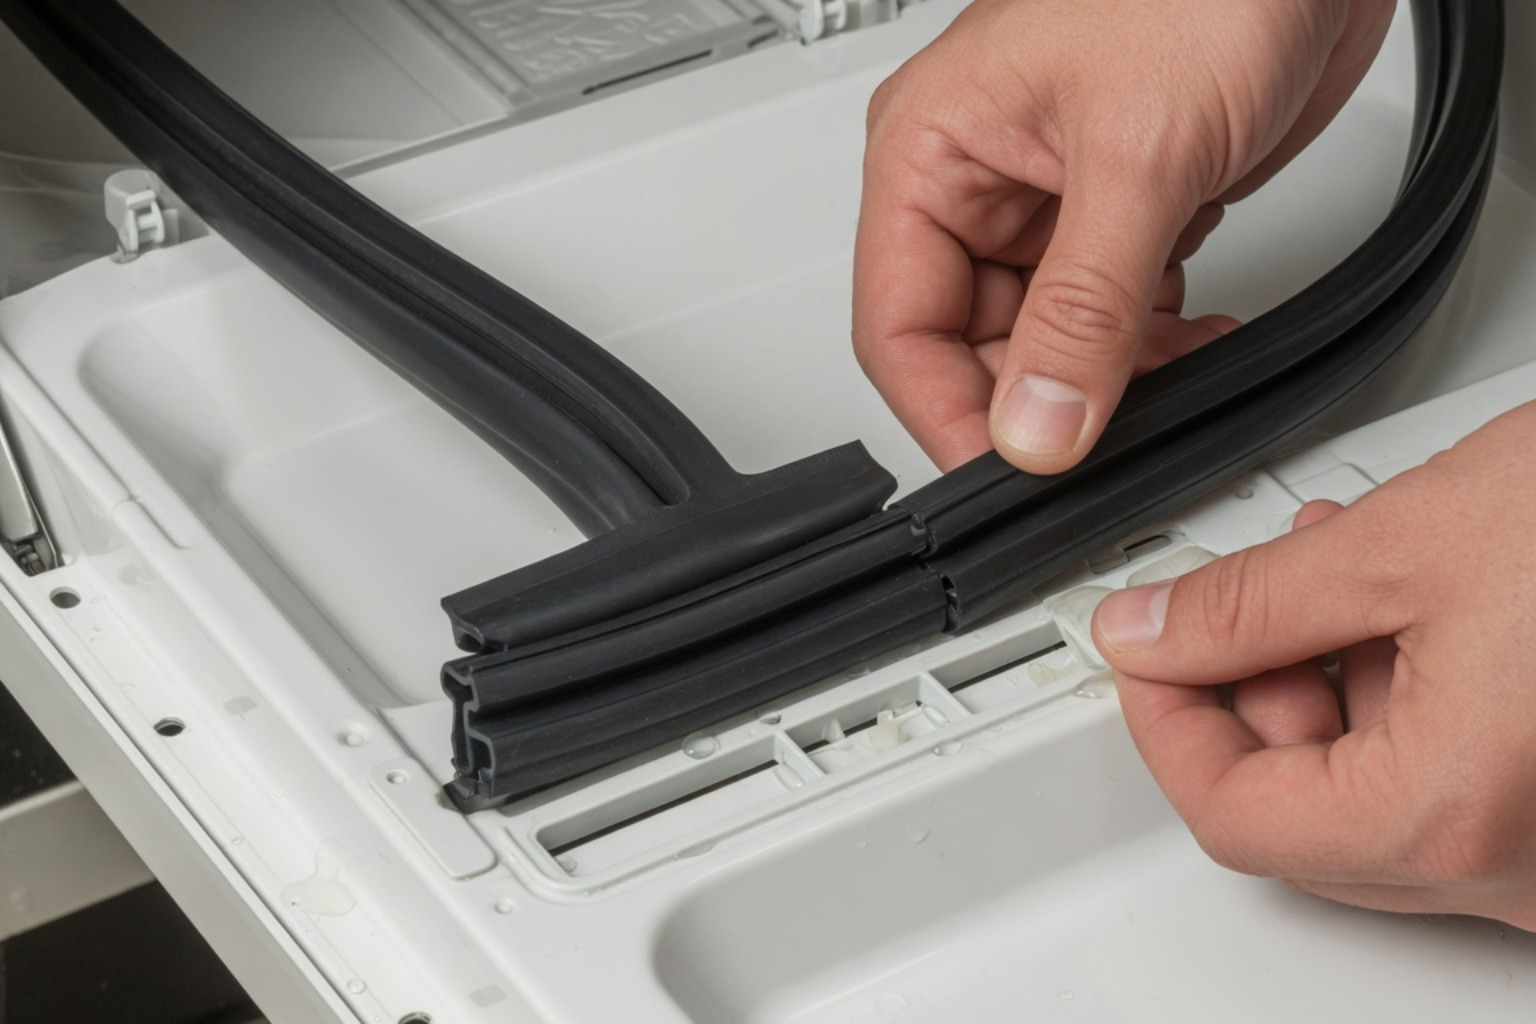
- Remove the Old Gasket: Locate the bottom door seal. On some models, it is held in place by a metal retaining bracket with small screws. On others, it is pressed directly into a hidden slot. Remove any retaining screws, slide the old seal out, and discard it.
Installing the New Dishwasher Bottom Door Seal Replacement
Now comes the precision work. Getting the seal aligned correctly is the secret to a leak-free repair.
- Clean the Groove Thoroughly: Before installing the new seal, take your toothbrush, warm soapy water, and a cloth to clean out the narrow channel where the seal sits. Years of old detergent and food slime will prevent the new seal from seating flush.
- Find the Center: Fold your new seal exactly in half to locate the midpoint. Mark this center spot with a pencil or piece of tape.
- Align and Angle: Align the center mark of the seal with the middle of the door latch or center line of the inner door panel.
- Insert at an Angle: When pressing the seal into the hidden slot, angle the seal slightly upward. This helps the rubber glide smoothly into the deep groove.
- Press Firmly: Working from the center outward to both the left and right sides, press the seal firmly into the groove. Ensure there are no gaps, bunches, or stretched sections. If your model uses a retaining bracket, place the bracket over the seal and reinstall the screws.
- Whirlpool Note: If you are working on a Whirlpool, Maytag, or KitchenAid unit, you will likely use the WPW10497235 Dishwasher Lower Door Seal. This part features a rigid plastic backing that snaps into place with screws accessed from underneath.
- Alternative Whirlpool Option: Some models may require the W10909089 AP6034205 Dishwasher Lower Door Seal … or the Official Whirlpool W11664713 Door Seal Assembly (Lower) – PartSelect.com, which includes the lower rubber lip molded directly to a structural plastic frame.
Reassembling and Testing for Leaks
With the new seal securely in place, it is time to put everything back together.
- Reattach the Outer Door Cover: Align the outer panel with the inner door frame. Reinstall the screws you removed earlier, starting from one side and alternating to keep the tension even. Be careful not to pinch any internal wiring harnesses.
- Restore Power: Flip the circuit breaker back on.
- Run a Test Cycle: Load a small rinse cycle and grab a flashlight. Watch the bottom edge of the dishwasher door closely for the first 10 minutes of the cycle.
- GE Note: If you own a GE, Hotpoint, or RCA model and used the WD08X10059 Lower Door Seal or GE Seal For Door Bottom – WD08X10059, ensure the flexible rubber flap folds smoothly inward toward the tub as the door closes. If it bunches outward, open the door and tuck it in manually before running the cycle.
Compatibility and Cost of Common Replacement Seals
Understanding part numbers is crucial because dishwasher seals are highly brand-specific. Here is a breakdown of the most common replacement seals on the market:
- Bosch 00744884: This is a popular OEM lower seal compatible with Bosch, Thermador, and Gaggenau dishwashers. You can buy the 00744884 Lower Door Seal online to fix common front-leaking issues.
- Bosch 00432490: Another highly demanded Bosch part. The Official Bosch 00432490 Lower Door Seal – PartSelect.com is designed for older Bosch and Kenmore models.
- Frigidaire 809006501 & 154827601: These are classic Frigidaire combo parts. Over 1,700 reviews exist for the genuine Frigidaire 809006501 door seal. You can find aftermarket options like the 809006501 Dishwasher Bottom Door Gasket Replacement Part – for … or the SURPOUF 5304500204 Dishwasher Door Bottom Gasket Door Seal … (also listed as the Dishwasher Door Bottom Seal 5304500204 | Official Frigidaire Part) which provide excellent water-tight seals for Frigidaire and Electrolux models.
Frequently Asked Questions about Dishwasher Door Seals
How long does it take to replace a bottom door seal?
For most DIYers, the repair takes between 30 to 60 minutes. If you have an easily accessible model where the seal slides right into a channel without requiring door panel disassembly, you can complete the job in under 15 minutes.
Can I replace the seal without removing the dishwasher door?
Yes! In fact, we highly recommend not removing the entire door if you can avoid it. Dishwasher door hinges are under high spring tension. Removing the door entirely requires locking the springs (often using vice grips) and disconnecting heavy door cables. You can easily access the lower seal on 90% of models simply by removing the outer decorative door panel while leaving the inner door attached to its hinges.
Why is my new bottom door seal still leaking?
If you just finished a dishwasher bottom door seal replacement and still see water pooling, check for these common mistakes:
- Orientation Error: The seal might be installed upside down or backward. The soft, flexible rubber lip must always point inward toward the water spray.
- Improper Groove Alignment: If the seal is not pressed fully and evenly into the hidden slot, tiny gaps will remain.
- The Dishwasher is Not Level: If your dishwasher tilts slightly forward, water will pool at the front of the tub and overwhelm even a brand-new seal. Use a spirit level and adjust the front leveling legs as needed.
Conclusion
A leaking dishwasher bottom door seal doesn’t have to mean a flooded kitchen or an expensive floor repair bill. With a little patience, a nut driver, and the correct OEM replacement part, you can easily restore your appliance’s watertight seal in under an hour.
However, we also know that DIY repairs can sometimes turn sideways. If you find yourself staring at a door that won’t align, springs that snapped out of place, or a leak that simply won’t stop, don’t panic. There are clear DIY appliance repair warning signs that tell you it’s time to step away from the tools and call in an expert.
At iFix Appliances, we are proud to be a family-owned appliance repair company serving homeowners throughout Raleigh, NC, and surrounding areas like Cary, Durham, Wake Forest, Chapel Hill, Apex, and Holly Springs. Our certified technicians offer same-day diagnostics, upfront pricing, and expert repairs for all major household brands.
Save yourself the headache and let us handle it! Browse our Dishwasher Repair Services or check out our main Dishwasher Repair solutions page to schedule your appointment today. We will have your dishwasher running smoothly and your kitchen floor dry in no time!

0 Comments