
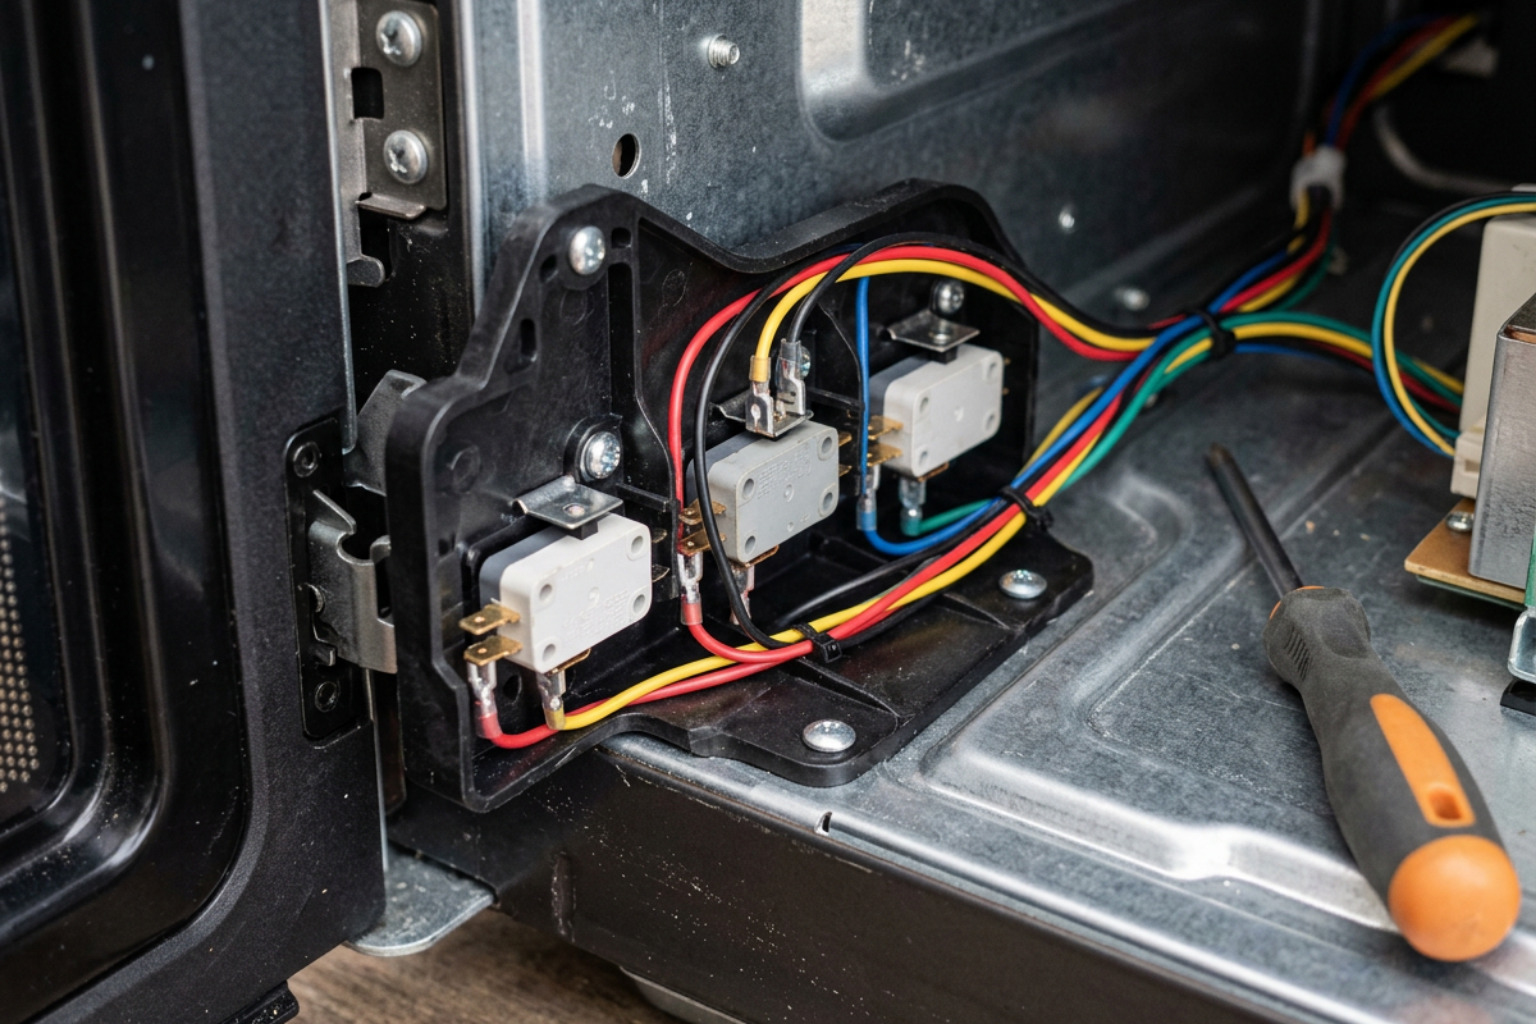
Fix Microwave Door Switch Safely Before the Problem Gets Worse
To fix microwave door switch problems, first unplug the microwave and avoid using it until the door interlock system has been checked. A bad switch can cause a microwave that will not start, stops mid-cycle, clicks oddly, or blows a fuse when you open or close the door.
Microwave door switches are not ordinary convenience parts. Most units use two or three microswitches that work together to confirm the door is fully shut before cooking can begin. Because a microwave contains high-voltage parts that may hold a dangerous charge even after it is unplugged, this is a repair where careful diagnosis matters as much as the replacement itself.
I am Vasyl Turetsky, Founder and Appliance Repair Specialist at iFix Appliances, and I have helped homeowners diagnose appliance problems across the Raleigh area. In this guide, I will explain when you can safely fix microwave door switch issues yourself and when a professional repair is the wiser choice.
Understanding Symptoms and Safety Before You Fix Microwave Door Switch
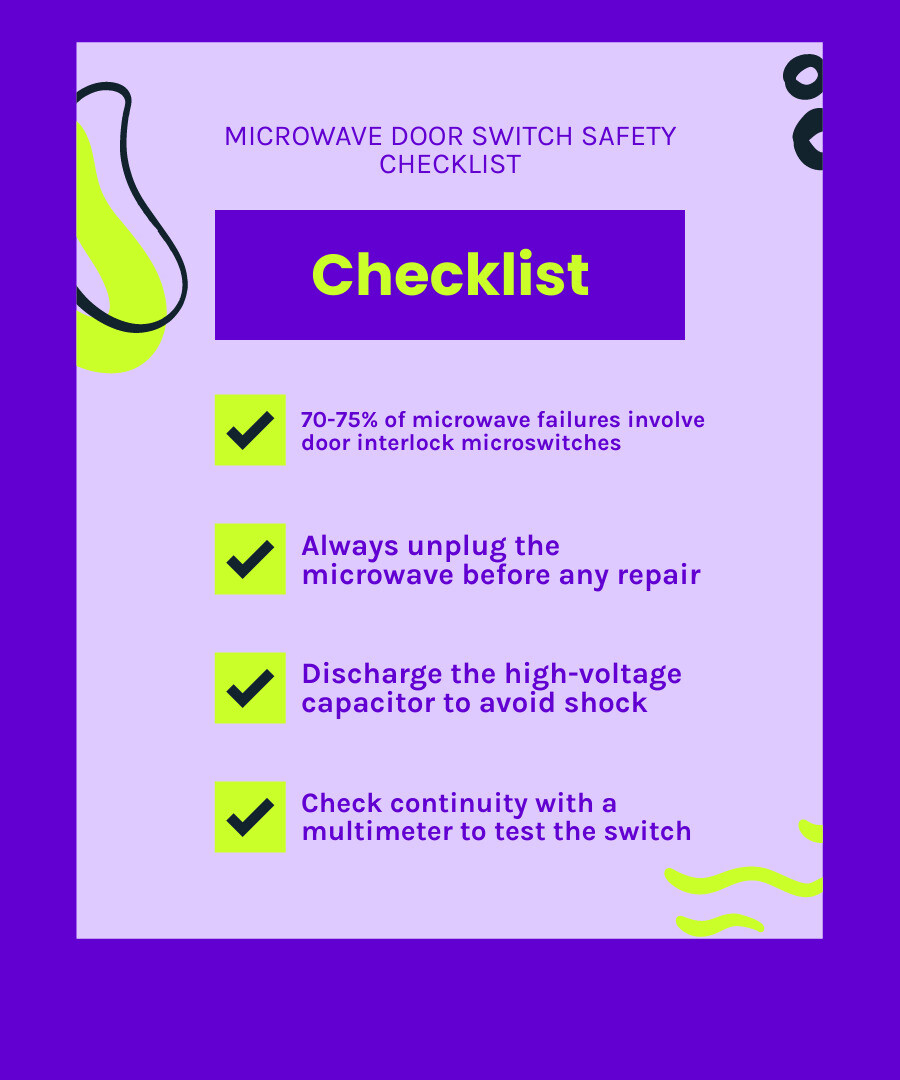
When a microwave stops working properly, around 70% to 75% of non-heating or power-on failures involve the door interlock microswitches. These small components act as the appliance’s primary safety shield. Because microwaves utilize high-frequency radiation to agitate water molecules in food, the door interlock system ensures that radiation can never escape while the appliance operates.
Before attempting to fix microwave door switch assemblies, you must recognize the primary symptoms of failure. Understanding how a faulty switch behaves helps you rule out other components like thermal cutoffs, main control boards, or magnetrons. You can learn more about general safety protocols in this Microwave Door Switch Safety Guide.
Here is a list of common symptoms that point directly to a bad microwave door switch:
- Microwave display turns on, but pressing “Start” does nothing: Keypads beep and the timer counts down, but heating, turntable rotation, and exhaust fan activation never begin.
- The line fuse or circuit breaker trips immediately when closing the door: This classic sign indicates an out-of-sync interlock system where the monitor switch causes an intentional short circuit.
- The microwave continues running with the door open: This is a critical safety hazard caused by a switch that has welded closed from electrical arcing.
- Unusual clicking or lack of physical resistance when shutting the door: Worn plastic actuator arms, fatigued internal switch springs, or loose cabinet mounting brackets prevent switches from fully depressing.
- Intermittent heating or light flickering during operation: High contact resistance inside a carbonized switch creates fluctuating voltage drops.
Critical Safety Steps: Discharging the Capacitor
Working inside a microwave requires far more caution than repairing an electric oven or washing machine. Even when unplugged from the 120V wall outlet, a microwave contains a high-voltage capacitor capable of storing lethal electrical energy between 2,000V and 5,000V DC. This charge can remain stored inside the capacitor for days or weeks if the internal bleed resistor fails.
To discharge the high-voltage capacitor safely before touching any internal switch connections, follow these mandatory steps:
- Unplug the appliance: Completely disconnect the power cord from the wall outlet. Never attempt to service door switches with power connected.
- Gain access to the HV section: Remove the outer cabinet casing using the appropriate Phillips or Torx drivers.
- Apply the “One-Hand Rule”: Keep one hand in your pocket or behind your back while working near high-voltage components. This prevents an electrical path across your chest and heart in the event of an accidental discharge.
- Use insulated tools or a resistor jumper: Using a heavy-duty screwdriver with an insulated handle rated for 1,000V, touch the bare metal tip simultaneously across both metal terminals of the capacitor, while contacting the bare metal chassis frame. Hold contact for several seconds to short out remaining current. Alternatively, attach a jumper wire fitted with a 20,000-ohm, 10-watt resistor between the terminals and chassis for 5 minutes.
- Verify zero voltage: Confirm with a voltmeter that no residual DC voltage remains across the capacitor terminals before placing your hands near the door switch bracket.
Safety Warnings Before You Fix Microwave Door Switch Components
Beyond high-voltage electric shocks, working on door interlock switches presents mechanical and radiation hazards. The interlock assembly is engineered with millimeter precision. If switches are installed out of alignment, or if plastic bracket tabs break during disassembly, the door latches will not depress switch buttons evenly.
Electrical arc erosion is another major safety factor. Opening a microwave door while it is actively heating forces microswitches to break high current under load. This creates miniature lightning arcs across the internal metal contacts, carbonizing the surface or fusing the contacts together. Never bypass or short-circuit a door switch to bypass safety locks; doing so allows microwave radiation to leak into your kitchen, easily exceeding FDA safety limits of 5 mW/cm².
How Microwave Door Interlocks Work: NO vs NC Switches
Modern microwave ovens rely on a redundant safety circuit featuring three separate microswitches: a primary interlock switch, a secondary interlock switch, and a monitor switch. Understanding how these switches interact prevents severe repair mistakes. Reviewing this guide on Microwave Interlock Troubleshooting shows how interlock timing misalignments frequently destroy new replacement parts.
Microswitches operate in two fundamental electrical states: Normally Open (NO) and Normally Closed (NC).
- Normally Open (NO): In its natural, resting state (button unpressed), the internal circuit is open, preventing electrical current from flowing. When the door closes and the plastic latch pushes the button, the contacts touch, closing the circuit.
- Normally Closed (NC): In its resting state (button unpressed), internal contacts touch and current flows freely. When the door closes and depresses the button, internal contacts push apart, breaking the circuit.
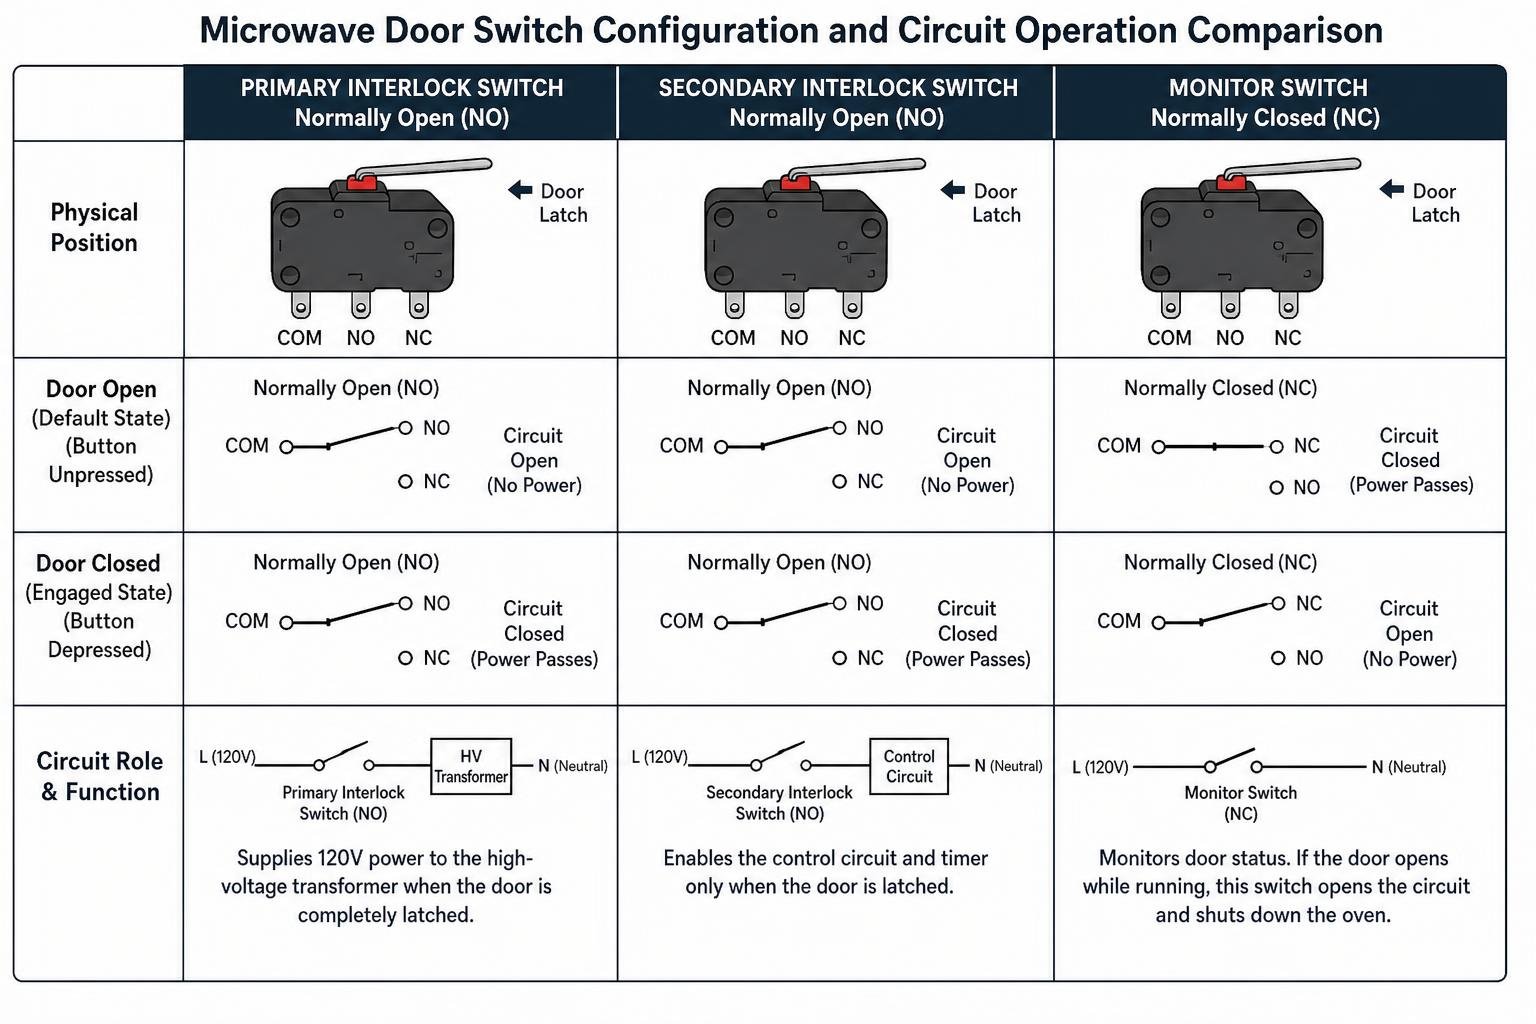
The table below outlines the specific roles, terminal states, and circuit functions of each microswitch within a standard microwave door interlock bracket:
| Switch Type | Default State (Door Open) | Engaged State (Door Closed) | Circuit Role & Function |
|---|---|---|---|
| Primary Interlock Switch | Normally Open (NO) | Closed (Passes Power) | Supplies 120V power to high-voltage transformer when door is completely latched. |
| Secondary Interlock Switch | Normally Open (NO) | Closed (Passes Power) | Provides a second layer of verification for control board logic and fan/turntable circuits. |
| Monitor Switch | Normally Closed (NC) | Open (Breaks Safety Short) | Acts as a safety “crowbar circuit.” If primary/secondary switches fail to open when the door opens, this switch shorts line power directly to ground, immediately blowing the main ceramic fuse. |
The “crowbar circuit” design means that if the door opens while the primary switch is stuck shut, power passes through the monitor switch directly to ground. This intentionally destroys the main line fuse to shut down the appliance before radiation can escape through an open door.
Diagnostics and Tools: Testing the Microswitch
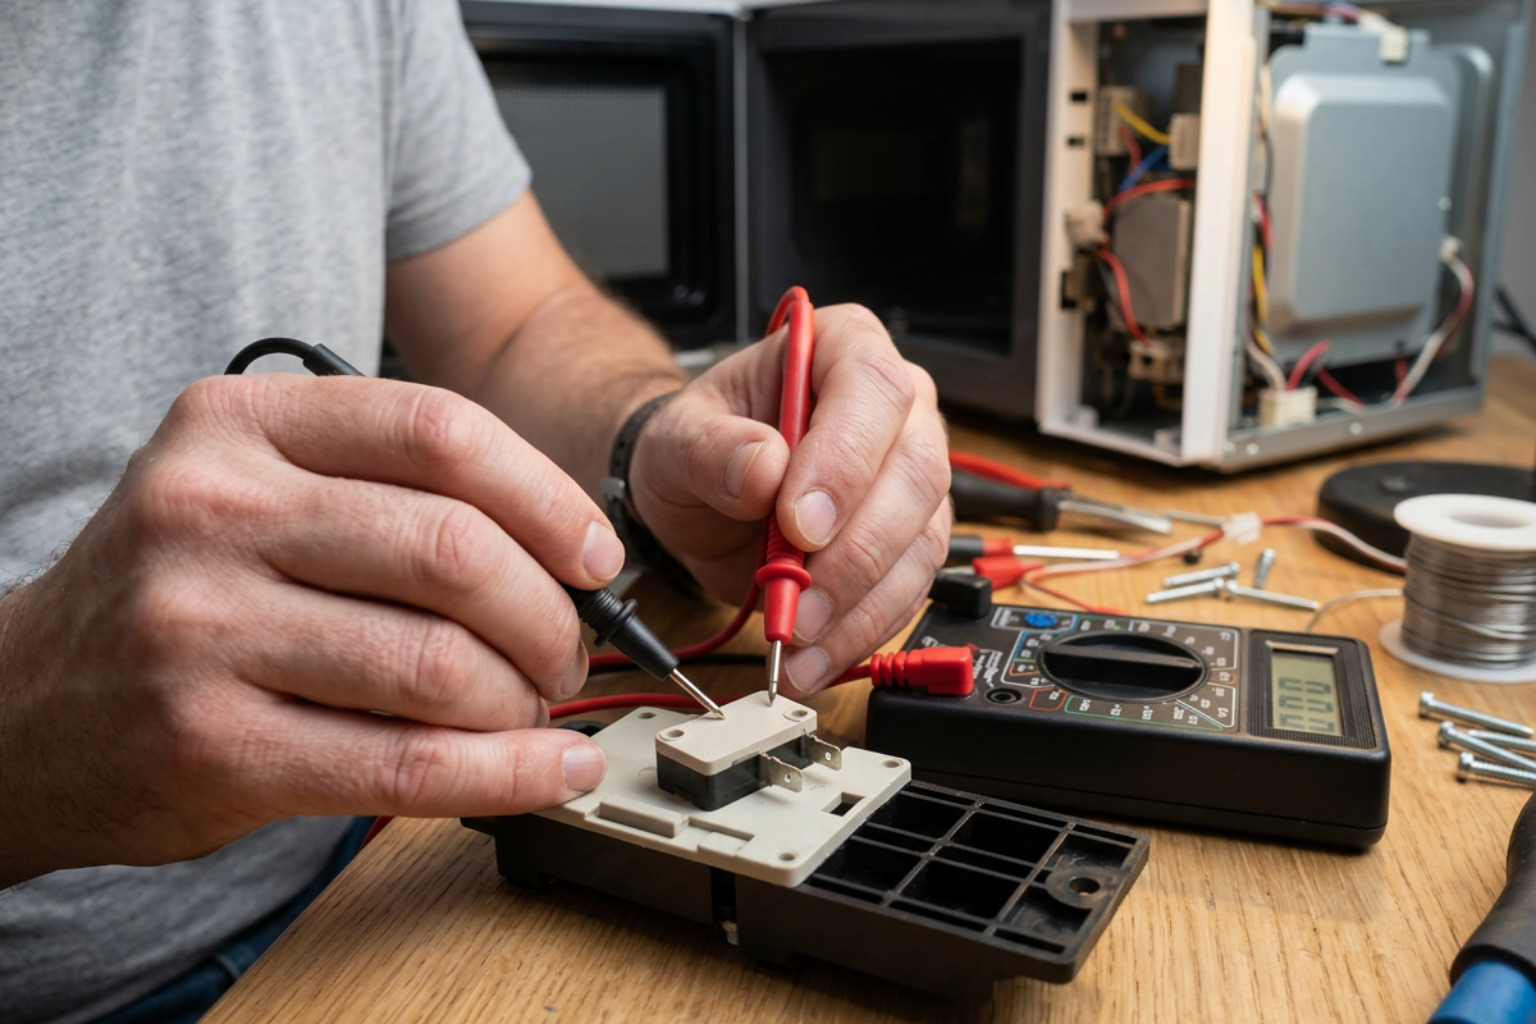
To diagnose microswitch issues accurately, gather the following hand tools and diagnostic equipment:
- Digital Multimeter (DMM): Essential for testing electrical continuity and contact resistance.
- Insulated Screwdrivers: Phillips #2 and Torx security bits (T15 or T20) for cabinet screws.
- Needle-Nose Pliers: Useful for gently pulling spade wire connectors off switch terminals.
- Work Gloves and Safety Glasses: Protects hands against sharp sheet metal edges.
While some DIY articles mention using an office paperclip to bypass switch terminals for fast testing, we strongly advise against it. You can read about Paperclip Test Risks to see why inserting conductive metal wire into high-voltage wiring blocks poses severe shock hazards, risks short-circuiting main control boards, and bypasses critical safety redundancy.
How to Fix Microwave Door Switch Continuity Issues
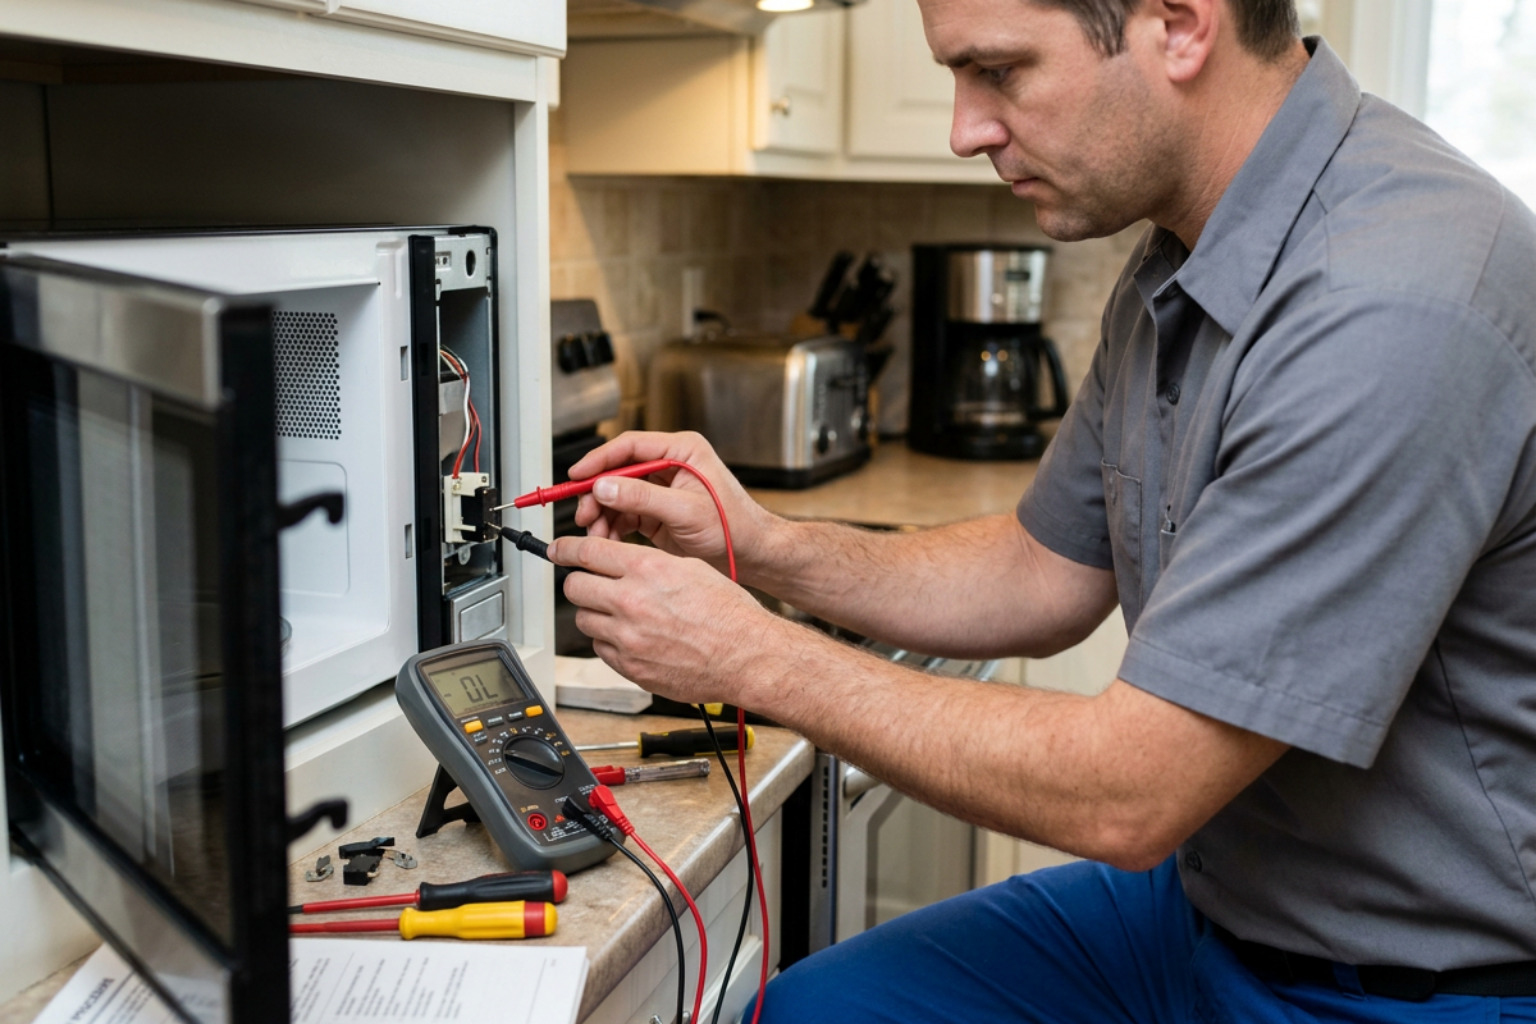
Testing a microswitch with a digital multimeter provides definitive proof of electrical failure. Microswitches are rated for specific electrical loads, typically 16A 125/250VAC or 20A 125VAC. Over time, millions of button presses cause contact wear, pitting, and carbon buildup.
Follow this procedure to test continuity across microswitch terminals:
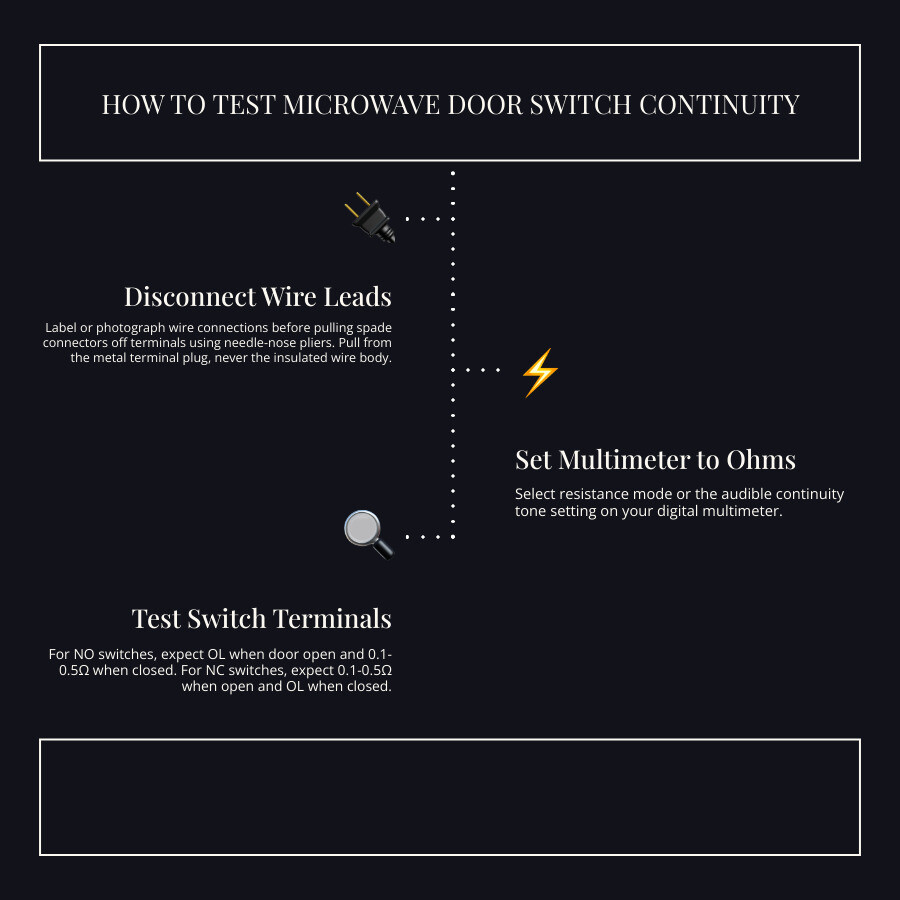
- Disconnect Wire Leads: Label or photograph wire connections before pulling spade connectors off terminals using needle-nose pliers. Pull from the metal terminal plug, never the insulated wire body.
- Set Multimeter to Ohms (Ω) or Continuity Mode: Select resistance mode or the audible continuity tone setting.
- Test Normally Open (NO) Switches:
- Touch multimeter probes to the COM (Common) and NO terminals.
- Door Open / Button Unpressed: The meter should read “OL” (Open Loop) or infinite resistance.
- Door Closed / Button Pressed: The meter should display between 0.1 and 0.5 Ohms, accompanied by a clear audible beep.
- Test Normally Closed (NC) Switches:
- Touch multimeter probes to the COM and NC terminals.
- Door Open / Button Unpressed: Meter should read 0.1 to 0.5 Ohms (continuous circuit).
- Door Closed / Button Pressed: Meter should read “OL” or infinite resistance.
If an engaged switch shows high resistance (such as 20 to 100 Ohms), internal oxidation or arc erosion is present. Even if the switch clicks mechanically, high internal resistance blocks required operating current, leading to failure under load.
Identifying the Correct Replacement Microswitch
Never install generic or under-rated switches into a microwave interlock bracket. Replacing a 16A-rated microswitch with a lightweight 10A switch will result in premature failure and rapid contact melting. Always match replacement parts to exact electrical specifications and terminal layouts.
To order the exact replacement, locate your microwave model number tag inside the door frame or on the rear cabinet panel. For example, if you own a GE appliance, sourcing a direct OEM replacement like the GE Microwave Door Switch Replacement ensures proper terminal thickness, mechanical button throw, and amperage compliance (e.g., SZM-V16 or KW3AT-16 specifications).
Step-by-Step Instructions to Replace Microwave Door Switch Assemblies
Replacing a faulty microwave door switch takes roughly 20 to 40 minutes once the appliance is unplugged and the high-voltage capacitor has been safely discharged. Follow these step-by-step instructions to perform the repair:
- Disconnect Power and Disassemble Outer Casing: Unplug the microwave power cord. Remove cabinet mounting screws located along the rear edge and sides, then lift the metal outer wrapper off the chassis frame.
- Discharge High-Voltage Capacitor: Apply insulated jumper leads across high-voltage capacitor terminals to discharge stored charge safely, following the procedures outlined earlier.
- Remove Control Panel Assembly: Remove top retaining screws holding the front control keypad housing. Gently lift the assembly upward and slide it forward to unhook plastic tabs from the frame.
- Locate the Switch Trolley Bracket: Behind the door latch key openings, locate the plastic mounting bracket holding two or three microswitches.
- Document Switch Wiring: Take clear photographs showing terminal spade positions and wire insulation colors attached to COM, NO, and NC terminals on each switch.
- Release Defective Microswitch: Depress the plastic retaining clip on the mounting bracket holding the bad switch. Pivot the old switch out of its alignment pins.
- Install New Microswitch: Align the mounting holes on the new switch with plastic alignment pins on the trolley bracket. Snap the switch firmly into place until retaining clips click securely. Reattach spade wire connectors according to your photograph.
- Verify Triple-Switch Mechanical Timing: Close and open the microwave door manually. Listen closely: all switch actuators must depress smoothly and release completely without binding. You should hear distinct mechanical clicks in rapid, synchronized sequence.
- Reassemble Panel and Outer Wrapper: Reinstall the front control panel assembly, tightening mounting screws securely. Slide outer metal cabinet sheets back onto the chassis frame and fasten casing screws.
- Test Appliance Operation: Plug the unit back into a grounded outlet. Place a cup of water inside the cavity, shut the door, and run a 30-second heating test cycle.
Frequently Asked Questions About Microwave Door Switches
Why does my microwave keep blowing door switches or line fuses?
If your microwave repeatedly burns out door switches or blows internal 20A ceramic line fuses shortly after a repair, the issue is almost always mechanical timing or user habit.
The primary cause of recurring switch failure is opening the microwave door while the unit is actively running. Opening the door mid-cycle forces microswitches to break high operating current, causing intense electrical arcing across contacts. Over time, this arcing welds contacts together or carbonizes terminals. Always press “Stop” or “Cancel” before pulling the door open.
Additionally, over-the-range microwaves mounted under kitchen cabinets can suffer from cabinet frame sag or loose mounting screws. If the chassis bows slightly, or if plastic door hinges and latch hooks wear down, switch actuators hit the trolley bracket at uneven angles. If the monitor switch closes a fraction of a millisecond before the primary switch opens, it creates an intentional direct short circuit that immediately blows the main fuse.
How much does it cost to fix a microwave door switch?
Fixing a microwave door switch is one of the most cost-effective appliance repairs available. If you complete the repair yourself:
- Individual OEM Microswitches: Range from $5 to $25 per switch depending on brand and amperage rating.
- Multi-Pack Switch Bundles: Generic 3-packs or 12-packs matching standard specifications (like KW3A 16A 125/250V) often cost between $8.99 and $15.00.
If you choose to hire a professional appliance repair technician:
- Professional Repair Costs: Total costs generally range between $110 and $190, which includes diagnostic service calls, labor, parts, and safety testing (such as microwave radiation leakage scanning).
Can I bypass a faulty microwave door switch permanently?
No, you must never bypass a microwave door switch under any circumstances. Bypassing an interlock microswitch with jumper wires or paperclips disables critical safety mechanisms engineered into the appliance.
Operating a microwave with a bypassed switch allows high-voltage circuits to energize while the door remains open or unsealed. This exposes occupants to high-frequency microwave radiation, causing severe thermal tissue burns, eye cataracts, and cellular damage. Permanent bypass violates National Electrical Code (NEC), UL safety standards, and FDA radiation compliance regulations.
Conclusion
Replacing a faulty microwave door switch is an achievable DIY repair provided you prioritize electrical safety, discharge high-voltage capacitors properly, and select exact replacement microswitches. By verifying mechanical door latch alignment and avoiding mid-cycle door openings, you can preserve your new switches for years to come.
However, if you feel uncomfortable handling high-voltage components, dealing with complex wiring blocks, or troubleshooting recurring fuse blowouts, seeking expert help is the safest decision. At iFix Appliances, our certified technicians deliver fast, reliable appliance service across Raleigh, Cary, Durham, Apex, Garner, Morrisville, Wake Forest, Chapel Hill, Holly Springs, and Fuquay-Varina. Whether you need specialized microwave diagnosis, Oven and Microwave Repair Services, or help with other kitchen appliances like Refrigerator Repair, Appliance Installation & Removal, or general troubleshooting detailed on our Blog, we are always here to help. Contact our team today to restore your household appliances to safe, efficient operating condition!



0 Comments